Spring Angular CRUD Application
In this section, we are going to develop a CRUD (create-read-update-delete) web application. This application contains the student form that includes the CRUD features like add, view, delete, and update student. In this integration, we are using Spring Boot to handle the backend part and Angular to handle the frontend part.
Working of Application
- Once we deployed our application on the server, a student form generates at the web browser.
- The form facilitates to add and view students.
- On clicking add student link, the page redirects to create student form where we can add a student by filling the required details and submit them.
- Using view student link, we can fetch the details of the existing student. Here, each student also contains update and delete link.
- So, we can update the details of the student and also delete them from the database.
- Once completed, provide the URL http://localhost:4200/ at the web browser.
Tools to be used
- Use any IDE to develop the Spring and Hibernate project. It may be STS/Eclipse/Netbeans. Here, we are using STS (Spring Tool Suite).
- MySQL for the database.
- Use any IDE to develop the Angular project. It may be Visual Studio Code/Sublime. Here, we are using Visual Studio Code.
- Server: Apache Tomcat/JBoss/Glassfish/Weblogic/Websphere.
Technologies we used
Here, we are using the following technologies:
- SpringBoot 2
- Hibernate 5
- Angular 6
- MYSQL
Create Database
Let's create a database indigo. There is no need to create a table as Hibernate automatically created it.
Spring Module
Let's see the directory structure of Spring Boot we need to follow:
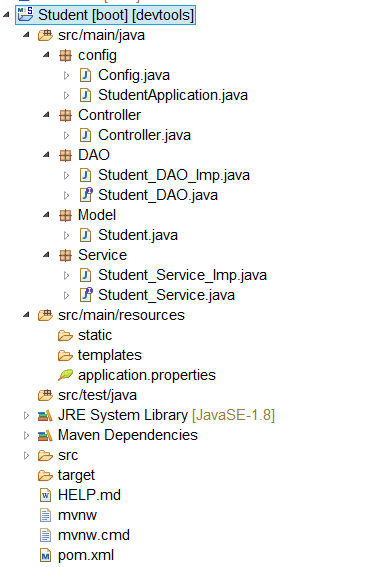
To develop a CRUD application, follow the below steps: -
- Add dependencies to pom.xml file.
- Create the configuration class
Instead of XML, we perform annotation-based configuration. So, we create a class Config.java and specify the required configuration in it. However, there is one more configuration class StudentApplication.java. This class is provided by Spring Boot automatically.q
Config.java
StudentApplication.java
- Create the entity class
Here, we are creating an Entity/POJO (Plain Old Java Object) class.
Student.java
- Create the DAO interface
Here, we are creating the DAO interface to perform database related operations.
Student_DAO.java
- Create the DAO interface implementation class
Student_DAO_Imp.java
- Create the service layer interface
Here, we are creating a service layer interface that acts as a bridge between DAO and Entity classes.
Student_Service.java
- Create the service layer implementation class
Student_Service_Imp.java
- Create the controller class
Controller.java
- Edit application.properties file
Here, we are editing the application.properties file present inside the src/main/resources folder. The following file contains the configuration properties.
application.properties
Angular Module
Let's see the directory structure of Angular we need to follow:
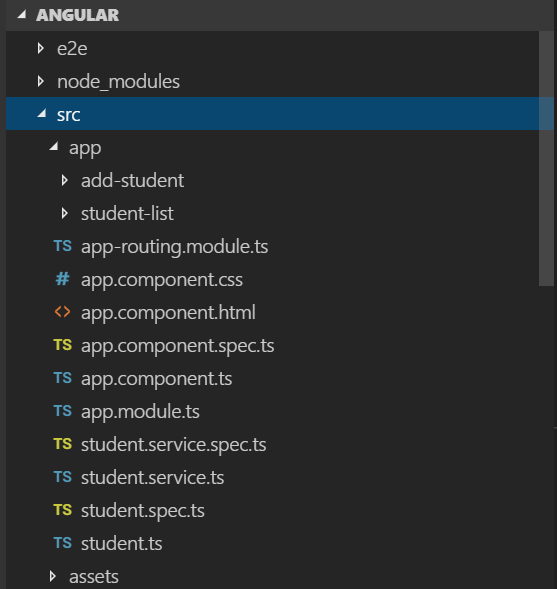
- Create an Angular project
Let's create an Angular project by using the following command:
ng new Angular
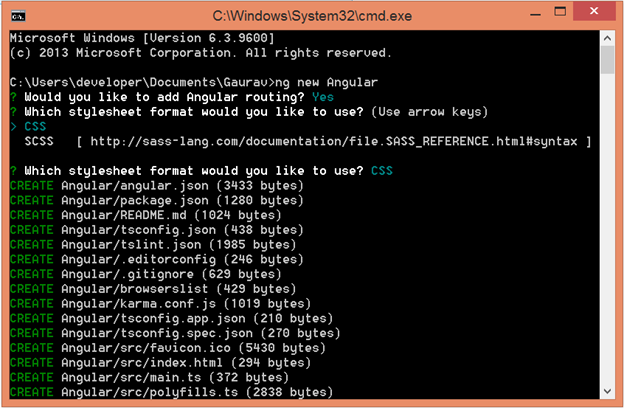
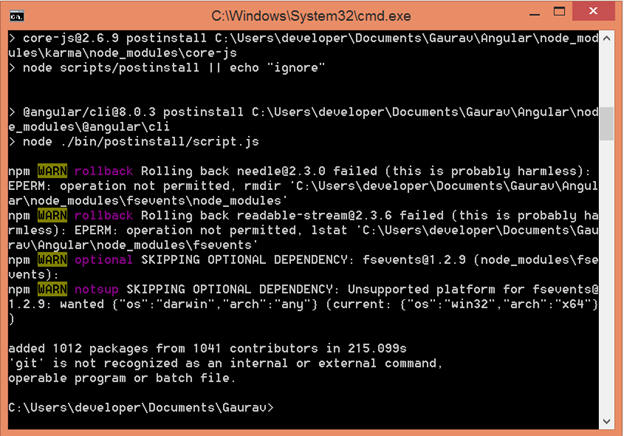
Here, Angular is the name of the project.
Install Bootstrap CSS framework
Use the following command to install bootstrap in the project.
npm install [email protected] --save
Now, include the following code in the style.css file.
Install Angular-DataTable
Use the following command to install angular datatable in the project.
npm install angular-datatable --save
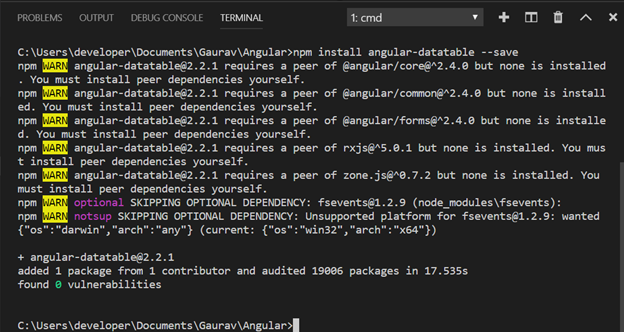
It is required to include DataTableModule in imports array of app.module.ts file.
- Generate Components
Open the project in visual studio and then use the following command to generate Angular components:
ng g c AddStudent
ng g c StudentList
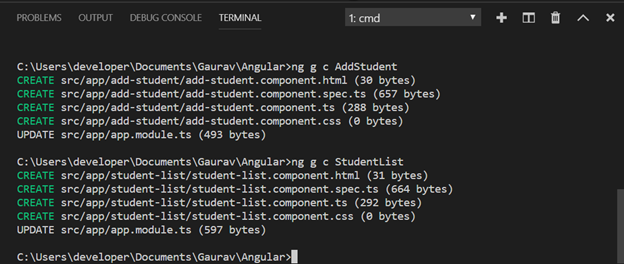
Let's also create a service class by using the following command: -
ng g s Student

- Edit the app.module.ts file
- Import Routing - Here, we are importing routing file (app-routing.module.ts) and include it in imports array.
- Import ReactiveFormsModule - Here, we are importing ReactiveFormsModule for reactive forms and specify it in imports array.
- Import HttpModule - Here, we are importing HttpModule for server requests and specifying it in imports array.
- Register Service class - Here, we are mentioning the service class in provider's array.
- Edit the app-routing.module.ts file
- Edit the app.component.html file
- Create the Student.ts class
Let's create a class by using the following command: -
ng g class Student

Now, specify the required fields within the Student class.
The purpose of this class is to map the specified fields with the fields of Spring entity class.
- Edit the student.service.ts file
- Edit the add-student.component.ts file
- Edit the add-student.component.html file
On clicking Add Student, the following page generates:
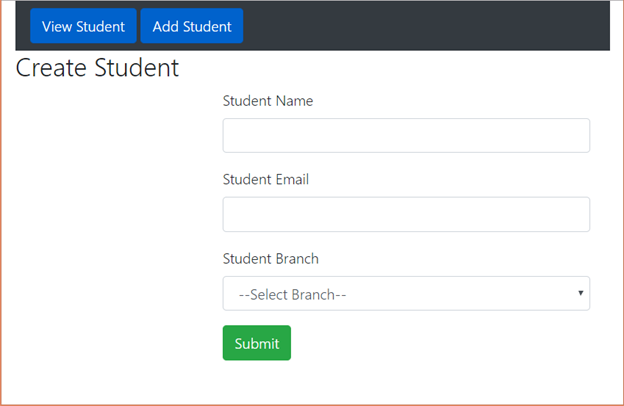
Now, fill the required details and submit them to add student.
- Edit the student-list.component.ts file
- Edit the student-list.component.html file
On clicking View Student, the following page generates:
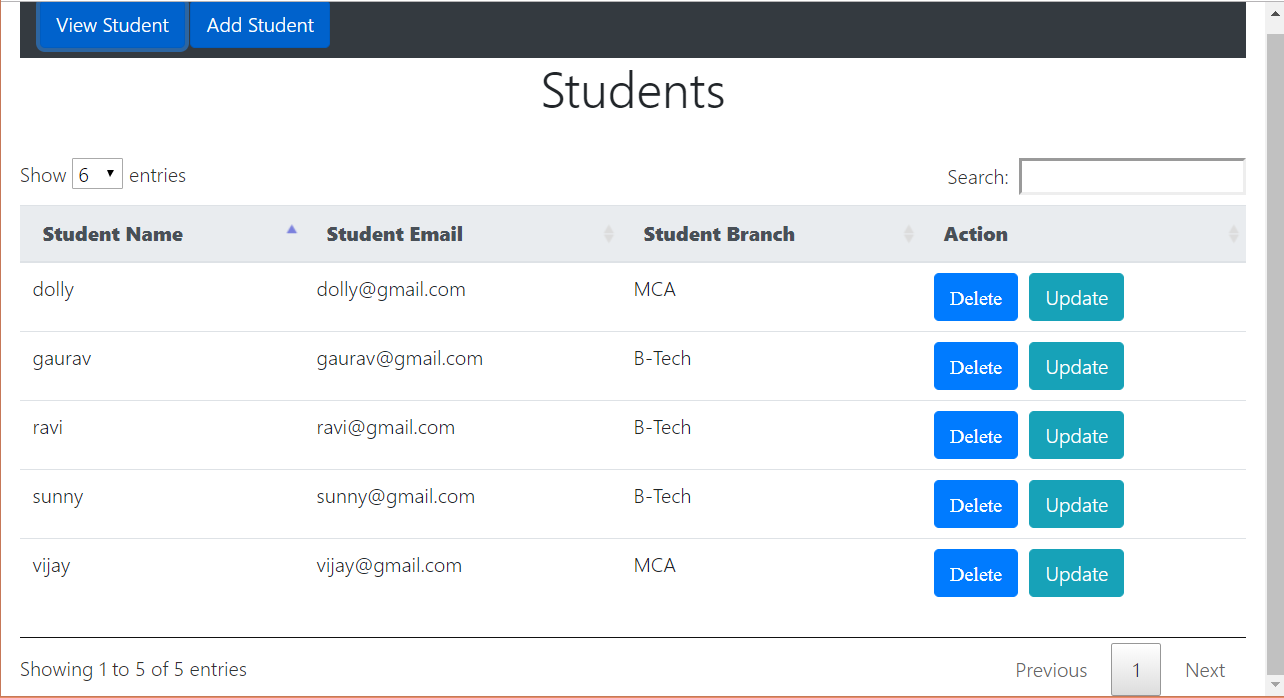
On clicking Update Student, the following bootstrap modal appears:
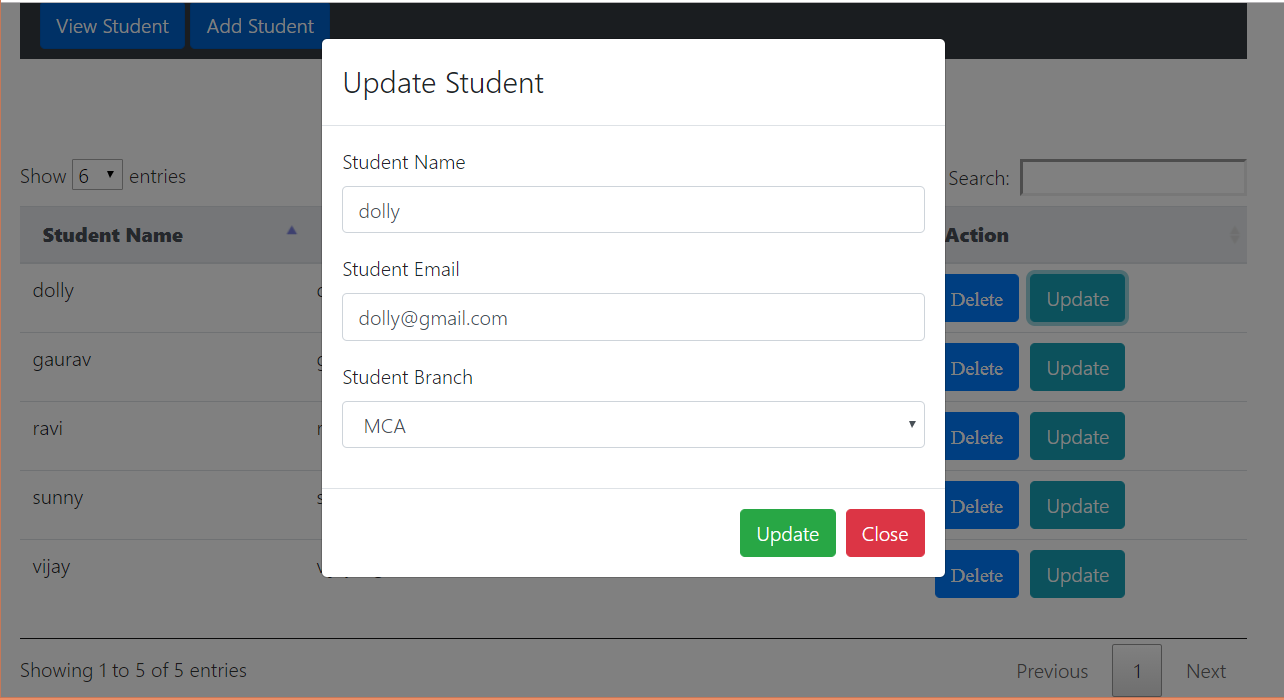
Here, we can update the details of the existing student.
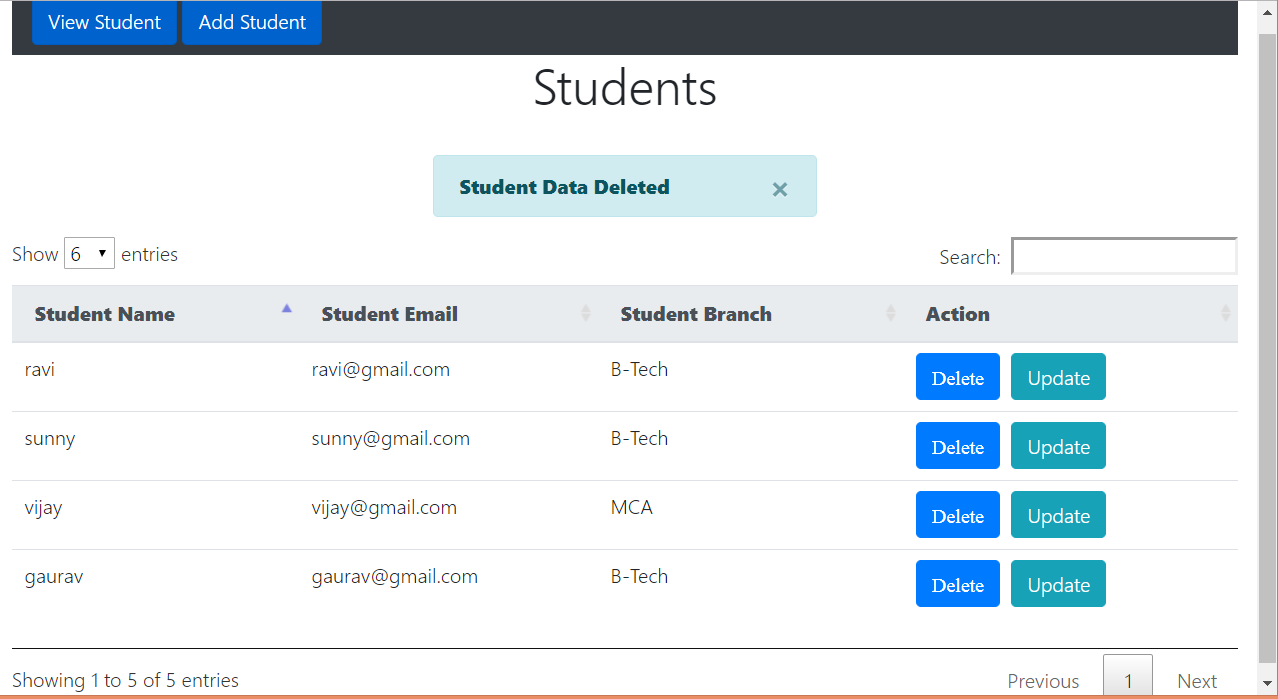
On clicking Delete, the existing student is deleted from the database. Let's see the result after deleting the particular student.
| 


 For Videos Join Our Youtube Channel: Join Now


