First Game in Godot
This tutorial will guide us making our first Godot project. We will learn how the Godot editor works, how to structure a project and to build a 2D game.
This project is an introduction to the Godot engine. It assumes that we have some programming experience already. If we're new to programming entirely, we should here.
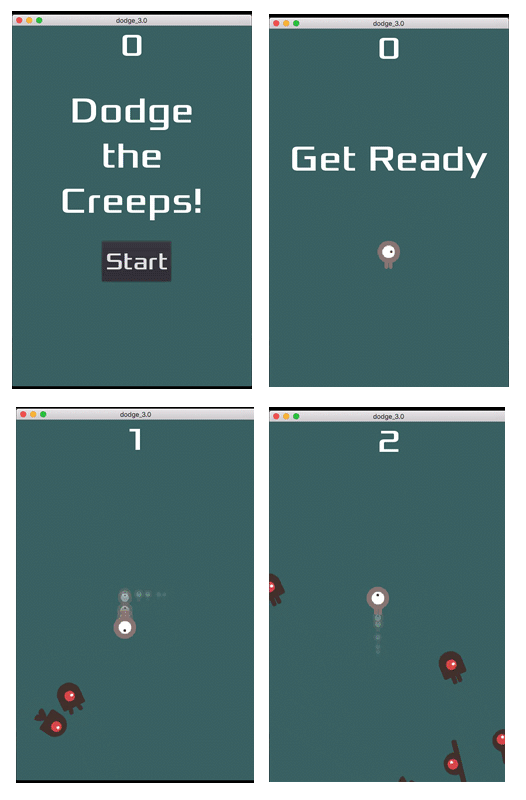
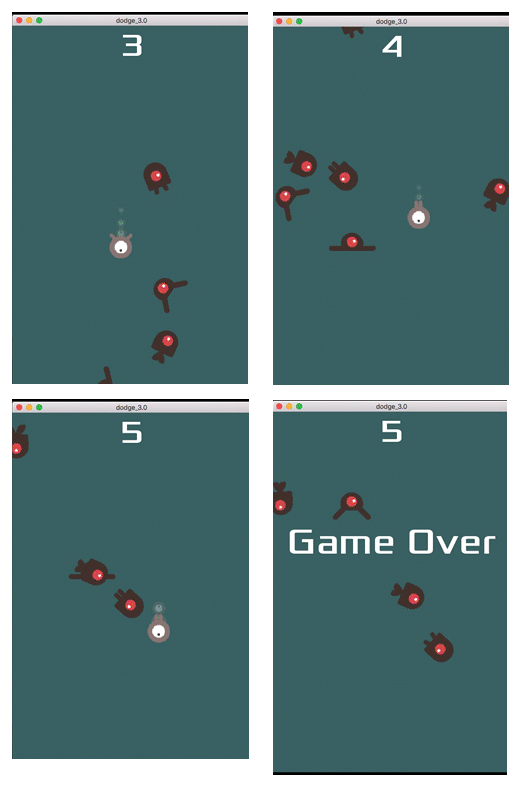
The game is called "Dodge the creeps!" our character must move and avoid the enemies for as long as possible. Here is a preview of the final result:
Why 2D?
3D games are much more complicated than 2D ones. We should stick to 2D until we have a good understanding of the game development process.
Project Setup
Launch Godot and create a new project. Then, download dodge_assets.zip the images and sounds we'll be using to make the game. Unzip these files to our project folder.
This game will use portrait mode, so we need to adjust the size of the game window. Click on Project-> Project Settings-> Display-> Window and set "Width" to 480 and "Height" to 720.
Organizing the Project
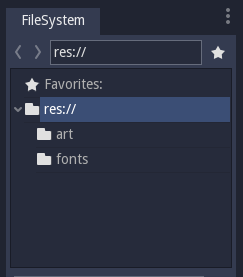
In this project, we will make three independent scenes: Player, Mob, and HUD, which we will combine into the game's main scene. In a larger project, it might be useful to make folders to hold the various views and their scripts, but for this relatively small game, we can save scenes and scripts in the root folder, referred to as res://. We can see projects folders in the FileSystem Dock in the upper left corner:
Player Scene
The first scene we will make defines the Player object. One of the benefits of creating a separate Player scene is that we can test it separately, even before we've created other parts of the game.
Node Structure
To begin, click the Add/Create a new node" button and add an Area2D node to the scene
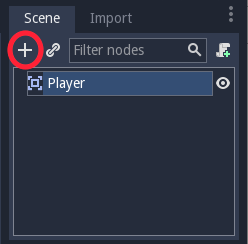
With Area2D, we can detect objects that overlap or run into the player. Change its name to the Player by clicking on the node's name. This is the scene's root node. We can add additional nodes to the player to add functionality.
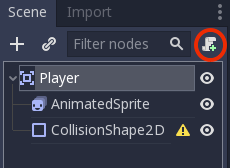
Before we add any children to the Player node, we want to make sure we don't accidentally move or resize them by clicking on them. Select the node and click the icon to the right of the lock; its tooltip says, "Makes sure the object's children are not selectable."

Save the scene. Click Scene -> Save, or press Ctrl+S on Windows/Linux or Command+S on Mac.
Note
For this project, we will be following the Godot naming conventions. Classes(nodes) use ParcalCase, variable and functions use snake_case, and constants use ALL_CAPs.
Sprite Animation
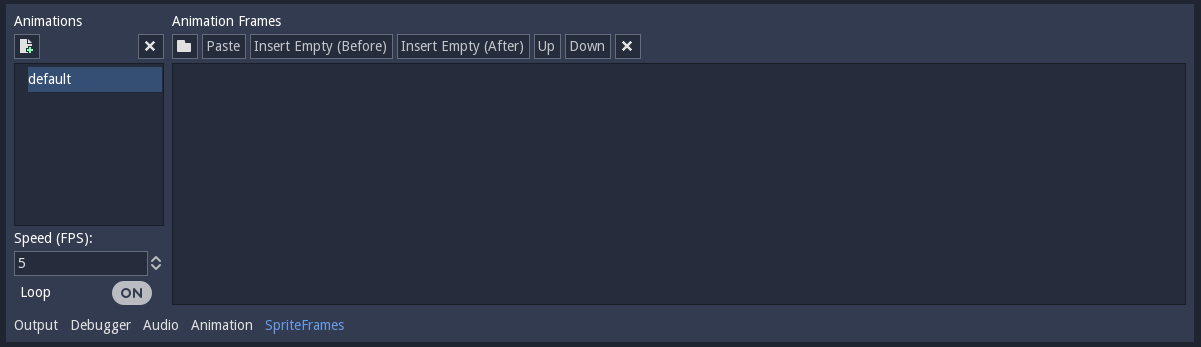
Click on the Player node and add an AnimatedSprite node as a child. AnimatedSprite will handle the appearance and animations for our players. Notice that there is a warning symbol next to the node. An AnimatedSprite requires a SpriteFrames resource, which is a list of the animations it can display. To create one, find the Frames property in the inspector and click "<null>" -> "NewSpriteFrames." Next, in the same location, click "<null>"->" NewSpriteFrames." Next, in the same location, click <SpriteFrames> to open the "SpriteFrames" panel:
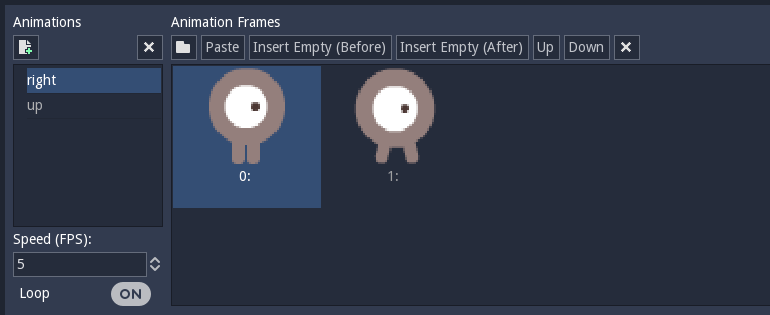
On the left is a list of animations. Click the "default" one and rename it to "right." Then click the "Add" button to create a second animation named "up." Drag the two images for each animation, named playerGrey_up[1/2] and playerGrey_walk[1/2], into the "animation frames" side of the panel:
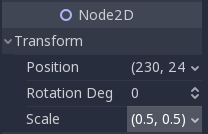
The player images are a bit too large for the game window, so we need to scale them down. Click on the AnimatedSprite node and set the Scale property to (0.5,0.5). We can find it in the inspector under the Node2D heading.
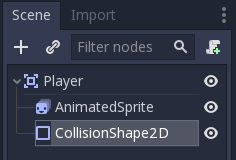
Then finally, add a CollisionShape2D as a child of Player. It will determine the player's "hitbox," or the bounds of its collision area. For this character, a capsuleShape2D node gives the best fit, so next to "Shape" in the inspector, click "<null>""->" New CapsuleShape2D." Resize the shape to cover the sprite:
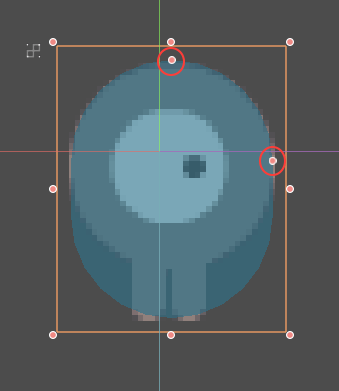
Don't scale the shape's outline! Only use the size handles (circled in red) to adjust the shape!
When we're finished, our Player scene should look like this:
Moving the Player
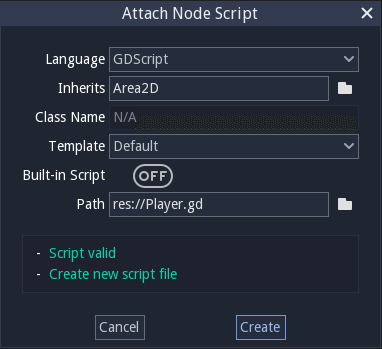
Now we need to add some functionality that we can't get from a built-in node, so we'll add a script. Click the Player node and click the "Add Script" button;
In the script settings window, we can leave the default settings alone. Just click "Create":
Note: If we're creating a C# script or another language, select the language from the language drop-down menu before hitting create.
If this is our first time encountering GDScript, please read scripting before continuing.
Start by declaring the member variables this object will need:
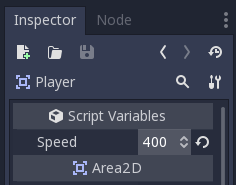
Using the export keyword on the first variable speed allows us to set its value in the inspector. This can be handy for values that we want to be able to adjust, just like a node's built-in properties. Click on the Player node and set the speed property to 400.
Warning
If we're using C#, we need to restart the Godot editor temporarily to see exported variables in the editor until it's fixed.
The _ready() function is called when a node enters the scene tree, which is a good time to find the size of the game window:
GDScript
Now we can use the _process() function to define what the player will do. _process() is called every frame, so we'll use it to update elements of our game, which we expect will change often. Here we will make it:
- Check for input
- Move-in the given direction.
- Play the appropriate animation.
First, we have to check for input- is the player pressing a key? For the game, we have four input direction to check. Input actions are defined in the project settings under "Input Map." We can describe custom events and assign different keys, mouse events, or other inputs to them. For this demo, we will use the default events that are attached to the arrow keys on the keyboard.
We can detect whether a key is pressed using Input.is_action_pressed(), which returns true if it is pressed or false if it isn't.
GDScript
We check each input and add/subtract from the velocity to obtain a total direction. For example, if we hold right and down at the same time, the resulting velocity vector will be (1,1). In this case, since we're adding a horizontal and vertical movement, the player would move faster than if it just moved horizontally.
We can prevent that if we normalize the velocity, which means we set its length to 1, and multiply by the desired speed. This means no faster diagonal movement.
Tip
If we've never used vector math before, or need a refresher, we can see an explanation of vector usage in Godot at vector math. It's good to know, but it won't be necessary for the rest of the tutorial.
We also check whether the player is moving so we can start or stop the AnimatedSprite animation.
$ returns the node at the relative path from this node or returns null if the node is not found. Since AnimatedSprite is a child of the current node, we can use $AnimatedSprite.
$ is shorthand for get_node(). So in the code above, $AnimatedSprite.play() is the same as get_node("AnimatedSprite").play().
Now that we have a movement direction, we can update Player's position and use clamp() to prevent it from leaving the screen by adding the following to the bottom of the _process function:
GDScript
Tip
Clamping a value means restricting it to a given range.
Click "PlayScene" (F6) and confirm we can move the player around the screen in all directions.
Warning
If we get an error in the "Debugger" panel that refers to a "null instance," this likely means we spelled the node name wrong. Node names are case-sensitive and $NodeName or get_node("NodeName") must match the name we see in the scene tree.
Choosing Animations
We need to change which animation the AnimatedSprite is playing based on direction. We have a "right" animation, which should be flipped horizontally using the flip_h property for left movement, and an "up" animation, which should be flipped vertically with flip_v for downward movement. Let's place this code at the end of our _process() function:
GDScript
Play the scene again and check that the animations are correct in each of the directions. When we're sure the movement is working correctly, add this line to _ready(), so the player will be hidden when the game starts:
GDScript
Preparing for collisions
We want Player to detect when an enemy hits it, but we haven't made any enemies yet! That's OK because we're going to use Godot's signal functionality to make it work.
Add the following at the top of the script, after extends Area2D:
GDScript
This defines a custom signal called "hit" that we will have our player emit (send out) when it collides with an enemy. We will use Area2D to detect the collision. Select the Player node and click the "Node" tab next to the Inspector tab to see the list of signals the player can emit:
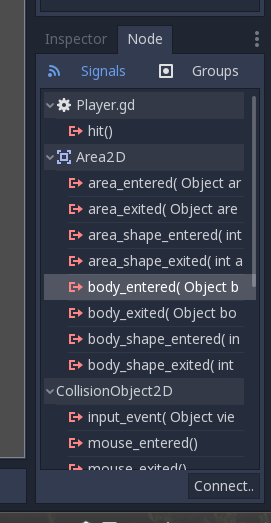
Notice our custom "hit" signal is there as well! Since our enemies are going to be RigidBody2D nodes, we want the body_entered(Object body) signal; this will be emitted when a body contacts the player. Click "Connect." and then "Connect" again on the "Connecting Signal" window. We don't need to change any of these settings- Godot will automatically create a function called _on_Player_body_entered in our player's script.
When connecting a signal, instead of having Godot create a function for us, we can also give the name of an existing function that we want to link the signal to.
Add this code to the function:
GDScript
Note
Disabling the area's collision shape means it won't detect collisions. By turning it off, we make sure we don't trigger the hit signal more than once.
The last piece for our player is to add a function we can call to reset the player when starting a new game.
GDScript
Enemy Scene
Now it's time to make the enemies our player will have to dodge. Their behavior will not be very complex: mobs will spawn randomly at the edges of the screen and move in a random direction in a straight line, then despawn when they go offscreen.
We will build this into a Mob scene, which we then instance to create any number of independent mobs in the game.
| 
 For Videos Join Our Youtube Channel: Join Now


