| |

How to Outline Text in PhotoshopText outline is one of the beautiful features of Photoshop to make the text attractive for our project. We can give our text some extra punch by outlining it. It will be useful if you want to make the main heading of the website more attractive or want to make your logo text fancy. There are different approaches followed by the designers to make a text outline. Few of them are required to rasterize the text, but that is not a good approach because, at a later point, you want to make some changes in your style, then it may be complicated to update that. In this section, we will discuss the easiest and efficient method to make the text outline. We will be using the layer style option stroke to provide our text a colorful outline. The values and colors we are going to use to educate you, you can choose any of the color value and outline radius as per your need. Following are the steps to outline text in Photoshop: Step1: Create a new document To create a new document, press the Ctrl+N keys. It will open a dialogue window to specify the document size and background color. Specify the properties and click OK to continue. Step2: Create a text layer Now create a text layer to add the text to it. To create a new layer, press the Ctrl+Shift+N keys to open a popup window to specify the layer name and background. We can specify the layer name and background accordingly. However, selecting the text tool will automatically add the text to a new layer. Step3: Activate the text tool Now, activate the text tool to add some text to our document. The text tool is given at the toolbox given left to the workspace. We can select it from the toolbox; alternatively, we can press the T key. Below is the icon for the text tool: 
Once the text tool is activated, the arrow icon will be converted into the text icon and look like a vertical line. Now, we can write some text on our document: 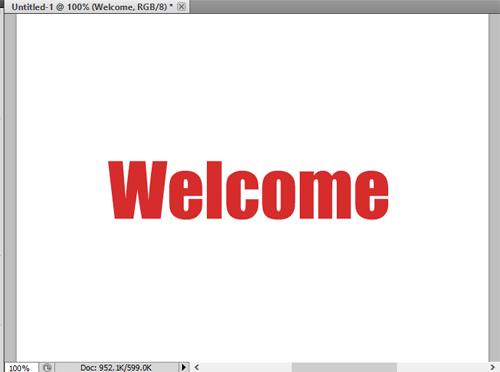
We can also change the font size and font family using the options bar given at the top of the workspace. 
Step4: Add a layer style Now, we need to select the layer style option to apply the stroke. To apply a layer style on the text layer, right-click on the text layer and select the Blending options. 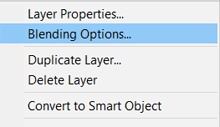
It will open the several layer style options for the text layer. For outlining the text, we have to choose the stroke option from this window. It will open the following options: 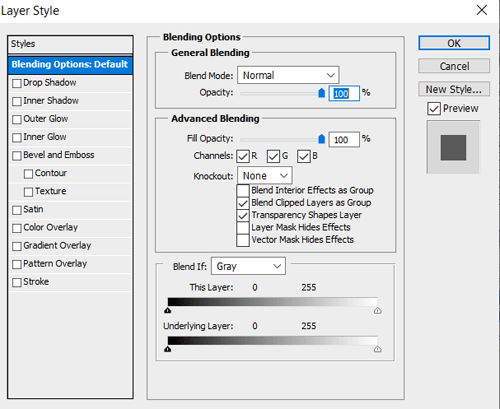
Step5: Apply stroke Now, mark the stroke option from this window and click on the stroke link. It will open the stroke options such as color, position, size, etc. 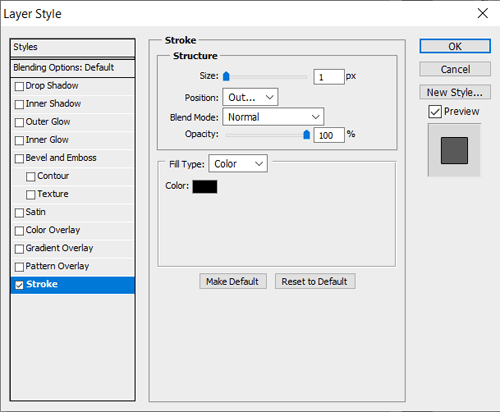
Specify the stroke style as per requirement. It will apply an outline to the given text. We can also have a preview of the outline of how it will be displayed. Once you are satisfied with the changes, click OK to apply them. It will be applied as follows: 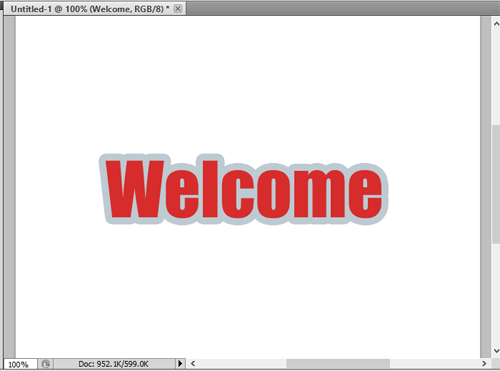
We can also select the outline style, such as inside, outside, and centre, from the drop-down menu from the stroke option window. 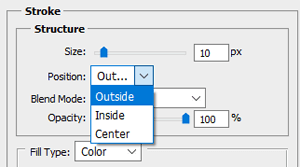
Step6: Remove text color This step is optional if you want your text-only outlined and remove the color. To remove the text color, either you can remove fill by making the text layer fill to 0%, or you can fill it with white color. To remove the color from the text, navigate to layers and select the text layer; just above the layers panel at the top-right corner, the fill option will be displayed. Make it to 0% to remove the color fill from the text. 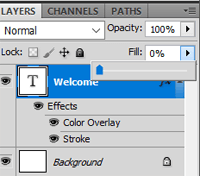
It will remove the color from the text. Now, only text with an outline will be displayed: 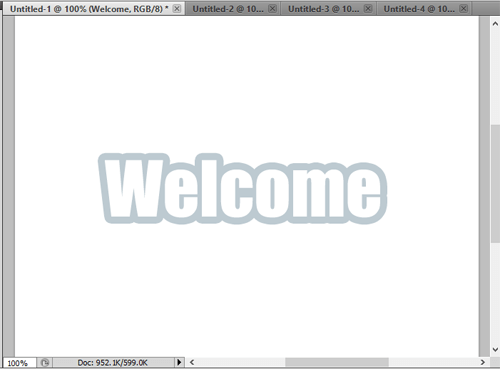
Now, we can have any background image or background color on this document to make it more stylish. The modern version of Photoshop provides more control over the outline. For example, we can have another stroke over this stroke so that it will look more attractive. The process of adding another outline over this outline will be the same as discussed. You will find an extra stroke option in the layer styles. You can apply the repeat stroke operation by selecting the blending options from the layer menu. Summary: We have discussed how to outline text in Photoshop. It is a super easy process to outline the text. Now, we can give our text some extra punch or make the website's main heading look more attractive. Also, it will be useful in logo making.
Next TopicHow to Undo/Redo in Photoshop
|
 For Videos Join Our Youtube Channel: Join Now
Feedback
- Send your Feedback to [email protected]
Help Others, Please Share


