| |

How to Smooth Edges in PhotoshopIt is very important to keep the edges smooth while editing a photo in Photoshop. During image editing, the edges of the object will usually become blurry, which does not look natural. But, don't worry about that, we can make it natural by smoothing it. It is not a single stroke task. We will have to apply several tools. Mostly in complex backgrounds, when we remove or change the image background, the edges of the main object get blurry or distorted. So, it will be helpful in such cases. Removing background is one of the essential and useful techniques for professionals to edit a photo professionally. Also, we can remove unwanted objects from the image using the same technique. There are so many approaches in Photoshop to cut out an object or remove a background Photoshop. We can follow any of them at our convenience. All the techniques are equally effective. Sometimes we also require to cut an object from an image and merge it with another image. In all these scenarios, we will get blurry edges of the object. In this section, we will discuss a step-wise process to make the blurry edges smooth by using the Antialiasing and feathering technique. Before we proceed further, let's understand the Antialiasing and feathering. What are Aliasing and Antialiasing?Aliasing and Antialiasing are two important terms to be understood before dealing with pixel-based editing. Aliasing is the visual stair-stepping of the object edges that occur in a low-resolution image while editing. While Antialiasing is a technique that reverses the aliasing effect, it smoothes the object's jagged edges by repairing the pixels with similar color pixels. Consider the below image, which demonstrates both the techniques: 
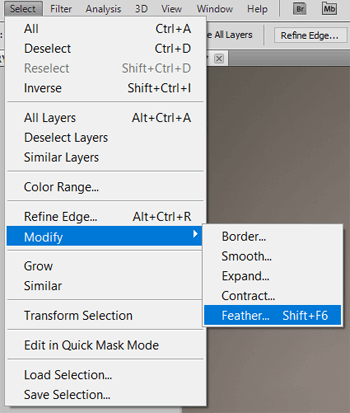
From the above image, the first picture is in alias format, and the next picture is after applying the antialiasing technique applied. Usually, we use the rectangular marquee tool, which produces nice and crisp edges of the selected region. Every selection tool is in Photoshop implements an antialiasing technique unless we turned off the antialiasing feature manually. Once we turned off the antialiasing feature from the options bar. The selection will automatically be aliased. What is Feathering in Photoshop?Feathering is a technique to make the selection edges softer and blurry. We can define the feather radius value from the options bar, making the edges value blurry and soft according to the defined radius. Usually, the feathering is used to blend into the background or another image to soften the edges. The feather value is defined in pixels. The technique for using the feather is first to define the selection where we want to use it then blend it with the image. It will fade one image into another. We can also define the feather by navigating to the Select-> Modify-> Feather menu. Alternatively, we can press the Shift+F6 key combination as a shortcut to apply the feather. Now, understand how to smooth edges in Photoshop by using the Antialiasing and feathering technique. There are different methods to make the edges smooth. Photoshop Smooth EdgesThere are different methods to make the selection edges smoother. Let's understand them: Method1: Using the Refine Edges toolPhotoshop provides a feature that refines edges to automatically smooth edges of the object. It can be found in the options bar at the top of the workspace. In this method, we will be using the refine edges tool, which is one of the easiest ways to make smoother edges. Follow the below steps to apply this tool: Step1: Open the image The first step is to open the image that we want to edit. To open the image, press the Ctrl+O key combination or drag and drop the photo in Photoshop. 
After opening the image, make sure the background layer should be unlocked. If it is locked, then double click on it to unlock. It will extract the background layer and the image layer. Now, we can apply selection and other options on it. Step2: Remove the background Mostly we have to refine the edges in case of removing the background. So, we are removing the background from this image. If you want to refine any existing object, you can skip this step. There are different ways to remove the image background in Photoshop. We are using the magic wand tool. Activate the magic wand tool by hitting the W key. Also, we can select it from the toolbox given left to the workspace. The magic wand tool will automatically select similar color pixels. Select the background by repeatedly pressing the Shift+ Drag keys. Once the background is precisely selected, hit the Del key to delete the selection. It will remove the background from the main object. 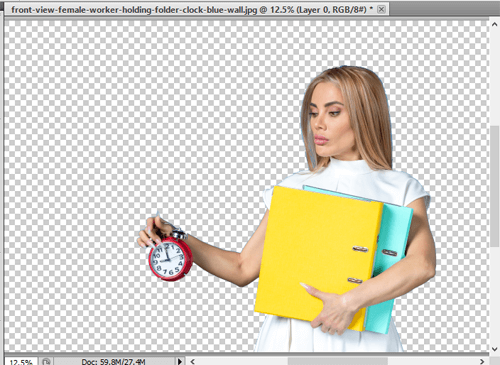
Now, zoom the image to see whether we got sharp or blurry edges to smooth that. Step3: Select the area Now, select the area that you want to smooth in the image using any of the selection tools. For example, we are using the magic select tool to select the edges, which will automatically select the similar pixels of the object. Always zoom the image while selecting pixels for better results. 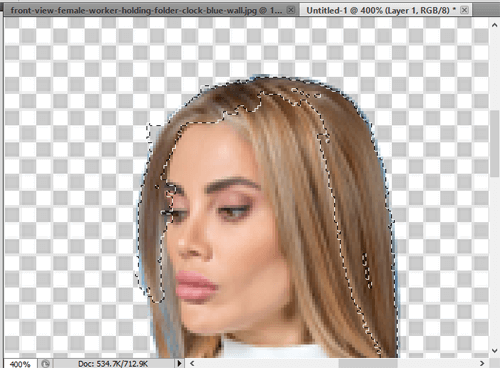
Now, we can smooth selection edges by using the refine edges tool. Step4: Smooth edges Now, select the refine edges tool from the options bar given at the top of the workspace. 
Activate the refine edges tool. It will open a dialogue box to refine the edges. 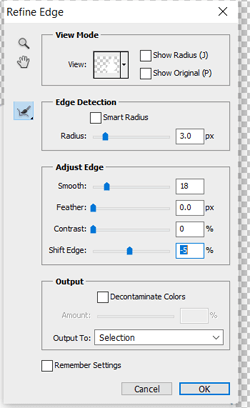
We can set our values, such as radius, feather, smoothing, etc., according to our requirements in this window. It will provide a live preview with a layer mask. When we change the values, it will display a live preview of how the object will be reflected in our image. The following are the usage of the given values: Smooth: The smooth value renders a smoother outline for the specified selection. Feather: The feather makes the transition soften between the selection and the background. Contrast: The contrast value defines the soft edge transition when it increases and becomes crisper. Shift Edge: The shift edge moves a soft selection edge inwards or outwards to remove unwanted pixels according to defined values. Once we are done with refining edges, click on the OK button to apply the changes. 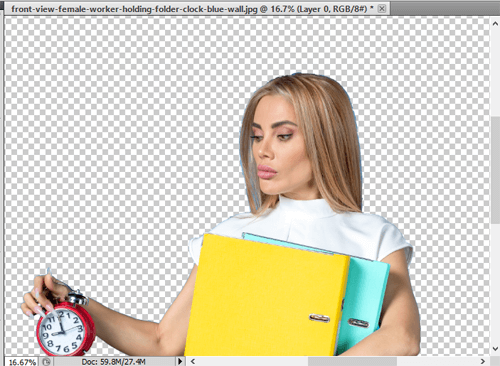
From the above image, we can the image edges are natural-looking. We can set any background to this image; it will look like an original image. 
In the above image, we have added a background image and placed it below the object layer. It looks like an original background because the object's edges are smooth; otherwise, it looks like an edited image in which the object edges contain the previous background. Method2: Using FeatherWe can also smooth the edges by using feathering. All we need to do is to set the feather value for the selection. To smooth the edges of an object, follow below steps:
Alternatively, we can press the Shift+F6 keys. It will open a popup window to define the feather value. 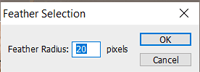
Click OK to apply the feather. It will smooth the edges of the object. Apart from the feather option, we can also choose the Smooth option in the Modify menu; it will also smooth the edges. We can also combine two tools for better results. Apart from refining edges and feather tools, we can use other tools such as clone stamp, spot healing, refine edges brush tool, burn tool, dodge tool, Gaussian blur tool, etc., to repair and smooth the edges. The strategy is almost the same for all the tools to make a selection according to requirement and target edges and then apply the tool operation. Combine multiple tools for better results. Summary:While editing photos, sometimes the main object loses its quality due to the image's low resolution or complex background. We can fix our object by smoothing its edges and repairing other images using different Photoshop tools. The following tools are useful for making the smoother edges and repair a damaged part of the image:
We have discussed a few of them with examples. The strategy for using the above tools are the same, i.e. make a selection as per requirement and target the edge or other region that should be fixed and apply the tool. We can also combine several tools for better results.
Next TopicDrop Shadow in Photoshop
|
 For Videos Join Our Youtube Channel: Join Now
Feedback
- Send your Feedback to [email protected]
Help Others, Please Share


