How to Undo/Redo in PhotoshopPhotoshop provides a powerful History panel for multiple steps. We can undo or redo in Photoshop for the multiple steps for any operation. It's like time-travelling for the artwork. Sometimes, we have mistakenly deleted or added an element or applied a filter that does not give the required output. We can use the Undo feature to correct the mistake. Photoshop supports undo, step backwards, and history palette options to fix the mistakes and get the previous status of the document. Similarly, we can use the redo operations to get back to the recent undo operations. The undo and redo command takes the most recent actions of the document. The undo/redo operations of Photoshop are extremely forgiving. It provides powerful control and let us back out almost anything that we do, which is most important, especially when we want to get out the things that are stuck. Shortcuts for Undo/Redo Methods
All the above shortcuts are very effective and powerful to take the document backwards or forward. We can also select these options from the Edit -> Undo menu. 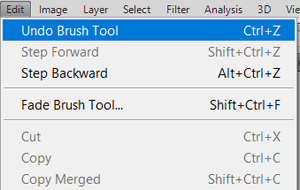
Once we undo a step, the redo option will be displayed for the same step to get it back. If we want to go back for the multiple steps, then select the Edit-> Step Backward option, and it will take us to the most recent steps. 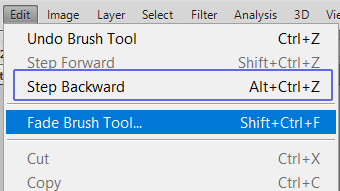
Similarly, for multiple redo steps, we can choose the Edit-> Step Forward option, and it will take us to the previously undo steps. This command allows us to undo the last 50 steps at a time. Similarly, we can step forward the last 50 undo steps. However, we can set this setting to go back even further. Setting the Number of Undo StepsWe can also specify the number of the history steps that Photoshop keeps track of. To set the number of the undo steps, navigate to the Edit menu and select the Preferences-> Performance option, and it will open the performance setting for Photoshop. 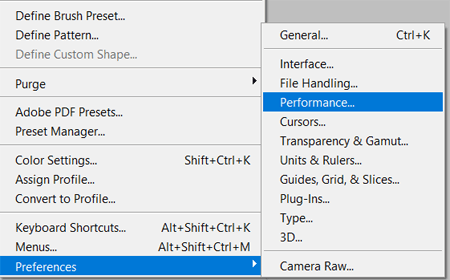
The performance window contains several options for customizing the Photoshop performance. 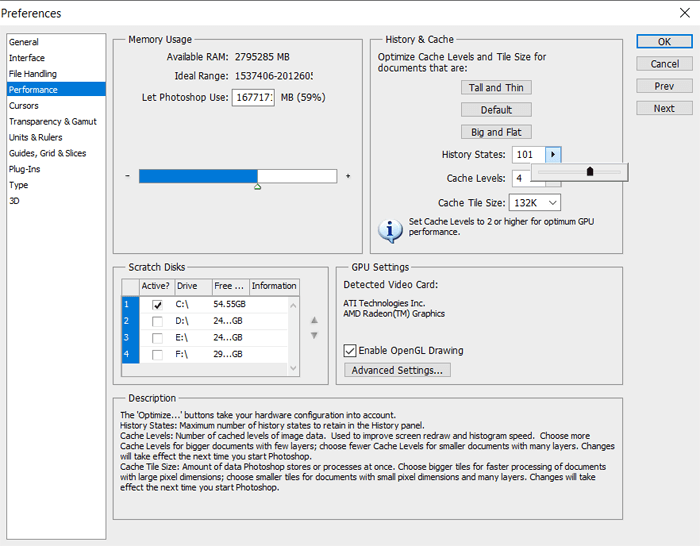
In the above window, we can specify the History States numbers. We can specify up to 1000 numbers here to save in the History, and it will save the specified numbers of states for the running document. Before increasing the number of states, always remember that increasing the number of steps will impact your PC's performance as it saves the states in your computer's RAM. So always keep the number of History as minimum as you require. Undo Steps using the History PaletteWhen we start creating a document, every change or action in an image creates a new image state. All these image states are recorded in the History palette. By default, it records 20 states equal to the number of the undo steps using the step backwards command. However, we can update it by following the above-discussed process. The history palette shows the most recent actions by their names. To apply an action, click on an action name. It will take you directly to that state; there is not any limitation for the order of states like the step backwards or forward. We can also create a snapshot for a particular step to make it available for always until the document is being processed. The history palette looks as follows: 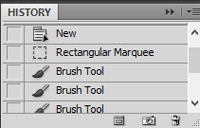
The history palette may not be visible in your default workspace. But, you can display it by navigating to the Windows-> History menu, and it will display it like a separate window in your existing workspace. How to make a snapshot of the History in the History palette The Snapshot command allows us to make a temporary copy of a particular image state. It will be added to the top of the History palette. Selecting the snapshot in the history palette will open that particular image state and allow us to work from that image version. To create a snapshot from any image state, select the image state and click on the snapshot given to the bottom of the history palette. 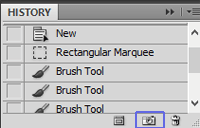
It will instantly create a snapshot of that image state and ping it on top of the history palette. Now, it will remain in your work history throughout the document processing. We can select it at any time, and it will take us to that particular image state. Thus, we can make an undo or redo operation using the Undo, redo, step backwards, step forward, history palette tools of Photoshop. Further, we can set the number of the undo steps using the preferences and performance settings.
Next TopicMake Gif in Photoshop
|
 For Videos Join Our Youtube Channel: Join Now
Feedback
- Send your Feedback to [email protected]
Help Others, Please Share


