| |

How to install Java in Ubuntu 16.04 LTS ?IntroductionJava is a most widely used programming language. It was created by Sun MicroSystem in 1990s. To install it on the Ubuntu operating system, follow the following steps. Introduction to JavaJava is an object-oriented, class-based, and high-level language that's created to have some implementation dependencies. Java code can execute on every platform without needing to recompile. Typically, Java applications are unified into bytecode that can execute on any JVM despite the basic computer architecture. The Java syntax is the same as C++ and C but has some low-level features than both of them. Besides, the Java runtime offers dynamic capabilities (like runtime code changes and reflection) that are generally not available in compiled languages. Java was the most famous languages according to GitHub as of 2019, specifically for server-client web application with 9 million developers.
Principles of JavaThere were five main objectives in the establishment of Java, which are as follows:
Special classes of Java
Java applet was a program embedded in many applications, generally on a web page shown in a web browser. Now, the applet API was deprecated in 2017 since Java 9 version.
Servlet technology offers web developers a consistent and simple mechanism to extend web server functionality and access older business systems. Java servlet is a server-side Java EE element that produces acknowledgments to requests through the client. It means producing HTML pages in acknowledgment of HTTP requests. However, there are several other classes of the standard servlet, e.g., for WebSocket communication.
For the Java SE environment, Swing is a GUI library. It's possible to define a different feel and look from the pluggable look and feel Swing system. Clones of Motif, GTK+, and Windows are equipped by Sun. Also, Apple offers an Aqua feel and look for macOS. In Java SE 6, Swing addresses this issue by utilizing a more natural GUI widget design routine of the basic platforms where previous implementations of these feels and looks may have been treated as lacking.
JSP (JavaServer Pages) is a server-side Java EE element that produces acknowledgments to requests, generally to HTTP requests through clients. JavaServer Pages insert Java code inside an HTML page with some special delimiters %> and <%. A JavaServer Page is compiled for a Java servlet, an application of Java in its right when it's accessed the first time. Then, the produced servlet makes the response.
JavaFX can be described as a software platform to create and deliver desktop applications and web applications that can execute around a range of devices. For Java SE, JavaFX is designed to substitute Swing as a GUI library, but since the 11th version of JDK, JavaFX hasn't been in the JDK and rather in an isolated module. JavaFX includes support for web browsers and desktop computers on macOS, Linux, and Microsoft Windows. JavaFX doesn't support native operating system feels and looks.
In 2004, generics were included in Java as a component of J2SE 5.0. Prior to the generic introduction, all variable declarations had to be of a particular type. For example, it is an issue for container classes as there is no simple way to make a container that takes only specific objects. Either a container works on every subtype of an interface or a class; generally, an Object or a specific container class has to be made for all contained classes. Generics permit type checking at compile-time without creating various container classes, all containing almost exact code. Some runtime exceptions are avoided from occurring by appearing compile-time mistakes in addition to running adequate code. It would type safe if Java avoided every runtime mistake from occurring. 1) Check Java Version Before installing Java, we will check whether it is already installed or not. Use the following command. If Java is not present, it will produce the following output. 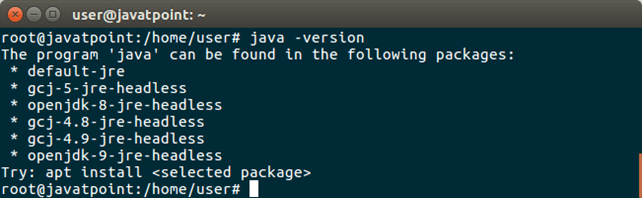
Now, add ppa to the repository by using the following command. 2) Add PPA (Personal Package Archives) It will produce the following output to the terminal. 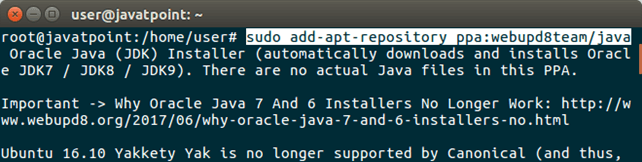
After adding package, now, update package index. 3) Update Package Index After updating, now install oracle installer. 4) Install Oracle JDK 8 Installer This command will install a installer that further will install Java 8 to the system. This command will produce the following output to the terminal. 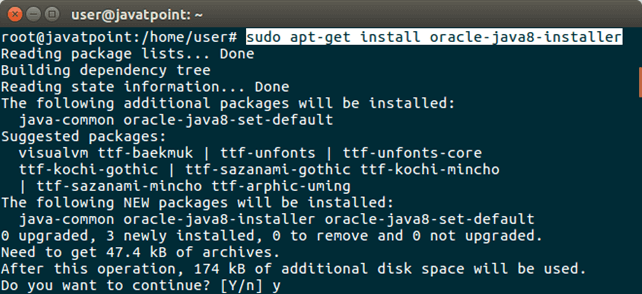
Type 'y' and press Enter, it will download and configure Java in our system. 5) Check Java Now, check once again, Java is present or not. Use the following command. 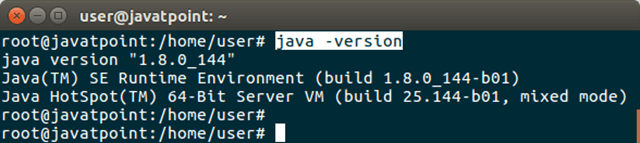
It displays Java version and other Java related informations to the terminal. It means, Java has installed successfully. Our system is ready to build and run Java applications. Extra InfoIf we have multiple versions of Java installed, we can see that using the following command. For Java, we can use this command. These commands will show Java installed path, priority info etc. 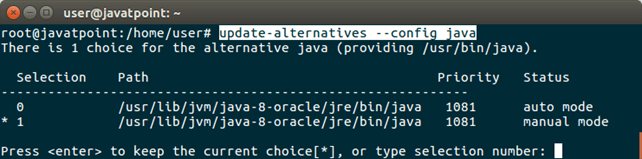
It asks for changing the current choice from the available Java versions installed. For Java compiler, we should use this command. This command shows the same information for the Java compiler.
Next TopicHow To Install PHP In Ubuntu
|
 For Videos Join Our Youtube Channel: Join Now
Feedback
- Send your Feedback to [email protected]
Help Others, Please Share


