| |

How to Run GlassFish on Ubuntu 16.04 LTS?IntroductionGlassFish is a lightweight, modular web server. It can be used for the development of J2EE applications and Java Web Services. It provides awesome performance, scalability and reliability. In this tutorial, we are installing Glassfish that includes the following steps. Prerequisites
Glassfish Installation1) Download Archive from the Oracle official site https://www.oracle.com/index.html. 2) Extract the Archive where archive-name.zip is our downloaded glassfish name. 3) Move the Glassfish Move the Glassfish server to the /opt/ directory by using the following command. Although we can move it to any place and run. 
This directory is used to install third party software applications. 4) Start Glassfish Server First, change current working directory by using the following command. Now, Start the server. 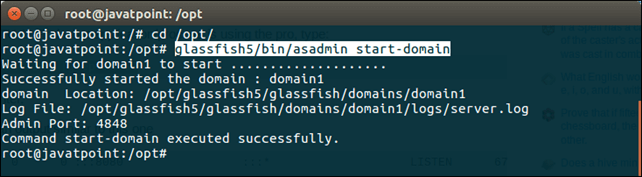
Glassfish has started, we can access it on the browser using localhost:4848, because it runs on 4848 port by default. On the browser, its output looks something like the below. 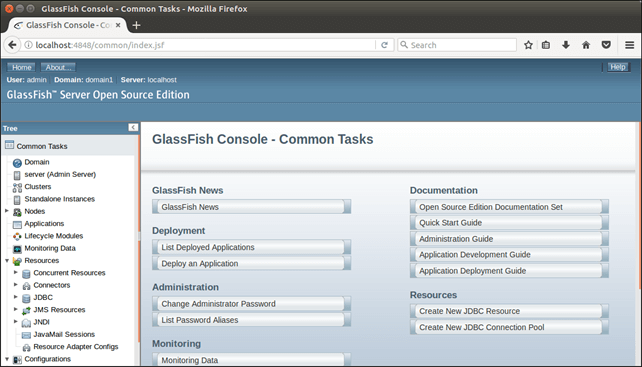
Well, we have setup GlassFish successfully. Now, we can perform server related tasks. Extra InfoMange server by using following commands. Execute all commands after changing directory to /opt/ glassfish5/bin/ directory. Start GlassfishUse the following command to start Glassfish server. Stop GlassfishUse the following command to Stop Glassfish server. Restart GlassfishUse the following command to Restart Glassfish server. Deploy GlassfishUse the following command to deploy application on Glassfish server. Undeploy GlassfishUse the following command to undeploy Glassfish server.
Next TopicHow To Install LAMP In Ubuntu
|
 For Videos Join Our Youtube Channel: Join Now
Feedback
- Send your Feedback to [email protected]
Help Others, Please Share


