JavaFX with EclipseNow, we need to configure Eclipse to execute the JavaFX applications. There are two ways of Eclipse Configuration for this purpose. We can either export the JavaFX jar files to every Java project or install a new software which can support the JavaFX project creation directly. In this part, we will look at both the ways. First Lets look at the way by which, we can export the JavaFX jar files to the Java Project. Exporting JavaFX jar files to the Java ProjectJust click on the file icon appeared at the top left corner of the eclipse screen. Click on new and select Java project from the various types of options given in the list. 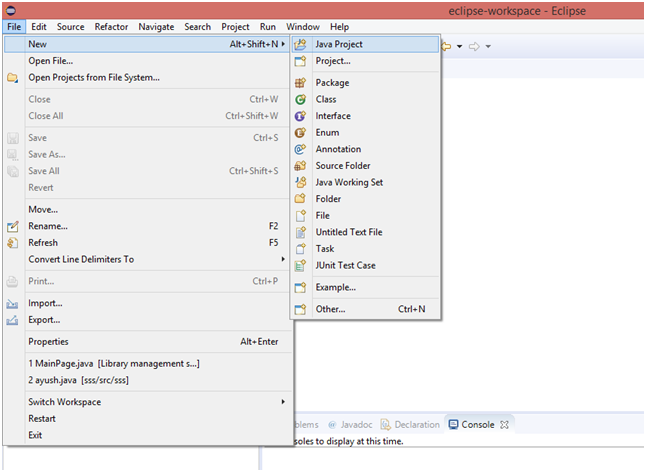
The following Pop-up window will be opened. Enter the project details like project name and click Finish. 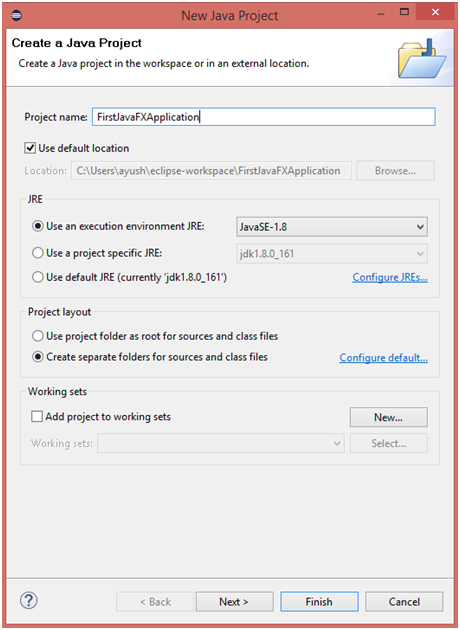
Now, we have created our project. The project doesn't support the JavaFX syntax. We need to export the JavaFX jar files to the project in order to run the JavaFX application. Just Right click on the project and select properties from the options. 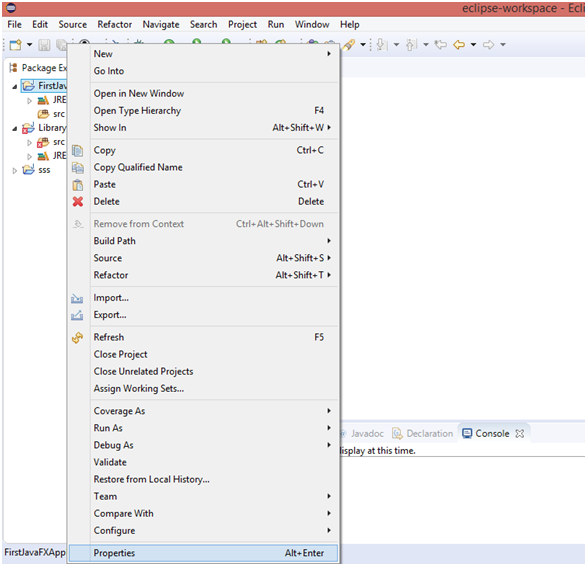
Go to Java Build Path → Libraries. Here, the JRE System Library is shown which is responsible to execute our java project. We need Add a Library here, choose Add Library from the options in the list given on the right side of the screen. 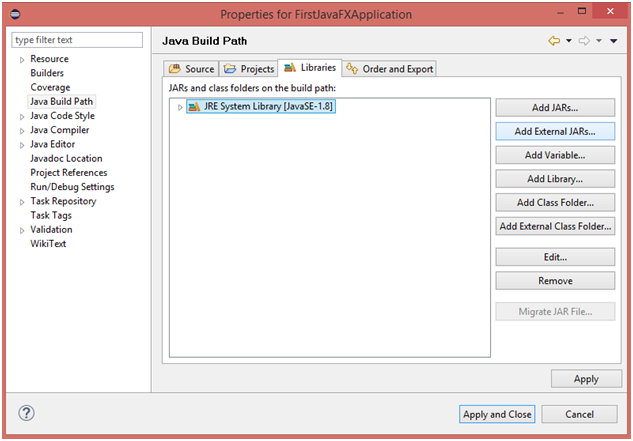
Choose User Library from the list and click Next to continue. 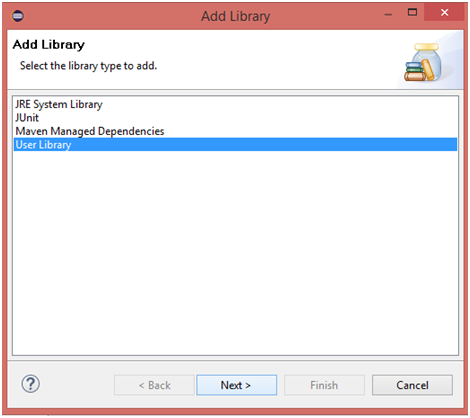
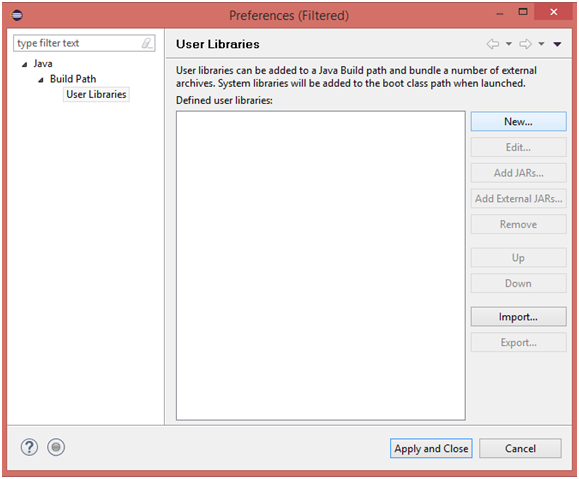
Now, We are in the user library section. We need to create a new User Library hence choose New from the list given on the right side of the system. 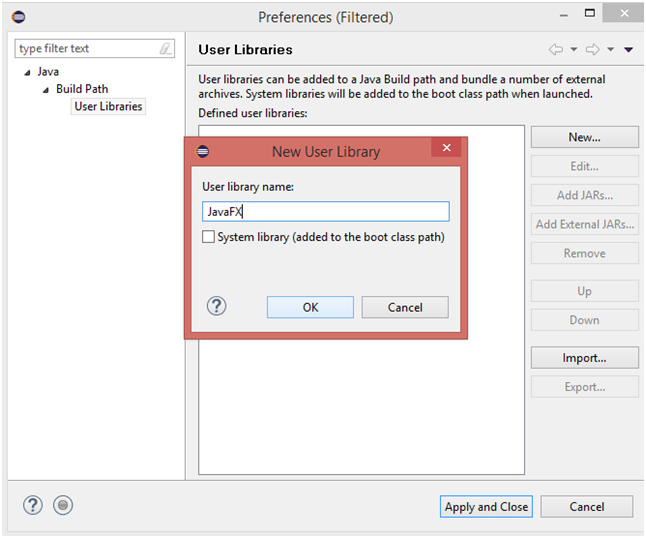
Just enter JavaFX in the user library name and press OK. 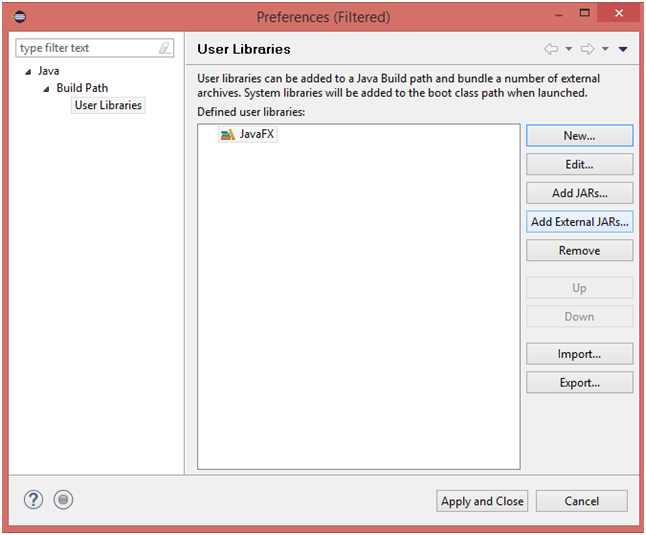
Now, a user library named as JavaFX has been created, we need to add some external JARs file here to make our project working. Click on Add External JARs from the list given on the right side of the system and choose appropriate JAR files from the system. 
browse to Java/jre1.8.0_161/lib in the system and select jfxswt.ja rpresent in the directory. However, to set-up the appropriate environment for JavaFX application, we need to add one more JAR file so just browse to Java/jre1.8.0_161/lib/ext and choose jfxrt.jar. 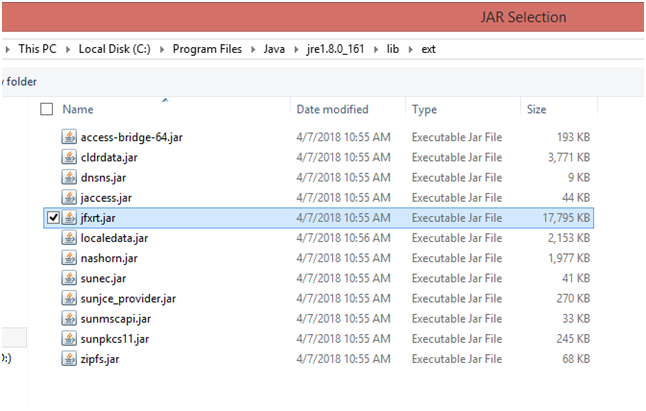
Now, we are all ready to execute our first class file of the project. We have added the number of JAR files ( shown in the image below) to our project. Click on Apply and Close to apply the settings to the project. However, this is valid for this project only and we have to repeat this whole procedure with the other projects as well. It is not the better idea to implement but we can execute the JavaFX applications for now. 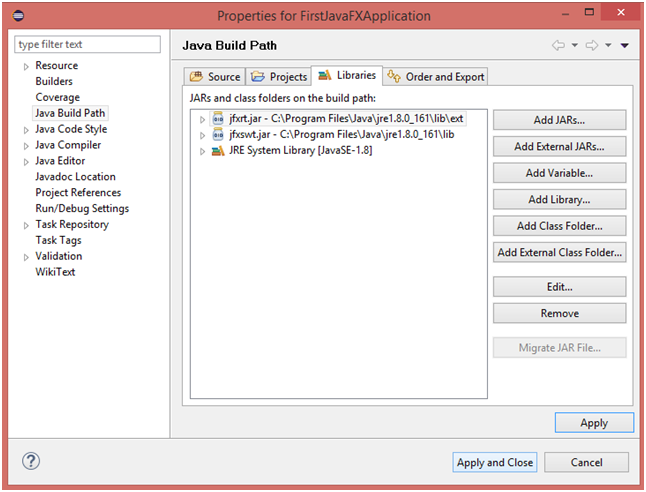
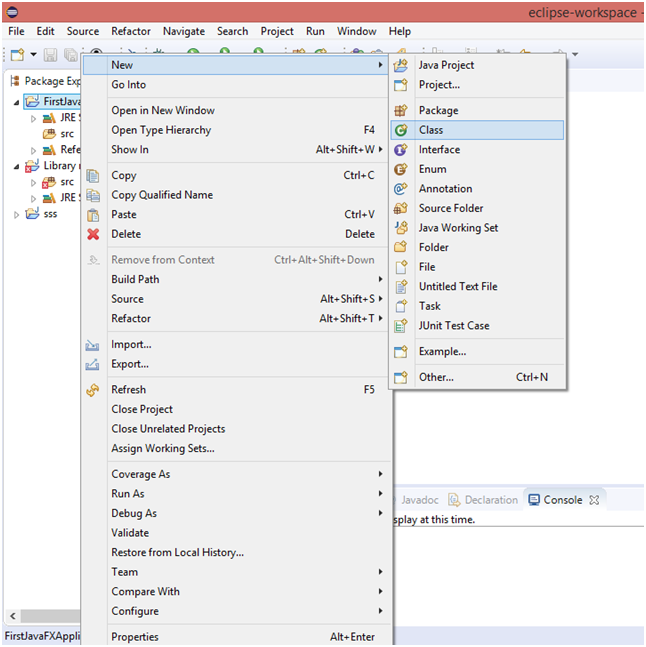
Right click on the project and follow New → Class to create your first class of the application. Copy and paste some JavaFX code and run the application. We will get the following output from our first JavaFX application which contains a button which prints hello world on pressing it. 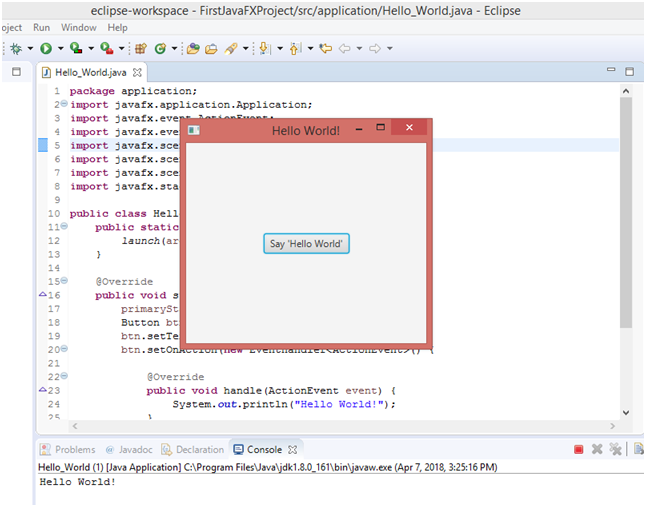
We have just executed our first JavaFX application by exporting JAR files to the project. Now, we will discuss how we can install a new software to eclipse in order to create a JavaFX project directly. Install a New SoftwareOpen Eclipse and click on Help. Choose Install a New Software from the list of options given in the drop down menu. 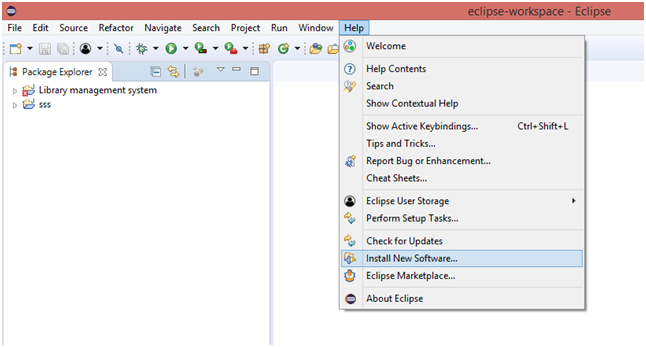
Now, we need to add a repository, just click Add. Type e(fx)clipse in the Name and type http://download.eclipse.org/efxclipse/updates-released/1.2.0/site/in the location. Press OK to proceed with this repository installation. 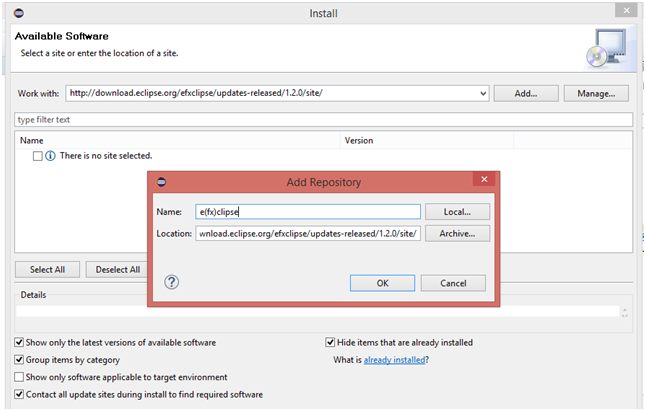
Now, the name of all the components which will be installed from the location which we have just entered. Click on Select All and click Next. 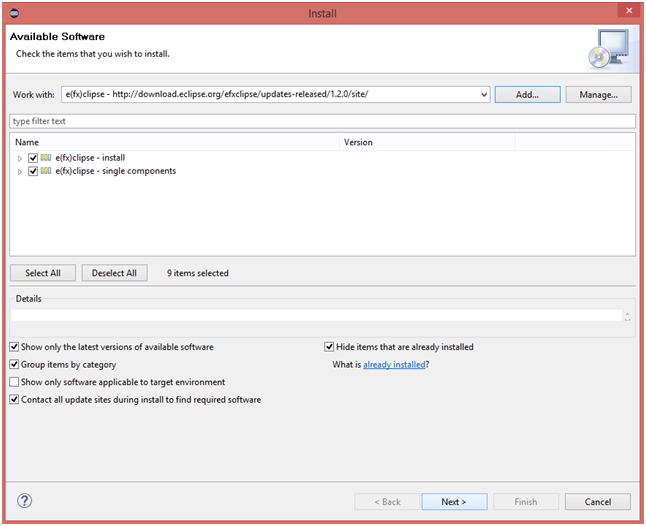
A list has been shown which contains all the components which will be installed. Just click Next to continue with the installation. 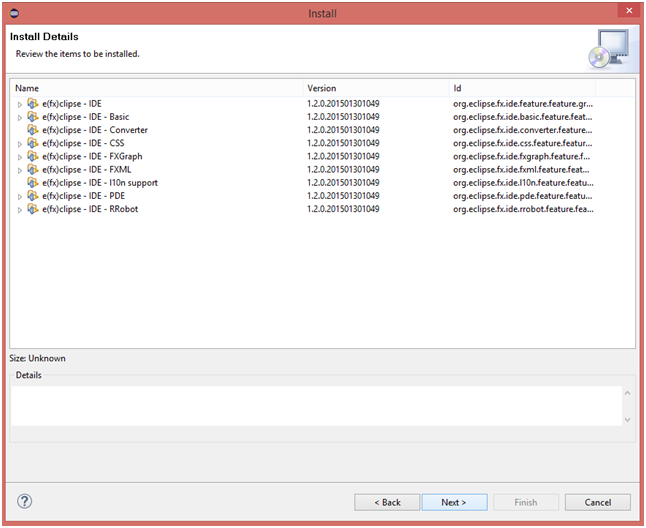
Now, a software agreement has been shown. Just select the radio box which says I accept the terms and conditions and click finish. 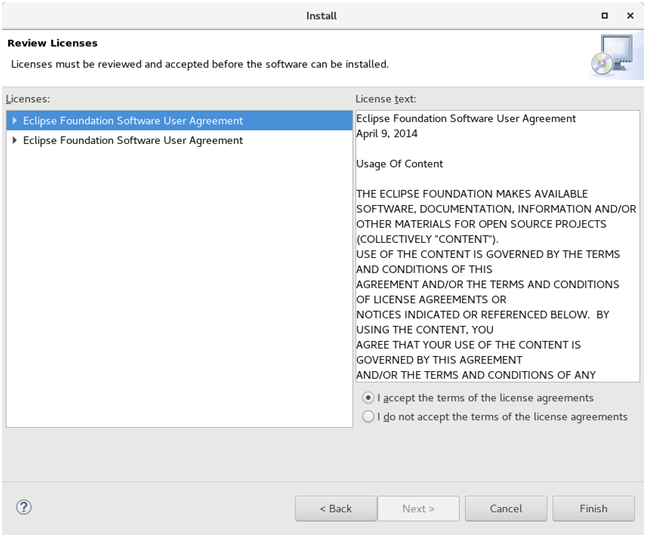
Now, the software is being installing to the eclipse. Once the process gets over, it shows a pop-up window which asks to restart the eclipse. Just click Restart Now and wait while restart process gets done. 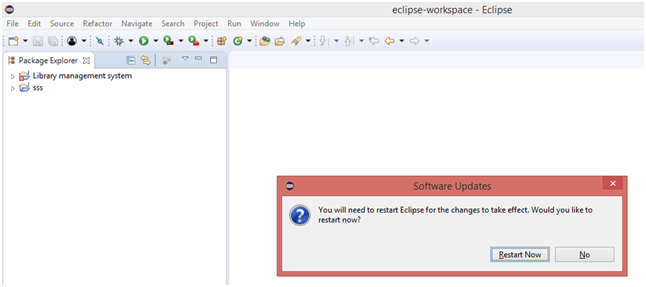
Now, we have installed the new software which enables us to create the new JavaFX Application directly. We just need to click on file and choose new → project from the drop down options. 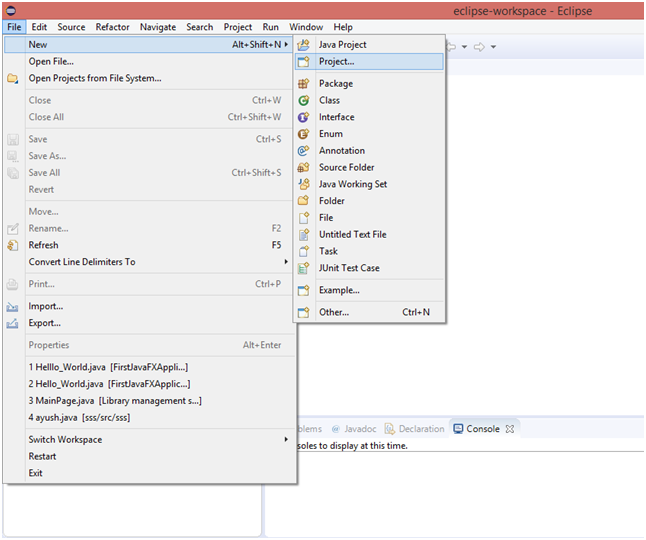
Now, we can see that there is a option of JavaFX project. We can now create JavaFX application directly. Choose JavaFX Project and click Next. 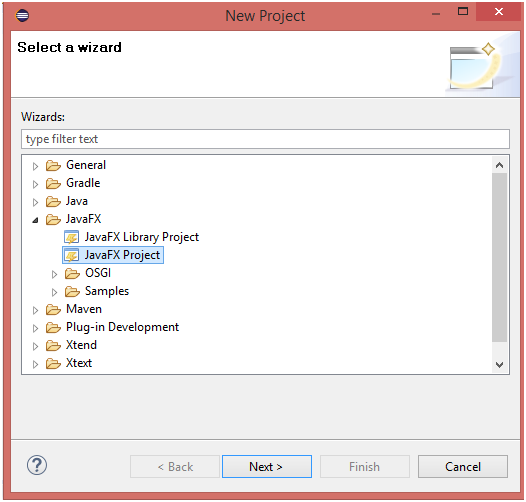
Enter the JavaFX project details and click Finish 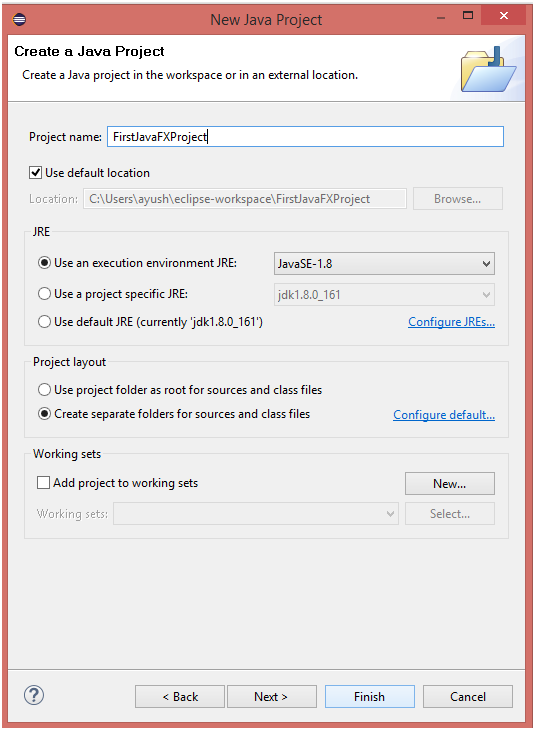
Now, create your first JavaFX class. Just enter the class name in the pop-up window shown below. Click Finish. 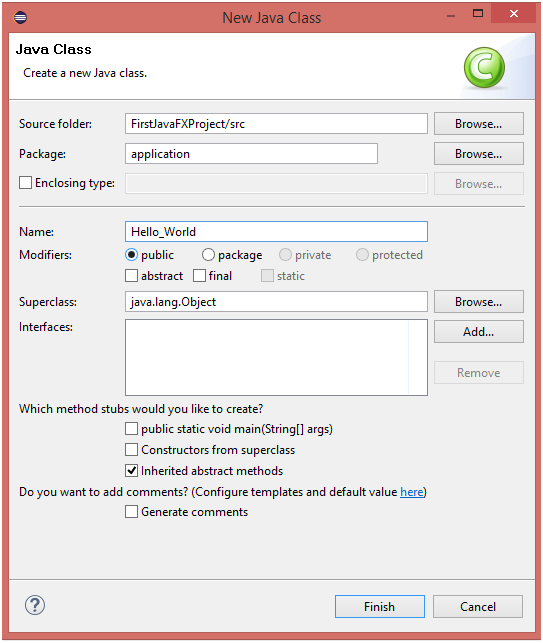
Paste some JavaFX code into the file and execute the class file. 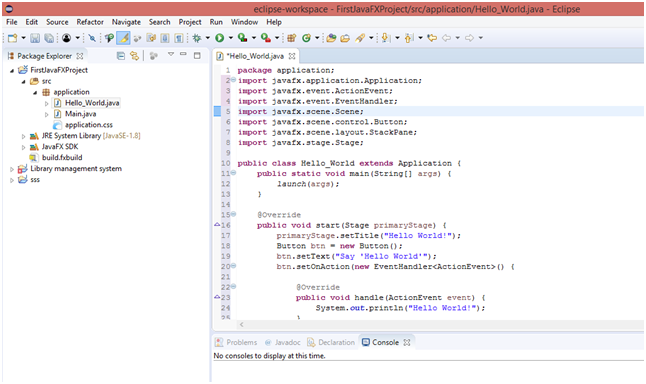
We got our application running fine, printing hello world on the console on clicking the "Say Hello Button" 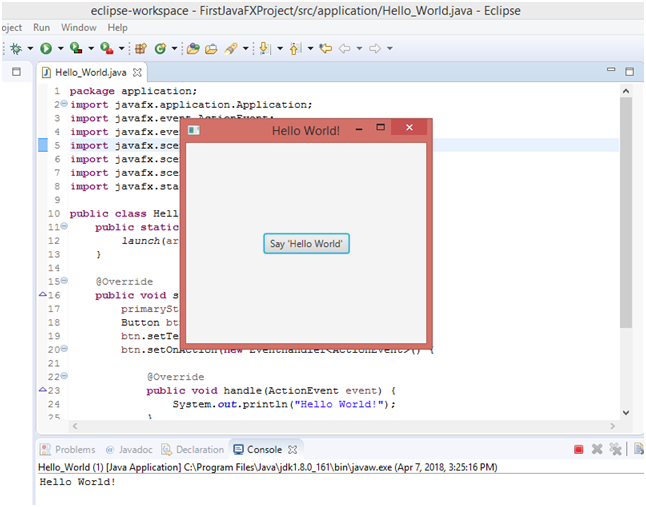
Hence, we have created an environment in which, we can execute our JavaFX application in eclipse.
Next TopicJavaFX Architecture
|
 For Videos Join Our Youtube Channel: Join Now
Feedback
- Send your Feedback to [email protected]
Help Others, Please Share


