| |

Joomla Components MenuNavigate to the "Components" menu from Joomla Taskbar. After you click on the "components" button, a drop-down menu will be displayed. It contains several options, as shown below: 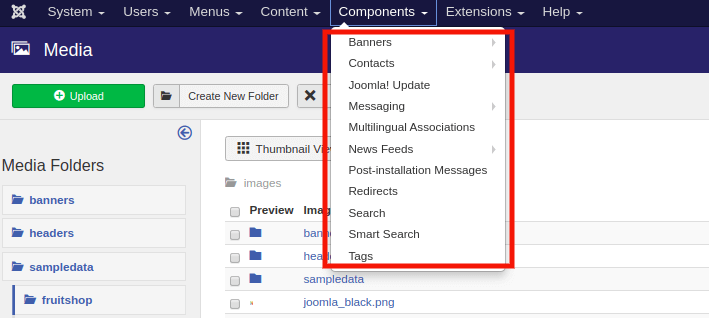
BannersBanners are used to set or arrange the banners on the website. If you click on Banners, you will get the submenu with the following options: 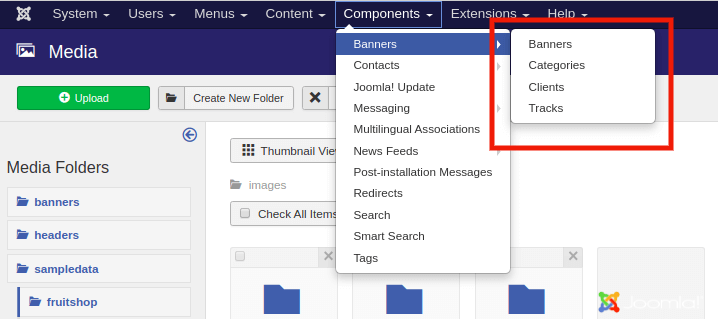
1) Banners Banners are used to edit, modify, or add the banners on the Joomla website to display. To access the banners, navigate to the "Components - Banners - Banners" from the Joomla Taskbar. The following screenshot will be displayed after clicking on the 'banners' button: 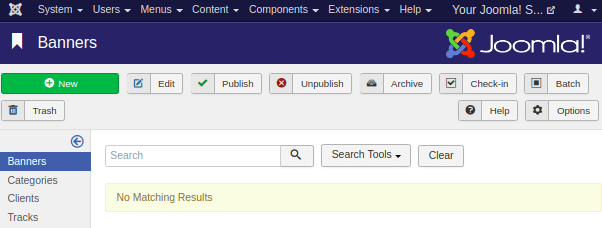
There are some options in the toolbar, which include some buttons to perform various tasks. These tasks include features like adding a new banner, editing the existing one, publishing or unpublishing the banner, deleting the banner, etc. 2) Categories The category manager provides you an option to create a new banner category or edit the existing one. You need to click on "Components - Banners - Categories" to access the category manager. The category manager page looks like the following screenshot: 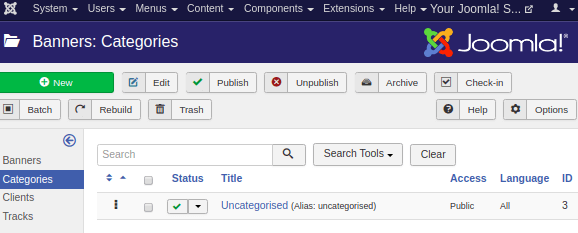
The category manager page also includes the toolbar on top of the page containing several buttons so that you can create, edit, publish/unpublish, or delete the banner categories. Then, there is a search box with some filters to find the created banner category easily from the list. Below, there is a column specifying the various details related to the banner categories. A column header contains the following options:
3) Clients The client manager is used to create a new client banner or edit the existing ones. To access the client manager, navigate to the "Components - Banners - Clients" from the Joomla Taskbar. It will look like the following screenshot: 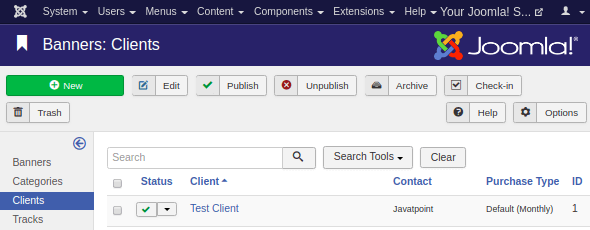
The toolbar on the client manager page contains the basic options to create, edit, publish/unpublish, or delete the clients. The column header in the "Banner Manager - Clients" page contains the following details:
The search box helps to find the client from the list easily. 4) Tracks This page helps to view the tracking information for a list of existing banners. Navigate to the "Components - Banners - Tracks" from the Joomla Taskbar to open a tracking page. It will look like the following screenshot: 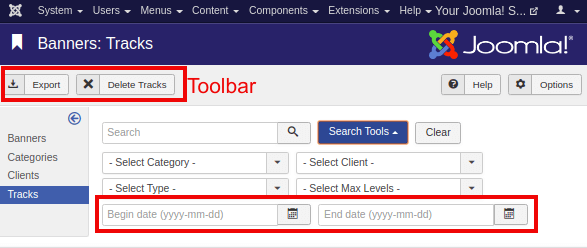
There are two options available in the toolbar:
There is a search box and some filter options available below the toolbar. You can choose the "Begin Date" and the "End Date" to track the information of banners within a particular period. ContactsIt is used to add the contact information of the client on the Joomla site such as name, address, telephone number, email, etc. To open contacts manager, navigate to the "Components - Contacts" from the Joomla Taskbar. The following screenshot displays the contact manager: 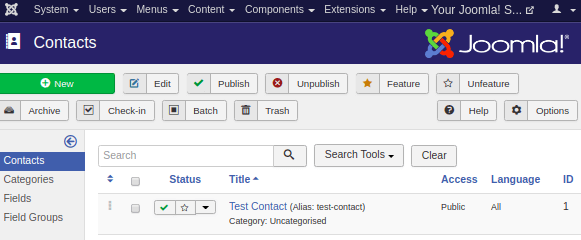
You can also create contact categories, fields, and field groups for contacts. Joomla Update Click on the "Components - Joomla! Update" It displays the installed Joomla version. There are three buttons on the toolbar of Joomla Update page: 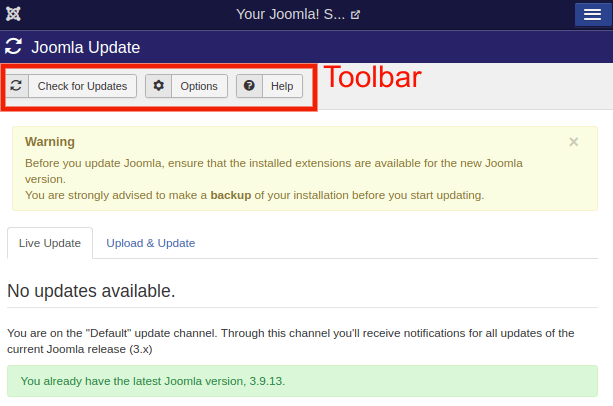
There are two sections below the toolbar: 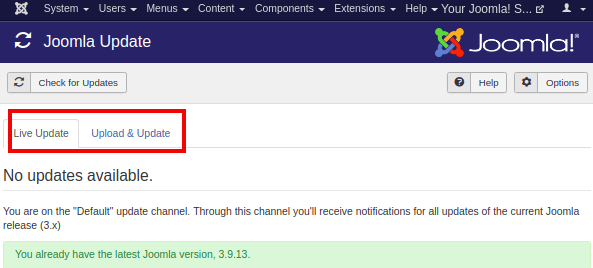
MessagingThe message manager allows you to send and receive messages in Joomla. Click on "Components - messaging" from the Joomla Taskbar to access the message manager page. It looks like the following screenshot: 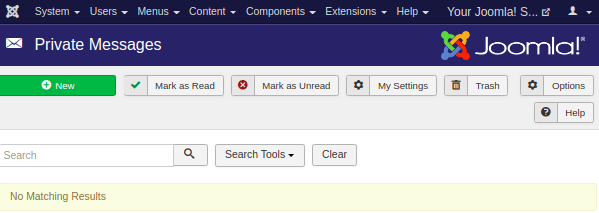
This option is used to send messages to the other backend of Joomla site. You can create or delete the messages from this page. The toolbar in the message manager page contains the following options:
If you want to create a new private message, then you need to click on a "New" button from the toolbar. It will open a new window like the following screenshot: 
You can also create a new private message directly from the Joomla Taskbar. Navigate to the "Components - Messaging - New Private Message". NewsfeedsIt is used to add a news feed on the Joomla site from other sites. To open a newsfeed page, navigate to the "Components - News Feed" from the Joomla Taskbar. The following image displays the newsfeed page: 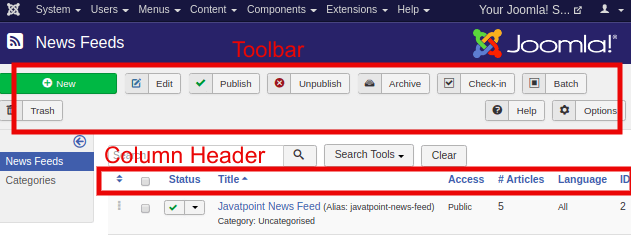
The toolbar provides several options such as create new newsfeed, or edit, publish/unpublish, archive, check-in, trash or batch process existing newsfeeds. Then there is a search box to find the created newsfeed easily from the list. Below, there is a section containing details in columns for the created newsfeeds. A column header contains the following options:
You can also create newsfeed categories using the categories option from the newsfeed manager page. Post-Installation MessagesIf you click on the "Components - Post Installation Messages", you will get the screen where you can review an actionable message from Joomla after installation. 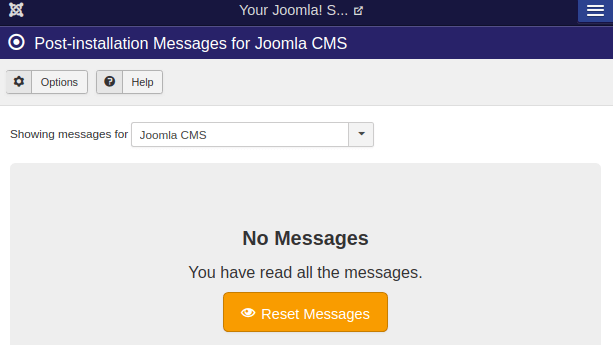
It is used to deliver messages after a successful installation of Joomla or its extension. RedirectThe redirect manager is used to redirect the URLs which do not exist on the website with the working web pages. Navigate to the "Components - Redirect" option to open a redirect manager. It will look like the following screenshot: 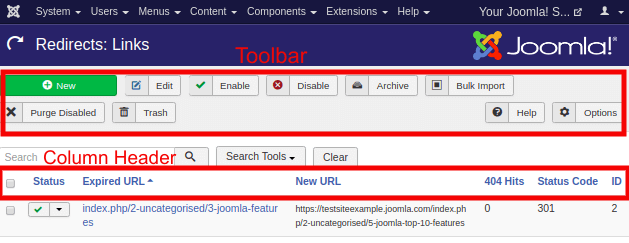
The following are the options available on the toolbar present on the redirect manager page:
Just like other pages, the redirect manager page also provides a search box with filters to find the particular redirect easily. The column header contains the following options:
SearchThe search manager allows you to track how many searches were made for each key combination and what was the result for each search. Navigate to the "Components - Search" from the Joomla Taskbar to open the search analysis page. It will look like the following image: 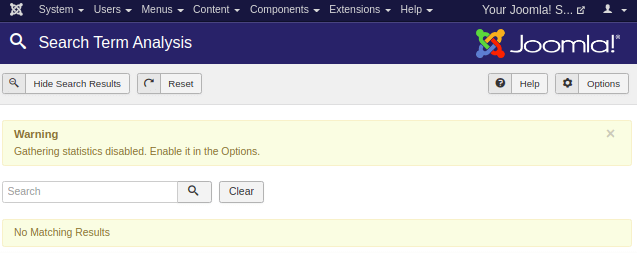
Smart SearchIt is used to enhance the site search. Click on the "Components - Smart Search" from the Joomla Taskbar to access the Joomla Smart Search page. The following image will be displayed after clicking on "Components - Search": 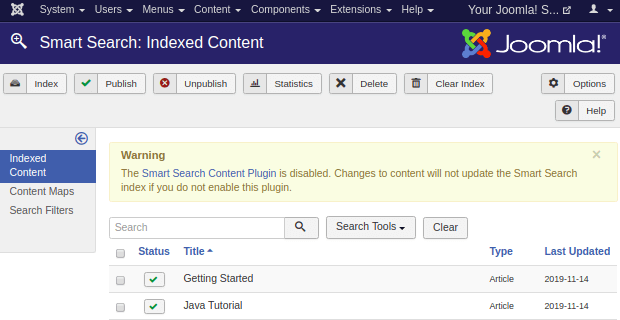
A column header present in the smart search page contains the following options:
TagsIt is used to manage the list of tagged pages. Click on the "Components - Tags" from the Joomla Taskbar to open the Joomla Tags page. It looks like the following screenshot: 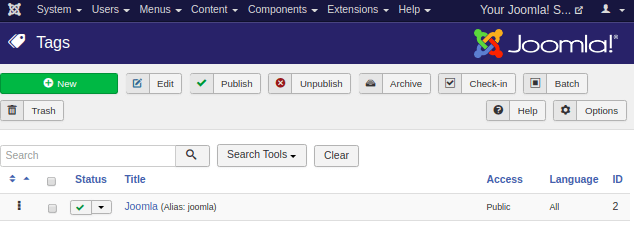
Here, you get several options so that you can create new tags, edit tags, publish/unpublish tags or delete tags, etc. Using a search box, you can easily find the tags from the list.
Next TopicJoomla Extensions Menu
|
 For Videos Join Our Youtube Channel: Join Now
Feedback
- Send your Feedback to [email protected]
Help Others, Please Share


