| |

How to Install Apache Web Server on CentOSIntroductionApache HTTP server is an open source, cross-platform web server which was released under the license of Apache 2.0. It is developed and maintained by an open community of developers under apache software foundation. In this tutorial, we will learn the steps involved in the installation process of Apache on CentOS. Prerequisites
Installation1. Install Apache Installing Apache Web Server on CentOS 7 is very easy. It just needs a single command given below. 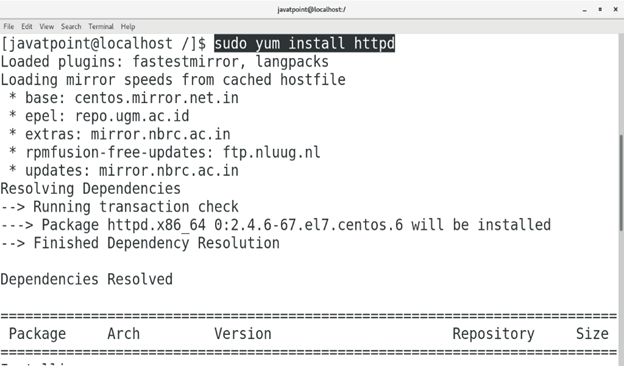
2. Start Apache service Execute the following command to start the Apache service. 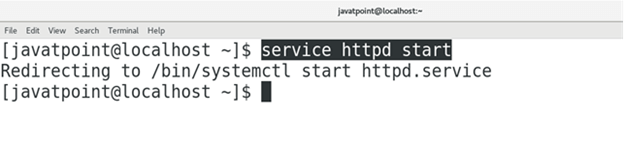
3. Test Apache We can check whether Apache has successfully configured on our CentOS or not. We need to just type 127.0.0.1 (localhost IP address) in the browser's search bar. We can also check the IP address of the system by using the following command. If Apache Web server is configured properly on the system then the browser gives the response shown below. 
4. Enable Apache Service To make the apache service enabled on the boot, execute the following command. 
Extra InfoExecute the following command to stop Apache service. To disable Apache service on the boot, Execute the following command. Hence, we have installed and get started with Apache on CentOS.
Next TopicInstall Nginx
|
 For Videos Join Our Youtube Channel: Join Now
Feedback
- Send your Feedback to [email protected]
Help Others, Please Share


