| |

Spring Boot AOP After AdviceAfter advice is used in Aspect-Oriented Programming to achieve the cross-cutting. It is an advice type which ensures that an advice runs after the method execution. We use @After annotation to implement the after advice. Let's understand after advice through an example. Spring Boot After Advice ExampleStep 1: Open Spring Initializr http://start.spring.io. Step 2: Provide the Group name. We have provided the Group name com.javatpoint. Step 3: Provide the Artifact Id. We have provided the Artifact Id aop-after-advice-example. Step 4: Add the Spring Web dependency. Step 5: Click on the Generate button. When we click on the Generate button, it wraps all the specifications in a jar file and downloads it to the local system. 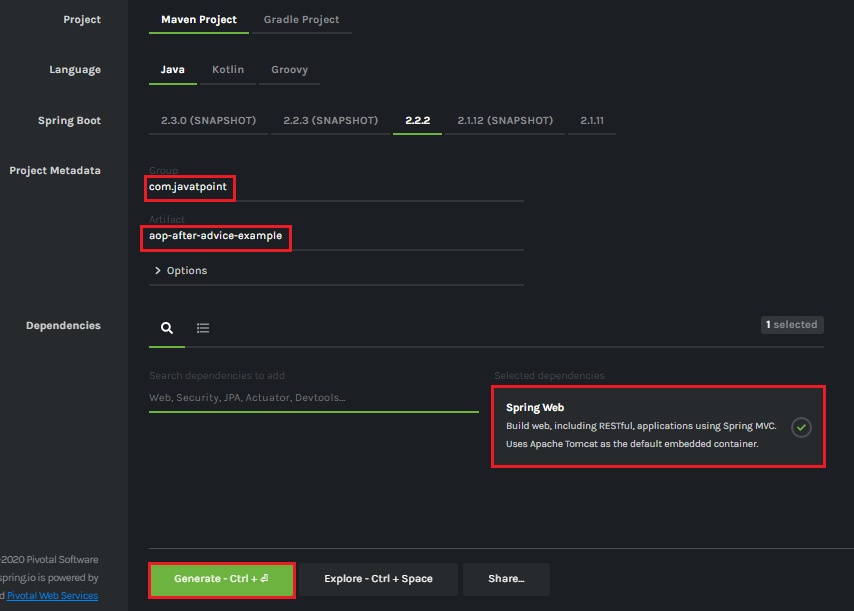
Step 6: Extract the downloaded jar file. Step 7: Import the folder by using the following steps: File -> Import -> Existing Maven Projects -> Next -> Browse the Folder aop-after-advice-example -> Finish. Step 8: Open the pom.xml file and add the following AOP dependency. It is a starter for aspect-oriented programming with Spring AOP and AspectJ. pom.xml Step 9: Open AopAfterAdviceExampleApplication.java file and add an annotation @EnableAspectJAutoProxy. It enables support for handling components marked with AspectJ's @Aspect annotation. It is used with @Configuration annotation. We can control the type of proxy by using the proxyTargetClass attribute. Its default value is false. AopAfterAdviceExampleApplication.java Step 10: Create a package with the name com.javatpoint.model. Step 11: Create a model class under the package com.javatpoint.model. We have created a class with the name Employee. In the class, define the following:
Employee.java Step 12: Create a package with the name com.javatpoint.controller. Step 13: Create a controller class under the package com.javatpoint.controller. We have created a class with the name EmployeeController. In the controller class, we have defined the two mappings one for adding an employee and the other for removing an employee. EmployeeController.java Step 14: Create a package with the name com.javatpoint.service. Step 15: Create a Service class under the package com.javatpoint.service. We have created a class with the name EmployeeService. In the Service class, we have defined two methods createEmployee and deleteEmployee. EmployeeService.java Step 16: Create a package with the name com.javatpoint.aspect. Step 17: Create an aspect class under the package com.javatpoint.aspect. We have created a class with the name EmployeeServiceAspect. In the aspect class, we have defined the after-advice logic. EmployeeServiceAspect.java In the above class:
After creating all the modules, the project directory looks like the following: 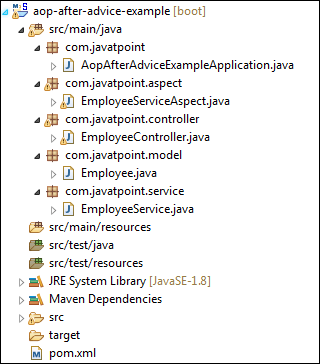
We have set-up all the modules. Now we will run the application. Step 18: Open the AopAfterAdviceExampleApplication.java file and run it as Java Application. Step 19: Open the browser and invoke the following URL : http://localhost:8080/add/employee?empId={id}&firstName={fname}&secondName={sname} In the above URL, /add/employee is the mapping that we have created in the Controller class. We have used two separators (?) and (&) for separating two values. 
In the above output, we have assigned emId 102, firstName=Sachin, and secondName=Bansal. Let's have a look at the console. We see that after invoking the createEmployee() method of EmployeeService class, the method afterAdvice() of EmployeeServiceAspect class invokes, as shown below. 
Similarly, we can also remove an employee by invoking the URL http://localhost:8080/remove/employee?empId=102. It returns a message Employee removed, as shown in the following figure. 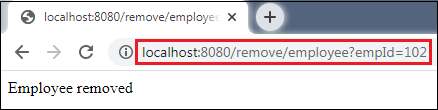
In this section, we have learned the working of after advice. In the next section, we will learn the working of around advice.
Next TopicSpring Boot AOP Around Advice
|
 For Videos Join Our Youtube Channel: Join Now
Feedback
- Send your Feedback to [email protected]
Help Others, Please Share


