| |

LATEX LISTSThe Latex lists are used to add any additional packages. There are three types of lists. One is the enumerate list, which produces the numbered list. The second is itemize, which is used for the bulleted lists. The third one is the description list, which is neither bulleted nor numbered. In Latex, each list is defined by the \item. Through this method, sub-lists can also be created. The example for the lists is shown below: The output of this is shown in the image below: 
1. EnumerateIt is used to create numbered lists. The simple code for the enumerate list is given below: The output is shown in below image: 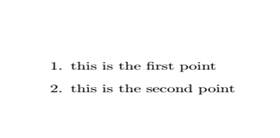
2. ItemizeIt is used to create the unnumbered list. The example is given below: The output is shown in the image given below: 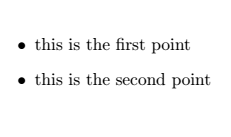
3. DescriptionThe description list is least known. It is used when you need to explain terms or notations. The program or code for the Description list is given below: The output is shown in the below image: 
Nested ListsFor all the above lists, Nested Lists are used to create different environments. It also means that it is possible to have a sub-list for an item of a list. The maximum depth for the number of levels is four. The example for the nested list is given below: The output is shown in the below image: 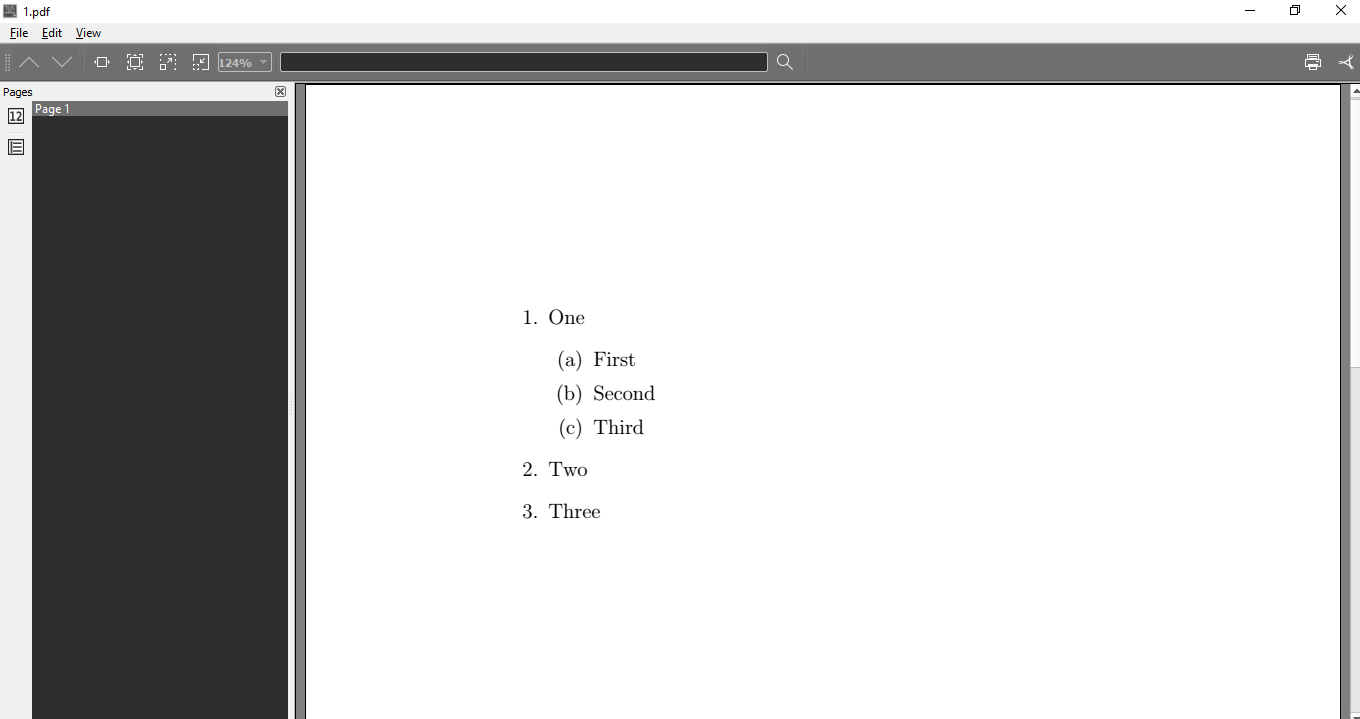
The numbering styles of the nested lists depends on the depth of the lists. Let-s consider another example: After writing the above code in Texmaker, the screen will look like the image given below: 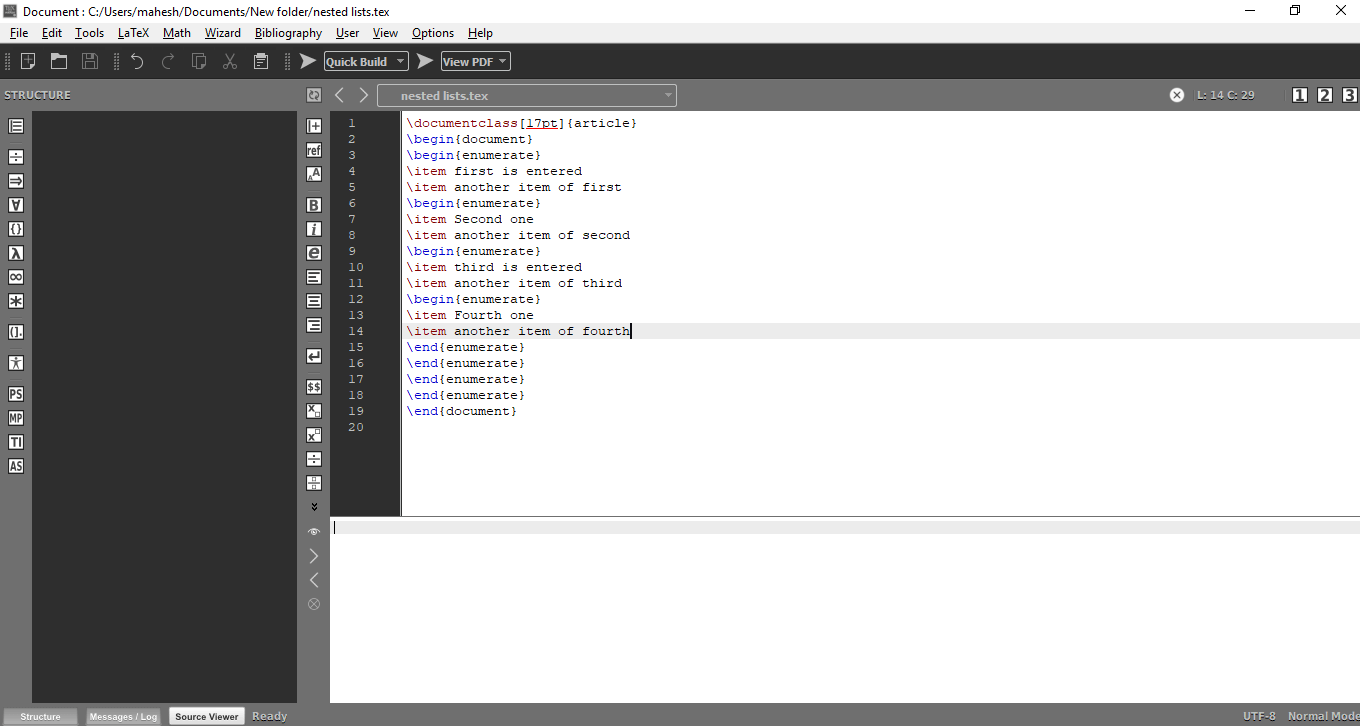
As already discussed, save the file and then click on the Quick Build option to compile the program. The output is shown in the image given below: 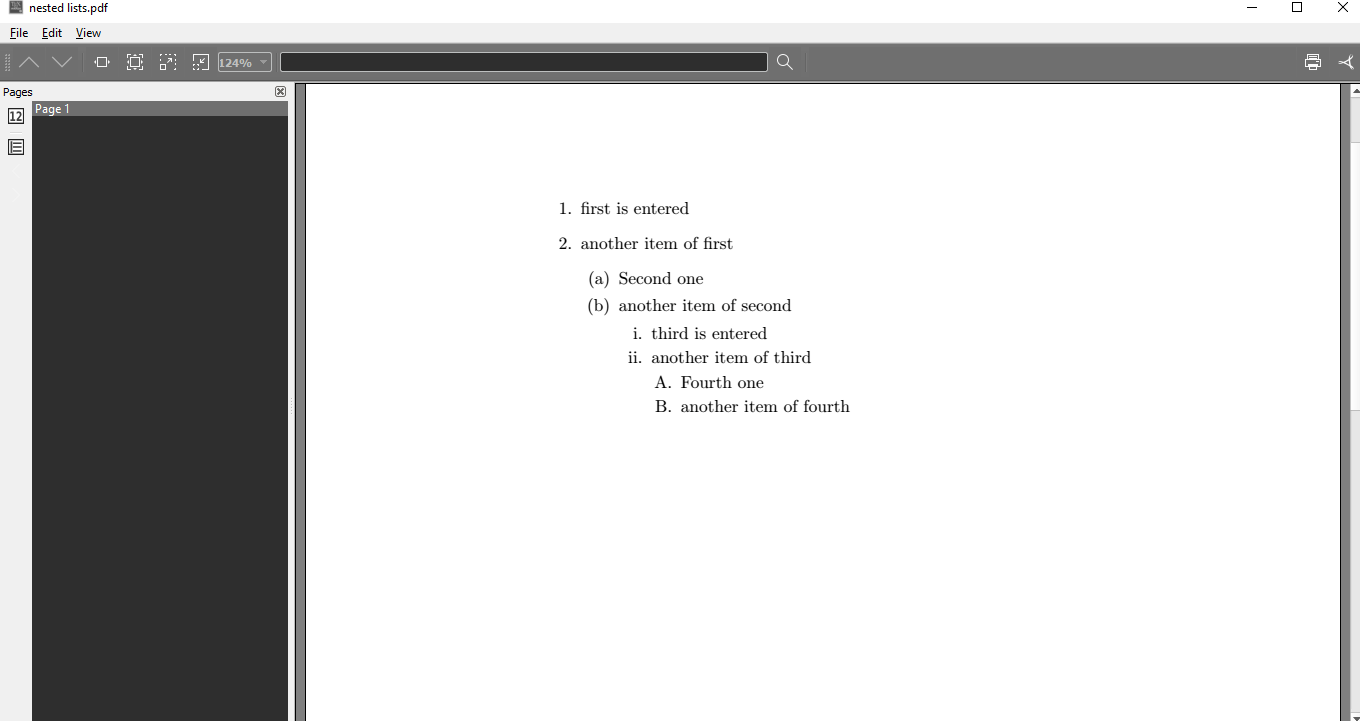
You can notice that depending on the depth of the list; the numbered list is adjusted accordingly. Note: The \itemsep command is used to control the spacing between the items. It is only used just after the beginning of the command.Latex lists are also categorized depending on the order, namely, ordered list and unordered lists. The example of both these lists is given below: 1. Ordered ListsLatex provides the enumerate environment for the ordered lists. Let-s consider an example. The code written here is used in the Texmaker to produce the output. The example for the ordered list is given below: The output is shown in the below image: 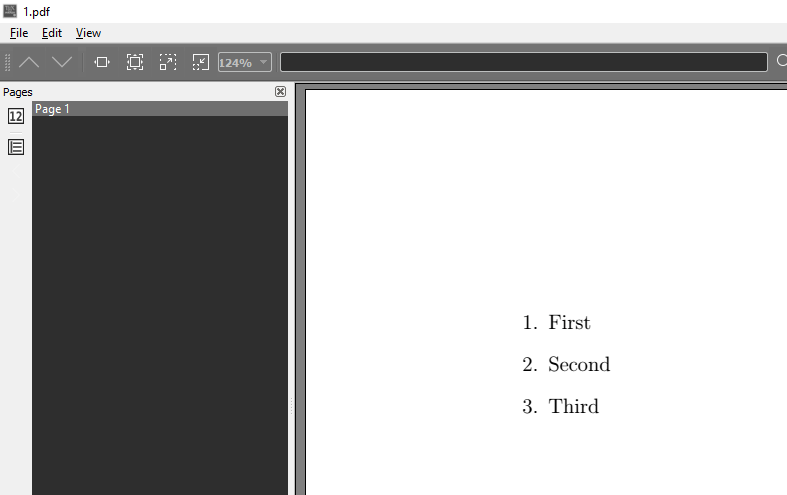
2. Unordered ListsFor Unordered lists, Latex provides the itemize environment. It also works without any additional packages. In the example given below, the code is the same as that of an ordered list, just in place of enumerate, itemize is used. The output is shown in the below image: 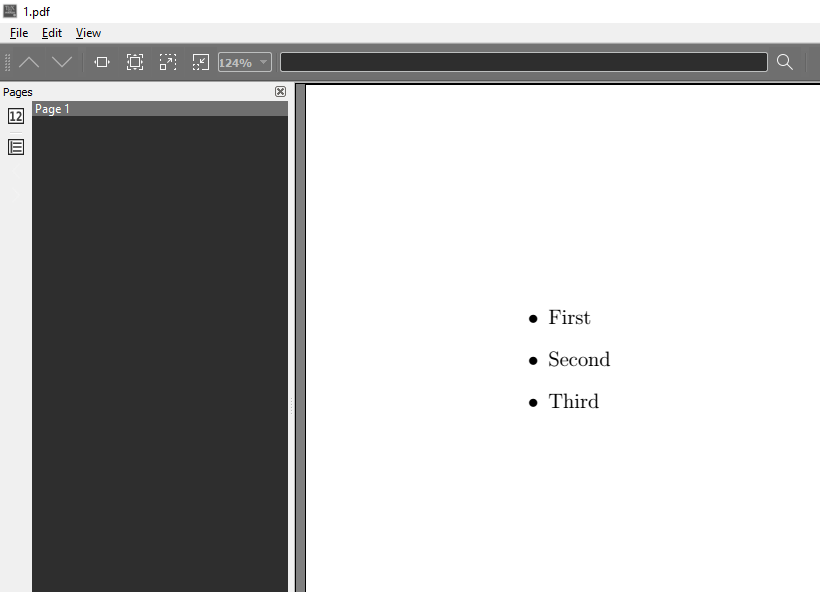
For both the environments, Latex provides the \item command, which has to be declared in the beginning. Changing the bullet and numbering pattern/format of Latex ListsSometimes, it becomes necessary to change the bullets and numbering of the lists to use a different format. As we know, for the input of a special character, $ sign is used at the beginning and at the end. The method for both the ordered and unordered list is given below:
If you change the format from bullets to dash, then the following command is used: If you change the format from bullets to asterisk, then the following command is used: If you change the format from bullets to particular character, then the following command is used: The program to change the bullets is given below: The output of the above code in the Texmaker is given below: 
It is a tricky process if you want to change the environment. The easiest step is to use the enumitem environment. This is used with the usepackage command like usepackage{enumitem}. The code for the following lists is given below: After writing the above program, the Texmaker screen will look like the below image: 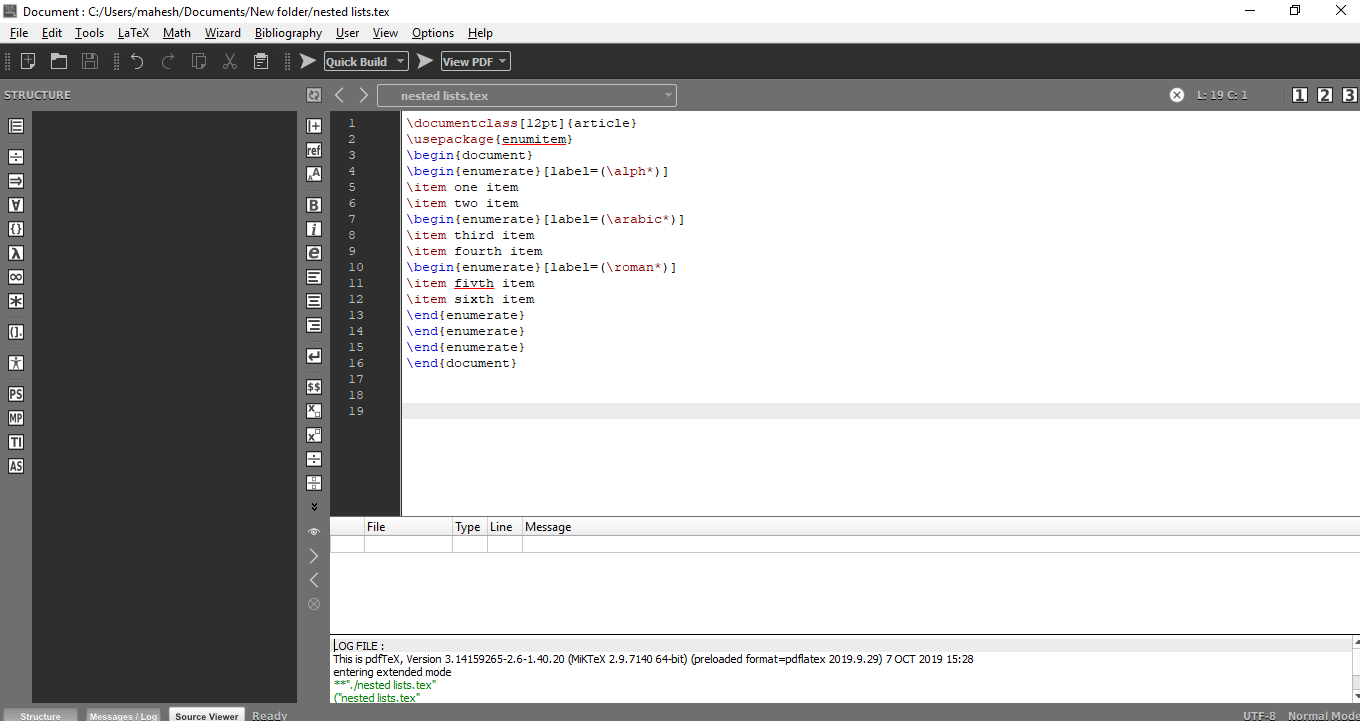
The output is given below: 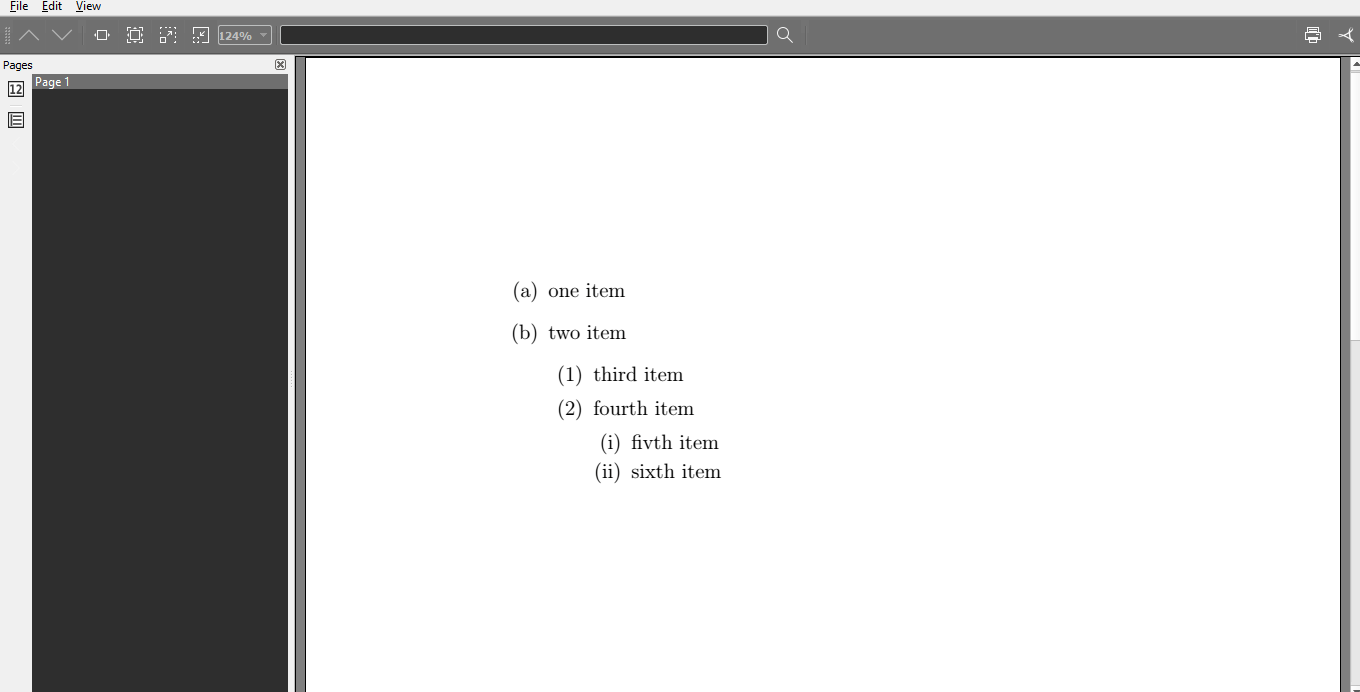
You can also use enumitem option for unordered list to change the symbol for all items of the list.
In this type of lists, the renewcommand is used to change the bullets size at different levels. Let-s understand this by an example. The commands can be used for the formats to replace the bullet points. The example is given below: The output is shown in the below image: 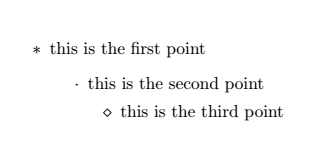
The label commands used at the different levels are:
The styles available for the numbered lists are given below:
To change the start number or starting you can use the \setcounter for the enumerate type lists. The code for this type is shown in the below example: After writing the above code, the Texmaker screen will look like the below image: 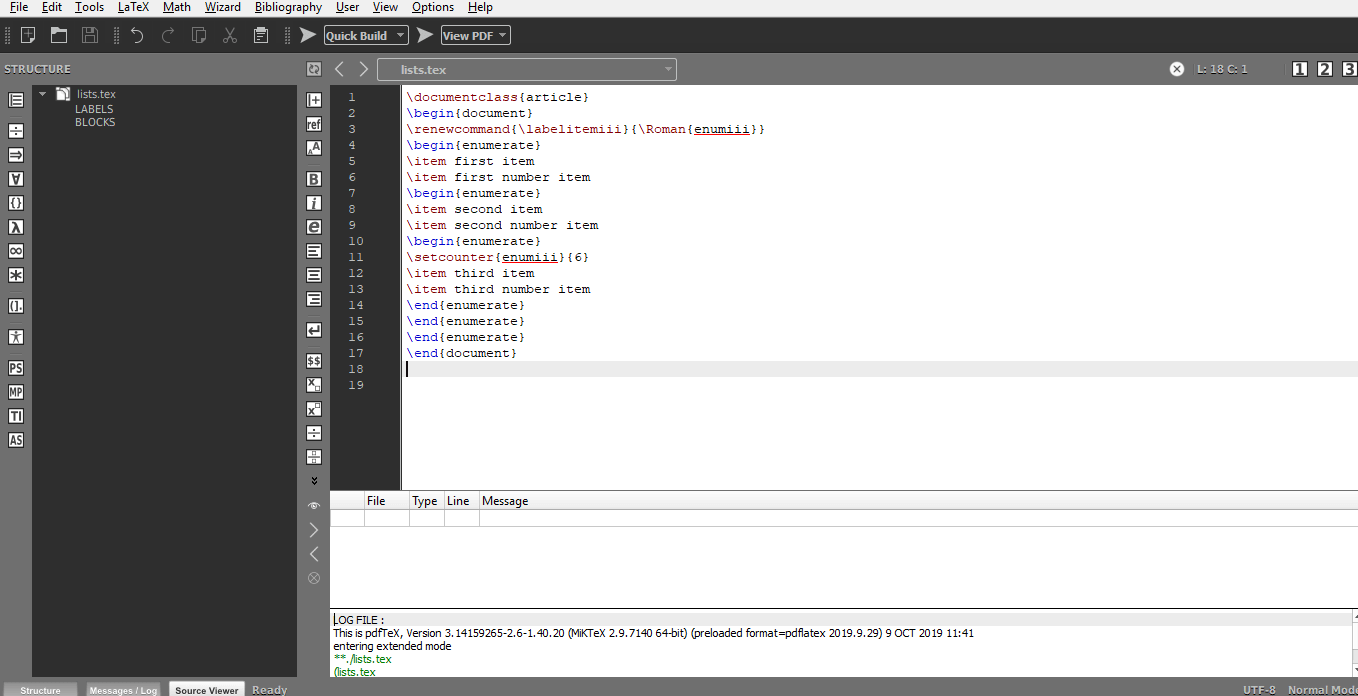
The output is shown in the image given below: 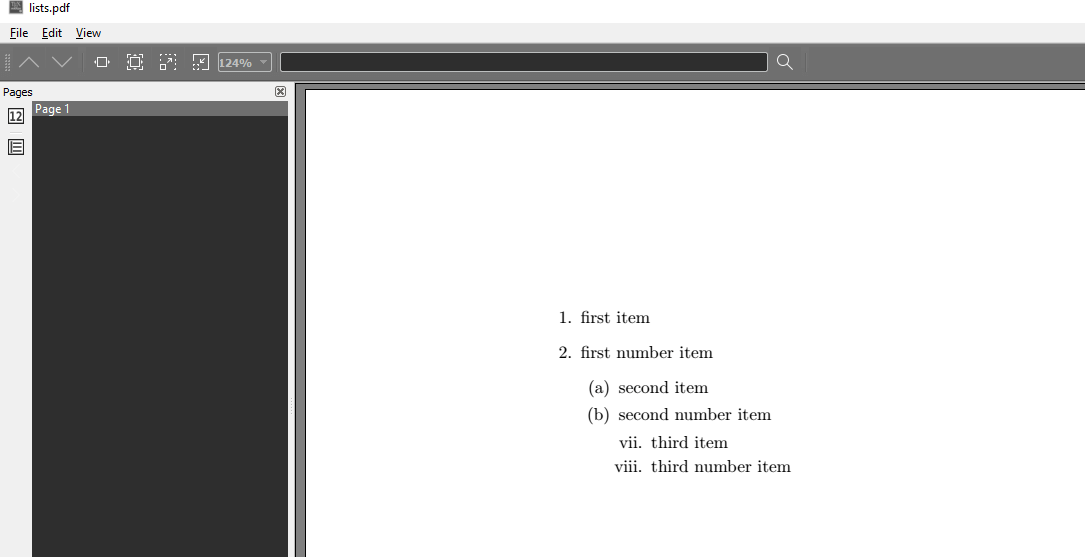
Spacing argumentsThese commands are used to change the spacing parameters of the list. Depending on the document styles and option, the null{} command commonly used here, will select the default spacings. The spacing commands, which can be used here, are mentioned below:
Next TopicLatex Fonts
|
 For Videos Join Our Youtube Channel: Join Now
Feedback
- Send your Feedback to [email protected]
Help Others, Please Share


