| |

Image Gallery CRUD using PHP MySQLIn this section, we are going to learn image gallery CURD. We will use PHP and MySQL to do this. Sometimes users, students, employees, admin, etc, need the option of image gallery, delete module and insert update. So we need to create these things for them. In order to easily upload the photo and remove that photo with validation, we will use the Photo album. In our application, we will create an attractive layout of Bootstrap with an image gallery. Here we will use scratch to make the photo gallery with an attractive layout. Using this way, it will be very easy for us to build it with our application. In our application, we will use the session to perform the proper validation with the proper message of success and error. We will get the proper success message if we successfully insert the image. Our example will create a new table named "image_gallery", and it will contain the column of main 'title', and 'image'. In order to display form, validation, error message, etc, we will also create files. The step by step process to make the photo gallery is described as follows: Step 1: In this step, we are going to Create image_gallery table. Here, we will use our database to create this table. In order to create this table, we will use the some SQL query, which is described as follows: item table: Step 2: In this step, we are going to Create DB Configuration file. For this, we have to set some details on the database like database name, username, and password of phpmyadmin database. After that, we will use our root directory and create a new file named "db_config.php". After that, we will add the following code into it like this: db_config.php Step 3: In this step, we are going to Create Index.php File. This file is used to show the display image with the delete button. It is also used to show the title of the image. Now we will use our root directory and create an "index.php" file. After that, we will add the following code into it like this: index.php Step 4: In this step, we are going to Create an imageUpload.php File. This file is used for validation using session, insert database code, and image upload code. So we will use our root directory and create a new file named "imageUpload.php". After that, we will add the following code into it like this: imageUpload.php Step 5: In this step, we are going to Create an imageDelete.php File. This file is used to delete records form the database. So we will use our root directory and create a new file named "imageDelete.php". After that, we will add the following code into it like this: imageDelete.php Now our above Image Gallery example is ready to run. In order to run this, we will use our root folder and create a new folder named "upload". Before going forward, we want full permission because the upload folder will save all the images. Now we will use our root directory and run the following command: Now we can use our browser to open the bellow URL: After open this, we can see the following output: 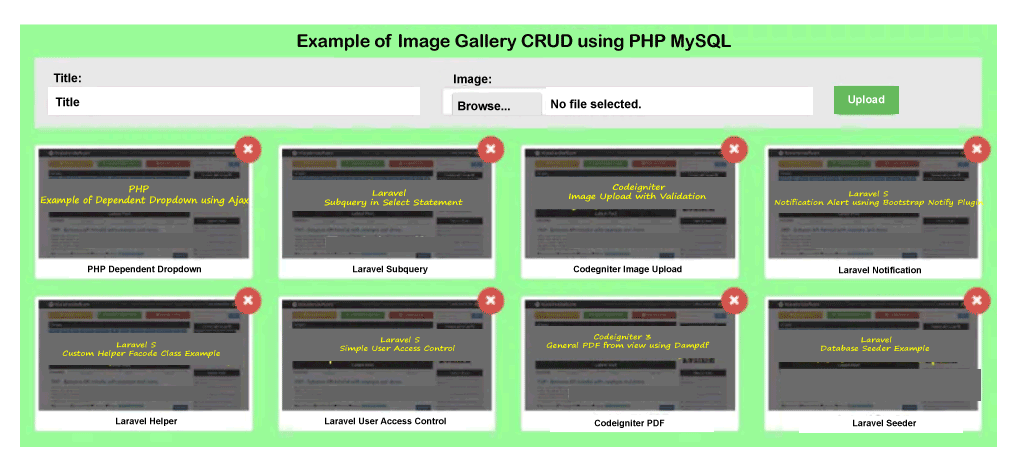
Next TopicHow to get selected option value in PHP
|
 For Videos Join Our Youtube Channel: Join Now
Feedback
- Send your Feedback to [email protected]
Help Others, Please Share


