| |

Multiple File Upload using Dropzone JS in PHPIn this section, we are going to use Dropzone JS to upload more than one file. When we use our project or website, it always needs the function which can upload multiple images or make more than one file. It does not look good if we use multiple inputs which will upload the images. In fact, the user of our website also does not like it. So we must try to make it better. Now the days every website has the feature of image uploading. But if we use the framework of PHP like Yii, Codeigniter, Laravel, etc, or PHP, it will be great to use the Dropzone JS library. It is a JavaScript library, and it is open source. Using this library, we can easily drag and drop more than one file uploading. The use of the Dropzone JS library is very easy. This library provides us the facility of validation such as specific extensions, max file upload, etc. In the given example, we will explain the use of dropzone.js to upload more than one image and build more than one file. In our example, we will also build a better layout by using the bootstrap. The step to upload images and build files is as follows:
We can upload the image by using the given step-by-step process. We have described three steps, which are able to provide full knowledge of image upload. In our below example, we will import by using the dropzone.js cdn. If we want to download it, we can do it in our local. The steps to upload images are as follows: Step 1: In this step, we are going to create index.php file. We will use root folder to create this file. In order to perform this, we are going to use the following code and put it on index.php file. The CDN is used in this file for JS, JQuery, Bootstrap and Dropzone CSS, which is described as follows: index.php Step 2: In this step, we are going to create upload.php file. We will use the root folder to create this file. This file will write the code of image upload, which is described as follows: upload.php Step 3: This is the last step, and in this step, we are going to create upload folder. In our example, we need to store images. That's why we will create an upload folder. Uploads can also have different names. We should also be careful to change on upload.php file. Now our above example is ready to run. So we will use our root folder to run the following command. Now, we will use our browser and open the URL, which is described as follows: When we open this URL on our browser, we will get some output, which is described as follows: 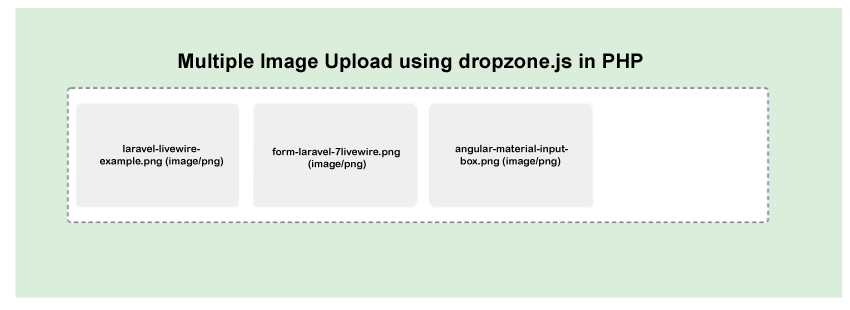
Next TopicPHP Dropzone File Upload on Button Click
|
 For Videos Join Our Youtube Channel: Join Now
Feedback
- Send your Feedback to [email protected]
Help Others, Please Share


