| |

GIMP CropGIMP is an open-source image manipulation program that allows us to perform several basic and editing tasks. It supports different tools to crop, edit, resize, retouch, refix the image. In this section, we are going to discuss how to crop an image using GIMP. Further, we will see how to reduce its size and save it in different image formats. To crop an image is an essential task for any image editor. It is one of the most frequently used tasks. We may require to crop the image for any purpose like to remove the unwanted area of the image, reduce the size of the image, etc. We can cut the selected part of the image by using the crop tool. The cropping can be performed in different ways like we can select a region of the image, then crop or cut it, or cut by dragging the specific area. There are different types of crop tools available in GIMP, like Crop, Crop to Selection, etc. Let's understand how to crop a specific part of the image using GIMP differently. How to Crop an Image Using GIMPTo crop an image using GIMP, select the Crop tool from the Tools-> Transform Tools menu or hit the "SHIFT+C" keys. It selects the whole image canvas, now specify the area by dragging that we want to crop. Let's understand it in detail: Follow the below steps to crop an image: Step1: Open or Create an image The First step is to create or open an image that we want to crop. To open an image, select the open option from the file menu. Now, select the image from the file system and click Open to open it. 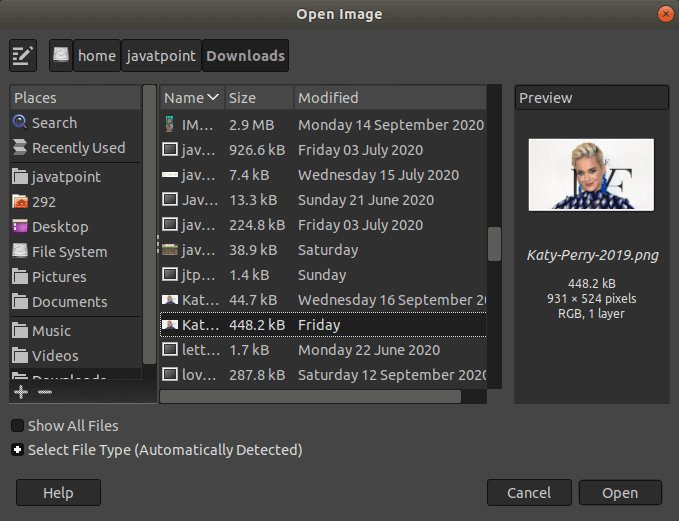
Step2: Select the Crop Tool Now, select the crop tool from the Tools menu. To activate the crop tool, select the Crop option by navigating the Tools-> Transform Tools menu or stroke the "SHIFT+C" keys. We can also do the same by clicking on the below icon from the toolbox: 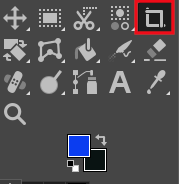
Step3: Select The Region After selecting the crop tool, we have to specify the area to be cropped. To do so, drag the mouse on the image canvas and specify the area. It will look like as follows: 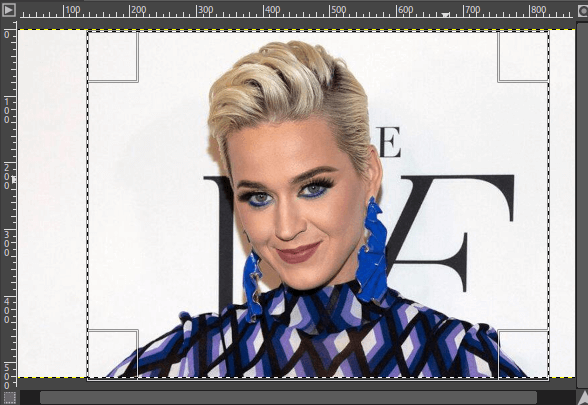
We can see the specified area is captured in a rectangular box. We can adjust it after selection by clicking on the box's edges and stretch it to anywhere in the image canvas. After resizing it, we can crop it by the selection. Step4: Crop the Image Now, our image is ready to be cropped. To crop it, hit the Enter key; it will crop the selected region. Now we have our cropped image. 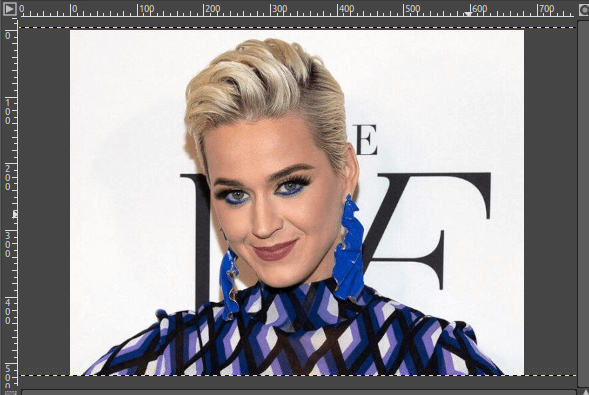
We can save it in different image formats by using the Export As option from the file menu. If we want to reduce its size and resolution further, we can do so using the scale option from the Image menu. Step5: Reduce the Image Size To further reduce the image size and resolution, select the Scale option from the Image menu and specify its properties. It will open a dialog window to specify the image properties: 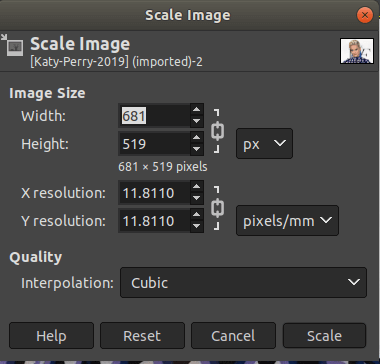
Reduce the image height and width and click Scale; it will reduce the image's size and resolution. For more detail, visit our detailed tutorial on how to resize the image using GIMP. Step6: Save The Image We can now save this image in different image formats such as Jpg, Png, Tiff, Gif, and so on. To save it in different image formats, select the Export As option from the File menu and specify the image format. It will open a dialog window to specify the file name and image format. 
Specify the file name with proper file extension and click on the Export option; To access all the supported image formats in GIMP. Expand the Select File Type option at the bottom of the Export window. It will list all the supported image formats in GIMP. 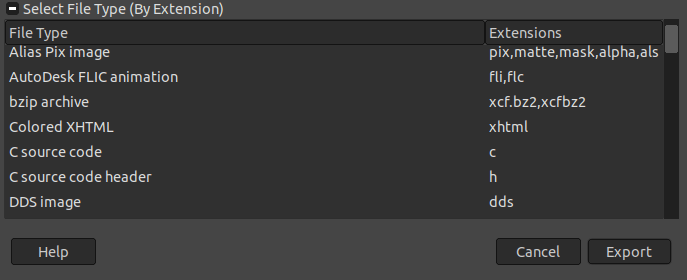
Click on any of the file formats and select the Export to save it.
Next TopicGIMP Patterns
|
 For Videos Join Our Youtube Channel: Join Now
Feedback
- Send your Feedback to [email protected]
Help Others, Please Share


