| |

GIMP PatternsA pattern is a small image used to fill the specific area by tiling. We can use the pattern by placing copies of the pattern side by side. The patterns are useful for repairing photos or filling backgrounds or filling letters of the company logo. By default, GIMP comes with several built-in patterns that can be used for any purpose. The GIMP packages marble, swirls, wood grains, and several other patterns. Further, we can create our pattern or download them from the web. The patterns are also a useful way to stroke a selection in a specific way. In this section, we are going to discuss how to use patterns. Further, we will see how to create our patterns and add them to GIMP. How to Use Patterns?The patterns can be used in different ways in GIMP. There is three popular technique to use the patterns:
Each of the above techniques is used to paint the image canvas's specific region with the given pattern. It acts like colors; the only difference is that it paints with the pictures. Fill Patterns Using Bucket Fill ToolThe Bucket Fill tool is one of the finest tools to fill a specific part of the image with a color or pattern. It is useful for filling a large area or entire image canvas. To fill the selection with an image pattern, select the bucket fill toll from the Tools menu and select the Fill with Pattern option from the Tool options. Now, we click anywhere on the image canvas to fill with a pattern. Follow the below steps to fill a selection with an image pattern using the Bucket Fill tool: Step1: Create or Open an Image The first step is to create or open an image to operate. To create an image, select the New option and open an image, select the Open option from the file menu. It will create a blank image. Step2: Select a Region to Fill Now, we have to select a region to fill it with a pattern. We can choose any of the selection tools from the Tools Menu. For example, we are making a rectangular selection using the Rectangle Select Tool. Step3: Select the Bucket Fill Tool Now, select the bucket fill tool from the Tools-> Paint Tools menu or press the "SHIFT+B" keys. We can also do the same by clicking on the below icon in the toolbox: 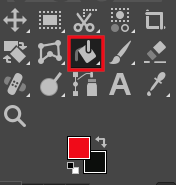
Step4: Select The Pattern Fill Option By default, the bucket fill tool is set on the fill with the color tool. But, we can change this by selecting the pattern fill option given on the tool option box, which can be seen at the below of the toolbox: 
Step5: Specify the Pattern As we have selected the pattern fill option, we have to specify the pattern by which we want to fill the specified region. We can select the default pattern by clicking on a pattern from the patterns of dockable dialogs. 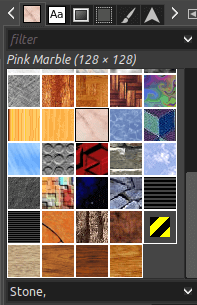
If the patterns dockable dialog is not visible on our screen, We can open it from the Windows-> Dockable Dialog-> Pattern menu. Step6: Fill with Pattern Now, we are all set to fill our selected region with pattern. To fill a specific region, click on it. It will be filled by the bucket fill tool. It works similarly to colors. Consider the below image: 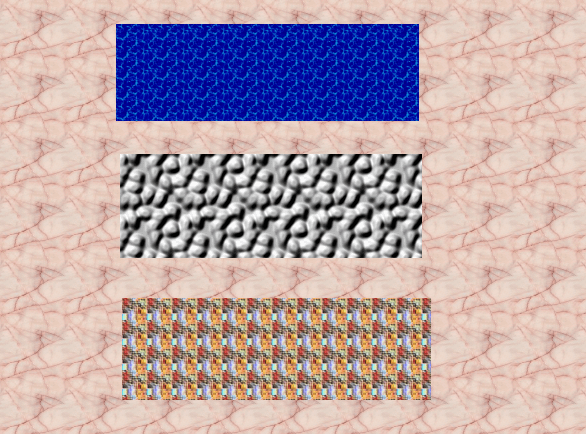
Draw Patterns Using Clone ToolThe clone tool is one of the most used tools for repairing photos. We can fill the patterns using the clone tool. It is useful for those who want to fill a specific region from a brush. To fill by the clone tool, select the clone tool from the Tools->Paint Tools menu and select the Pattern option. After selecting the pattern, specify the pattern. Now, draw over the image where we want to fill the pattern. It acts like a paintbrush tool; where we draw on the image canvas, it will paint the specified pattern. Let's understand it in detail: To fill a pattern using the clone tool, create or open an image and select the Clone Tool. To select the clone tool, navigate to Tools-> Paint Tools-> Clone menu or hit the C key. We can also do the same by clicking on the below icon in the toolbox: 
After Selecting the Clone Tool, select the pattern in the source file given at the bottom of the tool options box: 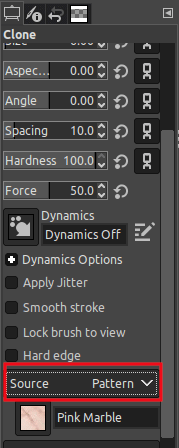
After specifying the source field pattern, select a specific pattern from the pattern dockable dialog window. 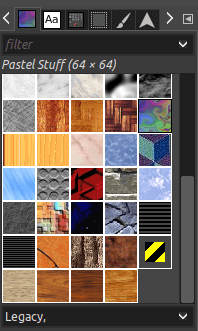
Now, we can draw a pattern anywhere on the image canvas. It will paint the selected image pattern with a paintbrush. We can adjust the size, hardness, angle, and other brush properties from the tool options menu. After specifying the properties, paint over anywhere on the image canvas. Consider the below image: 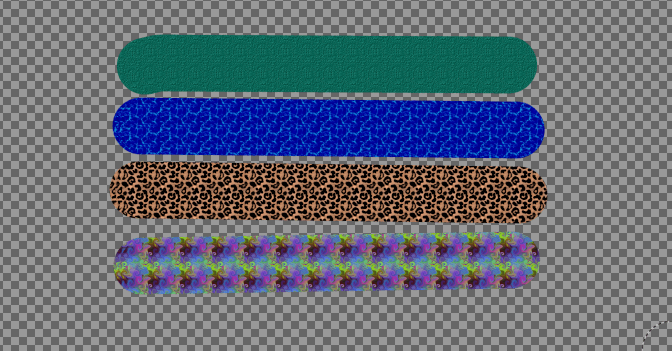
In the above image, we have painted different image patterns using the clone tool. Stroke Path Using PatternWe can stroke a selection or path using the pattern. It works similarly as stroking a line. The only difference is that we have to select the pattern instead of line or color. To stroke a selection or path, specify the path or selection, then select stroke selection or path option from the Edit menu. It uses the activate path to specify the path during the stroke, similar to the clone or bucket fill tool. Let's understand how it works? Create a selection on the image using any of the selection tools. For example, we have made a rectangular selection: 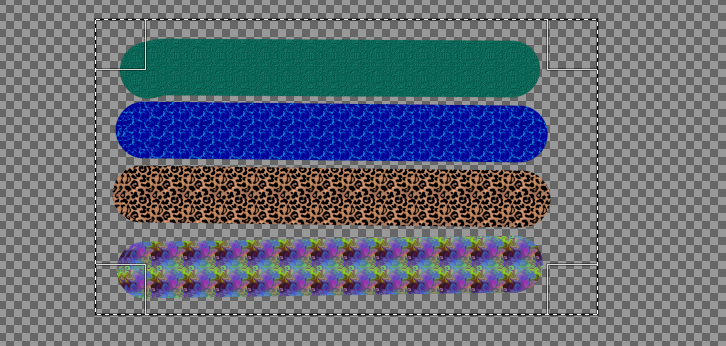
Now select the Stroke Selection tool from the Edit menu. It will open a dialog window to specify the stroke property: 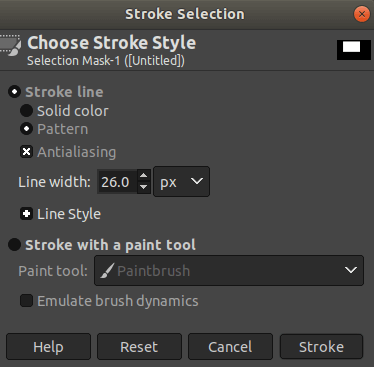
Select the pattern option and specify the line width and other aspects, then select the Stroke option. It will stroke the selection with the currently active pattern: 
Hence, we have used all the popular methods to use the pattern. Let's understand how to create a new pattern In GIMP. How to Create a New Pattern in GIMPIf we wish to add our pattern, GIMP provides several options to do so. To create a pattern, select the create option from the file menu and click and export it in the ".PAT" format and paste the file in the GIMP's pattern folder. For example, we want to create our above-created file pattern using the Export As option and provide the file name with the ".PAT" format. 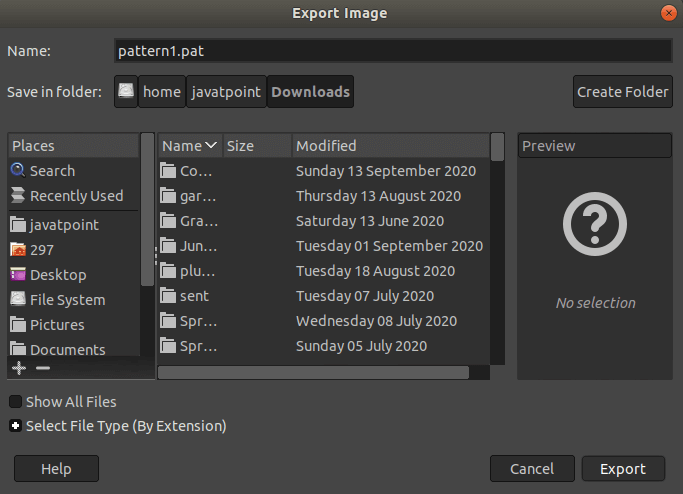
After providing the file name with proper pattern format, click on the Export option. It will verify Export Image as Pattern, click Export to confirm the description of the pattern: 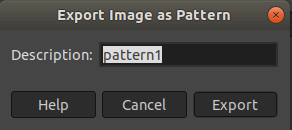
Now, the created image pattern will be saved in a specified directory. To add it to GIMP, we have to paste this file in GIMP's Pattern folder. To display the pattern folder, navigate to the Edit-> Preferences menu. It will open the default configurations and settings of GIMP. 
Here, we can see the default folders of GIMP. To view the default pattern folders, expand the Folders menu given at the bottom of the left menu: 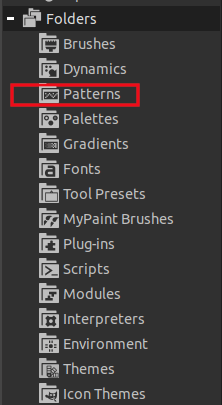
It will display the default pattern folder. Navigate to this folder, and paste the PAT file here. After pasting the pattern file, refresh the patterns by clicking on the below icon: 
It will refresh the list of the available patterns. If you still can not see your created pattern, restart the GIMP.
Next TopicGIMP Plugins
|
 For Videos Join Our Youtube Channel: Join Now
Feedback
- Send your Feedback to [email protected]
Help Others, Please Share


