Constraints in SQLConstraints in SQL means we are applying certain conditions or restrictions on the database. This further means that before inserting data into the database, we are checking for some conditions. If the condition we have applied to the database holds true for the data which is to be inserted, then only the data will be inserted into the database tables. Constraints in SQL can be categorized into two types:
Some of the real-life examples of constraints are as follows:
Constraints available in SQL are:
Now let us try to understand the different constraints available in SQL in more detail with the help of examples. We will use MySQL database for writing all the queries. 1. NOT NULL
NOTE: NULL does not mean zero. NULL means empty column, not even zero.Syntax to apply the NOT NULL constraint during table creation: Example: Create a student table and apply a NOT NULL constraint on one of the table's column while creating a table. 
To verify that the not null constraint is applied to the table's column and the student table is created successfully, we will execute the following query: 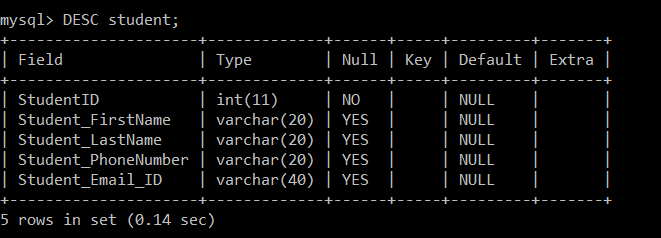
Syntax to apply the NOT NULL constraint on an existing table's column: Example: Consider we have an existing table student, without any constraints applied to it. Later, we decided to apply a NOT NULL constraint to one of the table's column. Then we will execute the following query: 
To verify that the not null constraint is applied to the student table's column, we will execute the following query: 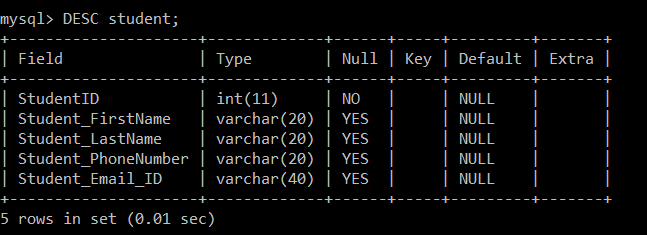
2. UNIQUE
Syntax to apply the UNIQUE constraint on a single column: Example: Create a student table and apply a UNIQUE constraint on one of the table's column while creating a table. 
To verify that the unique constraint is applied to the table's column and the student table is created successfully, we will execute the following query: 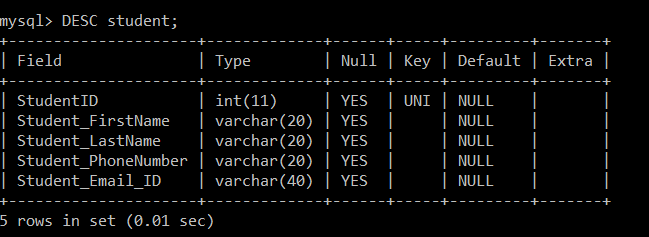
Syntax to apply the UNIQUE constraint on more than one column: Example: Create a student table and apply a UNIQUE constraint on more than one table's column while creating a table. 
To verify that the unique constraint is applied to more than one table's column and the student table is created successfully, we will execute the following query: 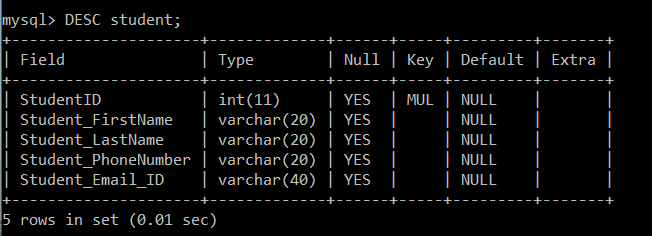
Syntax to apply the UNIQUE constraint on an existing table's column: Example: Consider we have an existing table student, without any constraints applied to it. Later, we decided to apply a UNIQUE constraint to one of the table's column. Then we will execute the following query: 
To verify that the unique constraint is applied to the table's column and the student table is created successfully, we will execute the following query: 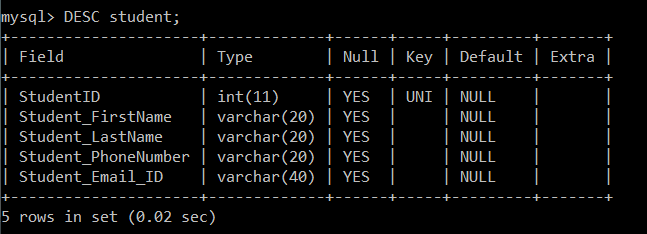
3. PRIMARY KEY
Syntax of primary key constraint during table creation: Example: Create a student table and apply the PRIMARY KEY constraint while creating a table. 
To verify that the primary key constraint is applied to the table's column and the student table is created successfully, we will execute the following query: 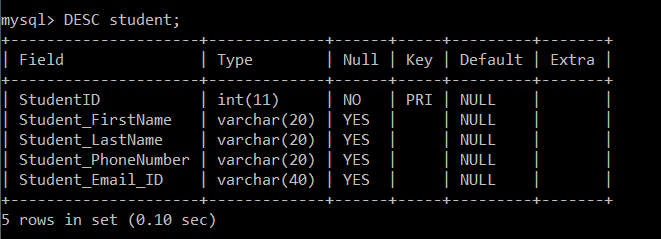
Syntax to apply the primary key constraint on an existing table's column: Example: Consider we have an existing table student, without any constraints applied to it. Later, we decided to apply the PRIMARY KEY constraint to the table's column. Then we will execute the following query: 
To verify that the primary key constraint is applied to the student table's column, we will execute the following query: 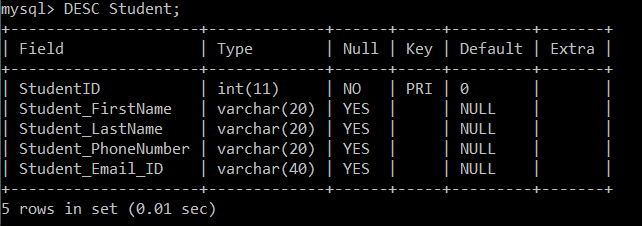
4. FOREIGN KEY
Syntax to apply a foreign key constraint during table creation: Example: Create an employee table and apply the FOREIGN KEY constraint while creating a table. To create a foreign key on any table, first, we need to create a primary key on a table. 
To verify that the primary key constraint is applied to the employee table's column, we will execute the following query: 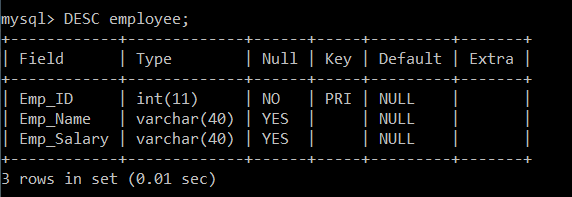
Now, we will write a query to apply a foreign key on the department table referring to the primary key of the employee table, i.e., Emp_ID. 
To verify that the foreign key constraint is applied to the department table's column, we will execute the following query: 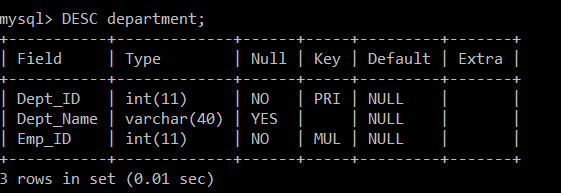
Syntax to apply the foreign key constraint with constraint name: Example: Create an employee table and apply the FOREIGN KEY constraint with a constraint name while creating a table. To create a foreign key on any table, first, we need to create a primary key on a table. 
To verify that the primary key constraint is applied to the student table's column, we will execute the following query: 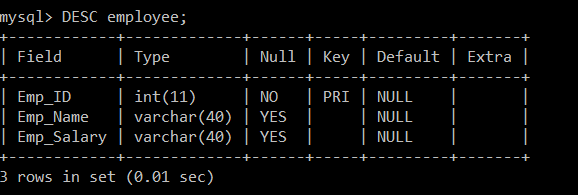
Now, we will write a query to apply a foreign key with a constraint name on the department table referring to the primary key of the employee table, i.e., Emp_ID. 
To verify that the foreign key constraint is applied to the department table's column, we will execute the following query: 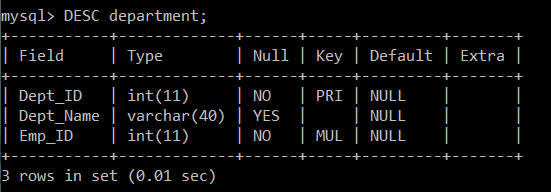
Syntax to apply the foreign key constraint on an existing table's column: Example: Consider we have an existing table employee and department. Later, we decided to apply a FOREIGN KEY constraint to the department table's column. Then we will execute the following query: 

To verify that the foreign key constraint is applied to the department table's column, we will execute the following query: 
5. CHECK
Syntax to apply check constraint on a single column: Example: Create a student table and apply CHECK constraint to check for the age less than or equal to 15 while creating a table. 
To verify that the check constraint is applied to the student table's column, we will execute the following query: 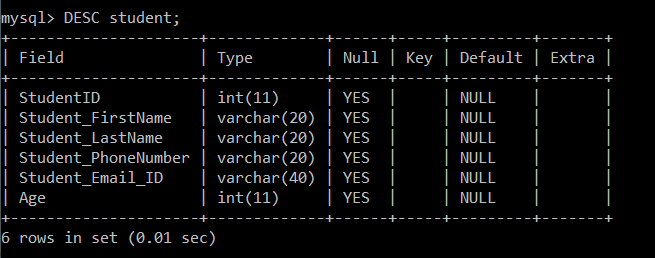
Syntax to apply check constraint on multiple columns: Example: Create a student table and apply CHECK constraint to check for the age less than or equal to 15 and a percentage greater than 85 while creating a table. 
To verify that the check constraint is applied to the age and percentage column, we will execute the following query: 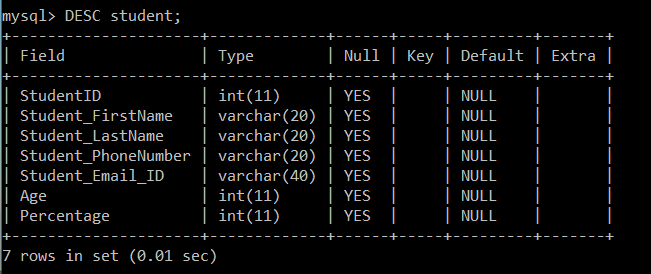
Syntax to apply check constraint on an existing table's column: Example: Consider we have an existing table student. Later, we decided to apply the CHECK constraint on the student table's column. Then we will execute the following query: 
To verify that the check constraint is applied to the student table's column, we will execute the following query: 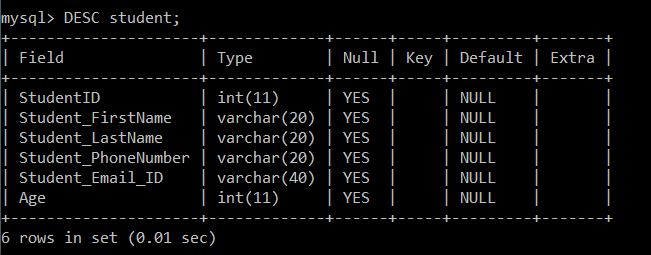
6. DEFAULTWhenever a default constraint is applied to the table's column, and the user has not specified the value to be inserted in it, then the default value which was specified while applying the default constraint will be inserted into that particular column. Syntax to apply default constraint during table creation: Example: Create a student table and apply the default constraint while creating a table. 
To verify that the default constraint is applied to the student table's column, we will execute the following query: 
Syntax to apply default constraint on an existing table's column: Example: Consider we have an existing table student. Later, we decided to apply the DEFAULT constraint on the student table's column. Then we will execute the following query: 
To verify that the default constraint is applied to the student table's column, we will execute the following query: 
7. CREATE INDEXCREATE INDEX constraint is used to create an index on the table. Indexes are not visible to the user, but they help the user to speed up the searching speed or retrieval of data from the database. Syntax to create an index on single column: Example: Create an index on the student table and apply the default constraint while creating a table. 
To verify that the create index constraint is applied to the student table's column, we will execute the following query: 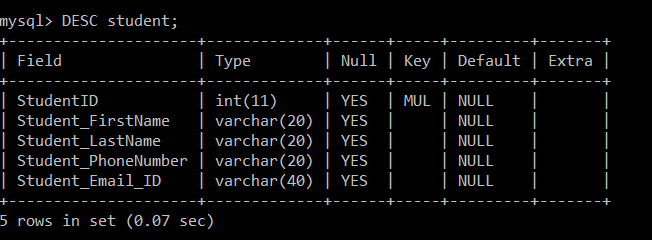
Syntax to create an index on multiple columns: Example: 
To verify that the create index constraint is applied to the student table's column, we will execute the following query: 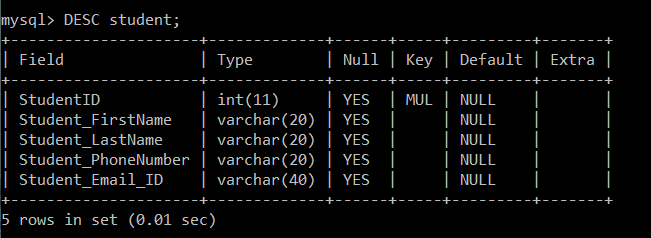
Syntax to create an index on an existing table: Consider we have an existing table student. Later, we decided to apply the DEFAULT constraint on the student table's column. Then we will execute the following query: 
To verify that the create index constraint is applied to the student table's column, we will execute the following query: 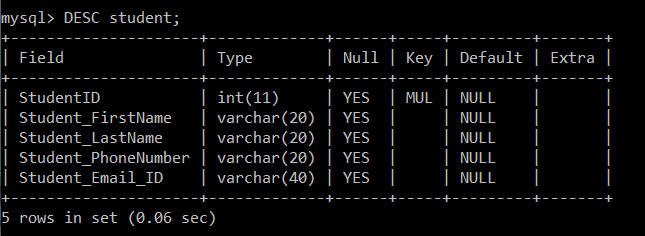
Next TopicPattern Matching in SQL
|
 For Videos Join Our Youtube Channel: Join Now
Feedback
- Send your Feedback to [email protected]
Help Others, Please Share


