| |

Join command in SolidWorksYou can combine two or more parts in an assembly to make a new part. The join process unifies the part bodies into a single solid volume and eliminates surfaces that protrude into one another's space. Joining pieces:
The Feature Manager Design Tree displays the new component Part1 for users to see. The component includes the Join1 functionality. How to utilize SOLIDWORKS' join commandIf you are familiar with SOLIDWORKS' combine command, you are probably used to connecting separate components into a single part or a solid body. But have you ever utilized SOLIDWORKS' join command? You may combine two or more separate parts into one component using SOLIDWORKS' join function. The connect command can only be used while changing a part in an assembly, as opposed to the combine command, which may be used to create a component with two or more solid bodies. The graphic below demonstrates that a section of join is disabled: 
The joint command button is hidden on the command manager by default in SOLIDWORKS. It may be turned on by adjusting your settings as follows:
Now that the join command is operational, you may utilize it by performing the following simple actions:
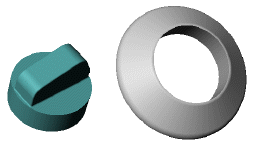
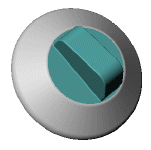
With the linked pieces, you now have your new part. By default, the linked pieces will be concealed, leaving only the new section visible. The join feature is identified as join1 if you extend the new portion from the design tree: Keep in mind that the replacement part is completely interchangeable with the original parts and assembly. The SOLIDWORKS JOIN feature.There are a tone of features and instructions in SOLIDWORKS. I was exposed to the assembly feature CONNECT Components while working on a presentation that a coworker had made. While in assembly mode, JOIN is utilized. A new part can be made by joining two or more existing ones. The JOIN procedure unifies the component bodies into a single solid volume and eliminates surfaces that overlap each other's space. If you're designing and decide to have one part rather than two, this capability can be useful. This prevents you from having to recreate the component by combining them. How to Make a Joined PartAn assembly with a knob and knob back plate is seen here. It was determined during design to make the knob and rear plate out of a single piece rather than two. |
 For Videos Join Our Youtube Channel: Join Now
Feedback
- Send your Feedback to [email protected]
Help Others, Please Share


