| |

Create a Contacts List Using PyQt, SQLite, and PythonThis tutorial will teach you how to create a contact book application using Python, PyQt, and SQLite. This project will be an effective way to learn different coding skills, as it requires you to apply various techniques and encourages you to research topics during the development process. By the end of this project, you will have a working contact book application that can store and manage your contact information. You can search for, view, add, modify, and remove contacts. This tutorial will guide you through the application process and give you a better understanding of how to create a GUI using Python and PyQt, connect to an SQLite database, and manage data using the Model-View architecture. The source code for the application and each tutorial step are available by following the link provided. Project OverviewTo build a contact book application, you must organize your code into modules and packages to give your project a clear and coherent structure. In this tutorial, you will use the following directory and file structure:
Step-by-step instructions will be provided for using each of these files. Step 1: Using PyQt, create the Contact Book's Skeleton AppIn this initial stage, you'll design a simple yet useful PyQt GUI application that will serve as the framework for the contact book. The bare minimum project structure, which consists of the project's core package and a script to launch the program, will also be created by you. The Contact Book Project's Organization Create a new directory called rpcontacts project/ to begin coding the application. The project's root directory will be this. Now under rpcontacts project/, create a new subfolder called rpcontacts/. This subfolder will house the program's main package. Open your code editor or integrated development environment in the root directory. Python requires a __init .py module to initialize the package to convert a directory into a package. Create this file in the rpcontacts/ directory, and then add the following code to it: This file informs Python that the rpcontacts package exists. The code in the file is run when you import the package or one of its modules. The package may be initialized without writing code in a __init .py file. It is sufficient to use an empty __init .py file. To keep the version number of your program in this instance, you establish a module-level constant named Creating the Main Window for the Application The primary pane for your contact book should now be created. To do that, add a module with the name views.py to your rpcontacts package. Then update the module with the below code and save it: You need to import the necessary classes first from PyQt5.QtWidgets.Next, you make a Window. The code for creating the application's main Window is provided by this class, which descended from QMainWindow.The Window is resized to 550 by 250 pixels, the Window's title is changed to "RP Contacts," and the center widget is defined and configured using QWidget. Then a horizontal box layout is used to define the layout for the central widget. Running the Application and CodingThe primary Window for the contact book is already created. Therefore it's time to build the code for a working PyQt application using QApplication. Create a new module in your rpcontacts package named main.py and add the following code to it to accomplish that: When you import sys into this module, you have access to the exit() function, which enables you to gracefully end the program when the user quits the main Window. Next, import QtWidgets, QApplication, and Window from PyQt5, respectively. The last step is defining main() as your application's main function. You create QApplication and Window inside of main(). After that, you use exec to start the application's main loop or event loop on Windows before calling show(). Create a file called rpcontacts.py in the root directory, rpcontacts project, immediately. The application's entry-point script is provided in this file. Save the file after adding the following code: Your main.py module's main() is imported in this file. The conventional conditional statement is then put into practice, calling main() if the user runs this module like a Python script. Run the command python rpcontacts.py to start the program in your Python environment. The following Window will appear on your screen: 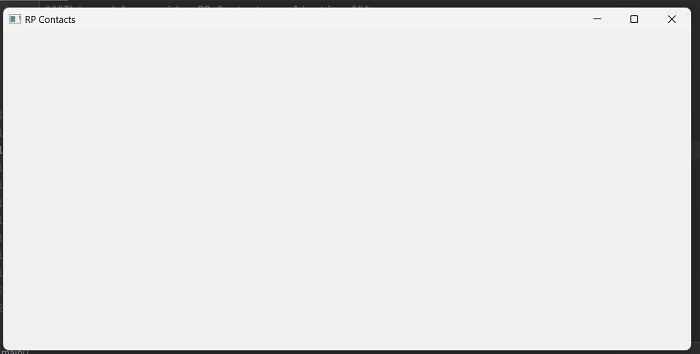
Step 2: Using Python, create the Contact Book's GUIIn this step, we need to create Contact Books' GUI, which has Add, Delete, and Clear all buttons Return to the views.py module and modify the Window code to produce the aforementioned GUI: The first modification to Window in this code is a call to.setupUI() at the conclusion of __init__ (). When you launch the application, this call creates the GUI for the main Window. The inside code is shown here.What setupUI() does:
Once you run the code, this screen will appear: 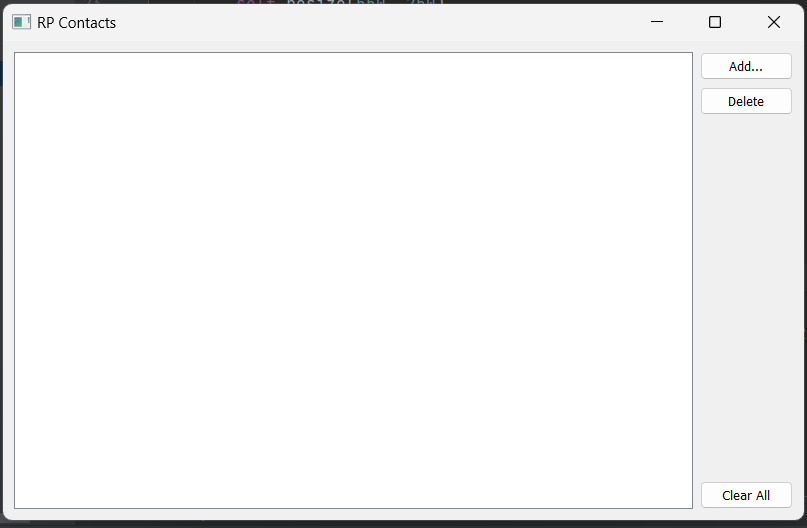
Step 3: Constructing the Database for the Contact BookIn this section, you will create the code to specify how the application connects to the contact database. To finish this step, use PyQt's SQL support to connect the application to the database and use SQLite and your contact information to manage the database. Initially, go back to main.py in the rpcontacts/ directory and update the code to create the database connection.: An attempt to establish a connection to the database using createConnection can be seen in the main() function's line "from .database import createConnection" (). The call to sys. exit(1) will close the application without creating a graphical element and will indicate an error if the application cannot establish a connection for some reason. Because the application relies on the database to function properly, you must handle the connection in this manner. Your application won't function if you don't have a working connection. If a problem arises, you can handle it and close the application thanks to this practice. Additionally, you'll be able to give the user pertinent details about the application's error when connecting to the database. Using PyQt and SQLite to Connect to the DatabaseThe first step in creating your contact book application is connecting it to the database that goes with it. To accomplish this, you must program the function createConnection(), which opens and creates a connection to the database. The function will return True if the connection is successful. If not, it will detail what went wrong with the connection. Return to the rpcontacts/ directory and add a new database.py module. Then incorporate the following code into that module: Here, it would help if you imported a few PyQt classes first. Next, createConnection is defined (). This function's single argument, DatabaseName, specifies the name or location of the SQLite database file that is stored in your file system.CreateConnection is already coded by you (). Now that the database's contacts tables are ready, the code to create them can be written. You can now write a helper function to create the contacts table once the function for creating and opening the database connection is in place. This table will be used to keep track of your contacts' information. You create a QSqlQuery instance in the _createContactsTable() function. After that, you call the exec() method of the query object with a string-based SQL CREATE TABLE statement. Your database's contacts table will contain pertinent data about your contacts. Adding a call to _createContactsTable() from inside createConnection(), just before the last return statement, completes database.py's coding. This guarantees that the application creates the contacts table before database operations. Once the contacts table has been created, you can test the database and add some sample data for additional testing. Database Testing for the Contact BookYou've already finished writing the code to manage the database connection for the contact book. You'll run some tests in this section to verify the functionality of both this code and the database. Later in this tutorial, you'll add some test data to the database to conduct additional testing. Open a terminal or command prompt now, and navigate to rpcontacts project/, the root directory. When there, start an interactive Python session and enter the following code: This code creates a connection to an SQLite database named "contacts. sqlite" using the "createConnection" function from the "rpcontacts.database" module. It then confirms that the "contacts" table exists in the database by calling the "tables()" method on a QSqlDatabase object. To insert data into the "contacts" table, it creates a QSqlQuery object and prepares a SQL statement. The statement includes placeholders for the values of the "name," "job," and "email" columns in the table. The code then defines a list of sample data, where each element is a tuple containing the values for a single row in the "contacts" table. It then iterates over this list, binds the values to the placeholders in the prepared query, and executes the query to insert the data into the table. Finally, the code creates another QSqlQuery object, executes a SELECT statement to retrieve data from the "contacts" table, and prints the values of the "name," "job," and "email" columns for each row in the table. 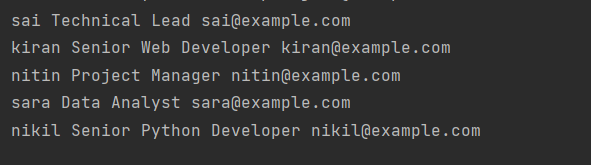
Step 4: Viewing and Modifying Current ContactsIn the application's main Window, you can display your contact information using QTableView. Developing a Model to Manage Contact Data For interacting with SQL databases, PyQt offers a wide range of classes. You'll use QSqlTableModel for your contact book application, which offers an editable data model for a single database table. Given that your database contains contacts in a single table, it is ideal for the task. Go back to your code editor and add a new module called model.py to the rpcontacts/ directory. Save the file after adding the following code: Your data model is now ready for use. You must perform a few necessary imports in this code before creating the ContactsModel. The class initializer specifies a model instance attribute that will house the data model. You add the following static method, which is used to configure the model object. It would help if you now linked the table view widget to the model to show the users the contact information. Linking the View and the Model You must link the table view and the data model to display contact information in the main Window of your contact book. To make this connection, you must call setModel() on the table view object and pass the model as an argument: You import ContactsModel from model.py at the beginning of this code. This class provides the model for managing the information in your contact database. You make an instance of ContactsModel in the Window initializer. Then, to link the model with the table view, you call.setModel() on the table object inside .setupUI(). The Window you saw at the start of step 4 will appear if you launch the application after this update. 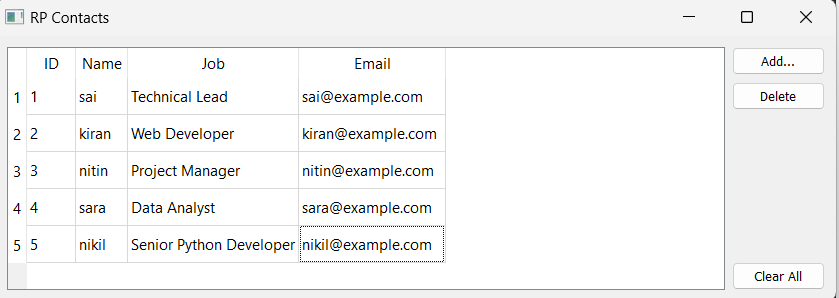
You can double-click on the name, job, and email to change the values. 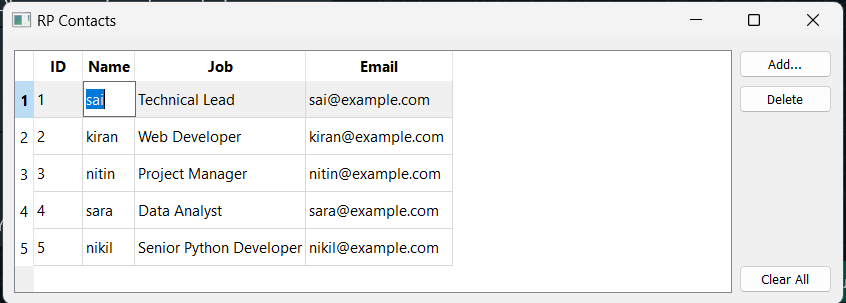
Step 5: Renewing ContactsYou can now use the functionality offered by your contact book application to load, display, and update the data about your contacts. You can edit and update the contact details, but you cannot add or remove contacts from the list. The Add Contact Dialog's creation Small windows called dialogues allow you to have conversations with your users. In this section, you'll write the code for the Add Contact dialogue in the contact book so that your users can add new contacts to their existing list. It would help if you subclassed QDialog to program the Add Contact dialogue. This class offers a template for creating dialogues for your GUI programs. This script provides views to manage a contacts table using the PyQt5 library. The main window class, Window, creates a QTableView widget to display the contacts data and includes buttons to add new contacts, delete contacts, and clear the entire table. When the "Add" button is clicked, the AddDialog class creates a dialog window where the user can enter the name, job, and email of a new contact. The ContactsModel uses the new contact to add it to the contacts table. contact() method addition Before the new contact is added, the AddDialog class additionally has validation to ensure the user submits a value for each field. Data Processing in the Model of the Add Dialog you will include a method named ContactsModel in your data model.. Data Processing in the Model for the Add Dialog To your data model, ContactsModel, you will add a method called. Add contact () in this section. Go to the definition of ContactsModel in model.py in your code editor and add the following code: This script is the "model" module of the RP Contacts application, which provides the data model for the contacts table. The ContactsModel class manages the underlying SQLite database of contacts and includes methods for adding, deleting, and retrieving contacts. The addContact method is used to add a new contact to the database, it takes a parameter "data," which is a list containing the name, job, and email of the contact to be added. The method begins by finding the number of rows in the model, then inserting a new row at that position. For each element in the data list, the method sets the corresponding cell in the new row to the value of that element and then submits the changes to the database. Finally, it updates the model after selecting the data from the database. 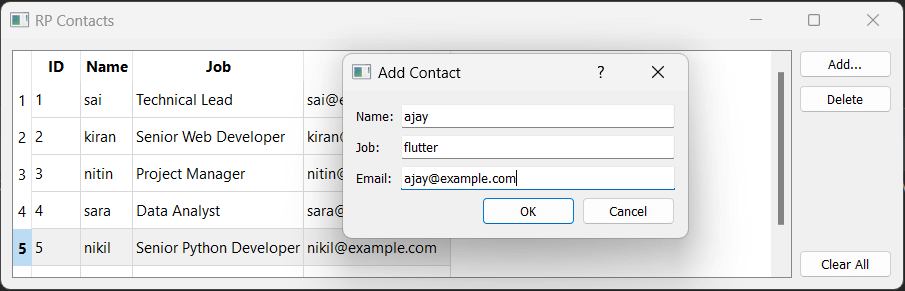
Step 6: Eliminating Current ContactsThe final feature of the contact book is to delete the contact in the book. To delete specific contact in the contact book, we need to change the view and model files: Three lines of code make up this method. The selected row is eliminated in the first line. The change is submitted to the database on the second line. The third line then loads the data once more into the model. Return to the views.py module after that and add the following code to the Delete button in Window: This script is the "views" module of the RP Contacts application, which provides the user interface for the contacts table. The Window class is a subclass of QMainWindow and is responsible for creating and managing the application's main Window. In the setupUI method, a button named "Delete" is created, and the deleteContact method is connected to the button's clicked signal. The deleteContact method is responsible for deleting a contact from the database. When this function is called, the index of the currently selected row in the table view is initially determined. If no row is selected, the method exits. It then displays a warning message box asking the user to confirm the deletion of the contact, and if the user confirms, the method calls the deleteContact method of the ContactsModel class and passes it the index of the selected row, which corresponds to the contact to be deleted from the database. 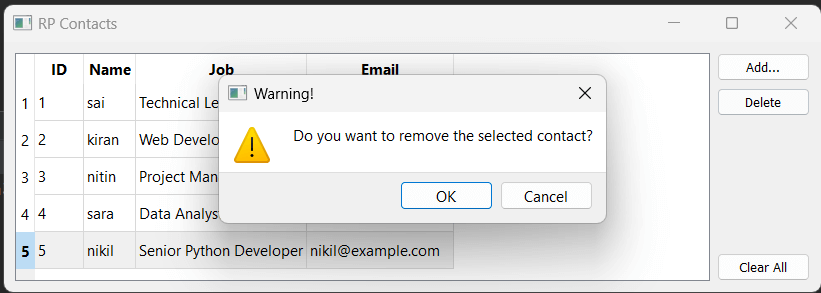
Database clearingIn this session, we will add functionality to the clear-all button To make this, we need to make changes to the files: Three lines of code make up this method. The first line eliminates the chosen row. The change is submitted to the database on the second line. The third line then loads the data once more into the model. Return to the views.py module after that and add the following code to the Delete button in Window: The method will prompt the user if they want to clear all the contacts. If they click yes, then all the contacts will be erased. 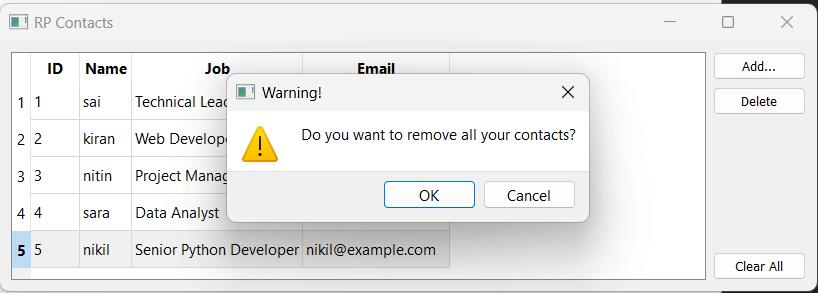
All done! Your contact book application is finished with this final line of code. Your users can display, add, update, and remove contacts from the database using the features provided by the application. |
 For Videos Join Our Youtube Channel: Join Now
Feedback
- Send your Feedback to [email protected]
Help Others, Please Share


