| |

Digital Clock using Tkinter in PythonThe amazing part of creating our Graphical User Interface (GUI) applications is that we can customize them the way we want. There are various features available for customization ranging from the font of the text to the background color. In the following tutorial, we will learn how to build a digital clock with the Tkinter library in the Python programming language. So, let's get started. Prerequisites for the ProjectIn order to build the Digital Clock with GUI in Python, we will need the following modules:
Since both these modules come pre-installed with Python, there is no need for us to install them separately. Building the Digital Clock with GUI in PythonThe procedure of building the Digital Clock in Python is divided into several steps for better understanding. The steps we will need to execute are as follows: Step 1: We will start by importing the required modules. Step 2: We will then define the function to display current time. Step 3: We will then create a main window for the application. Step 4: We will add widgets to the window. Let us now understand these steps in detail. Importing the required modulesFirst, we will import all the necessary modules to help us build this project. These modules include the tkinter module to add a graphical user interface to the application and the time module to work with dates. Let us consider the following snippet of code illustrating the same. File: clock_gui.py Explanation: In the above snippet of code, we have imported all the modules and widgets from tkinter to provide GUI to the application. We have also imported the time module to display time. Defining the function to display the current timeWe will now define a function that will allow us to display the current time whenever the program is executed. This function will use the strftime() method of the tkinter module to represent the current time in the string format. We will then convert the 24-hour time to 12-hour time and set the value as AM or PM in the label per the requirement. We will also insert the evaluated values in the labels we create later. Let us consider the following snippet of code illustrating the same. File: clock_gui.py Explanation: In the above code snippet, we have defined a function as display_time(). Within this function, we have used the strftime() method of the time module to represent the current time in the string format and separated the time into hours, minutes, and seconds and stored them in different variables. We have then used the if-else conditional statement to check if the hour range between 12 to 24 and the minute is greater than or equal to 0, then set the value of the meridiem_label label to PM. If not, we have set the value of the meridiem_label label to AM. We then used the if-elif conditional statement to convert the 24-hour format to the 12-hour format by subtracting 12 from the hour ranging between 13 and 24. We have also set the value of the hour to 12 in case the hour is 0. We have then used the config() method of the tkinter module to set the text of the labels displaying the hour, minute, and second to the value, we evaluated earlier. At last, we have then called the after() method to call the display_time() function after every 200 milliseconds. Creating the main window of the applicationNow that we have defined the required function, it is time to create the application's main window to display the function's working. We can create a window by instantiating the Tk() class of the tkinter module. We will then set the appropriate title for the window along with the size and positioning of the window. We will also add an icon and configure the background color of the window. Let us consider the following snippet of code illustrating the same. File: clock_gui.py Explanation: In the above snippet of code, we have created an object of the Tk() class as gui_root representing the main window of the application. We have then used the title() method to set the title of the window. We have also used the geometry() method to set the size and position of the window on the screen. We have then disabled the resizable option by setting the values of the resizable() method to zeros. We have also configured the background color to #2C3C3F by setting it as the value of the bg parameter in the config() method. At last, we have set the icon of the window with the help of the iconbitmap() method specifying the address of the ICO file present in the directory. Adding widgets to the main windowWe will now add some widgets to the window to display the data for the users. These widgets include some frames and labels. The frames will provide a well-defined structure to place other widgets on the window, whereas the labels will display the heading and time. Let us understand the implementation of these widgets in detail, as shown below. Adding FramesWe will start by adding some frames to the main window with the help of the Frame() widget offered by the tkinter module. These frames will provide support to the other widgets. We will then use the pack() method to set the position of these frames on the window. Let us consider the following snippet of code demonstrating the same. File: clock_gui.py Explanation: In the above snippet of code, we have added the frames using the Frame() widget of the tkinter module and set their master parameters to gui_root, the object of the Tk() class we created earlier. We have also set their background colors to #2C3C3F. At last, we have used the pack() method to set the positions of these frames on the window screen. Adding Widgets to the header_frame frameWe will now add a label to the header_frame frame to display the heading. We can add a label using the Label() widget offered by the tkinter module. We will also use the pack() method to set the position of this label on the window screen. Let us consider the following snippet of code illustrating the same. File: clock_gui.py Explanation: In the above snippet of code, we have used the Label() widget of the tkinter module to add a label to the window and set its master parameter to header_frame, a frame we created earlier. We have also set the text this label will display along with the font style and size. We have also configured the background and foreground color of the label. At last, we have used the pack() method to set the position of the label on the window screen. Adding Widgets to the body_frame frameWe will now add some labels to the body_frame frame to display the time. We will again use the Label() widget of the tkinter module to add the label to the window. We will also use the grid() method to set the position of these labels in a grid format on the main window. Let us consider the following snippet of code implementation of the same. File: clock_gui.py Explanation: In the above snippet of code, we have used the Label() widget of the tkinter module to add some labels to the window displaying different components of the clock such as hours, minutes, seconds, AM or PM as per the time, and the colons separating these components. We have set the master parameters of these labels to body_frame, another frame we created earlier. We have also set the text these labels will display along with the font styles and sizes. We have also configured the background and foreground colors of the labels. At last, we have used the grid() method to set the position of the label on the window screen. Running the ApplicationOnce we have successfully added all the necessary widgets, it is time to call the display_time() function we defined earlier and used the mainloop() method to run the application. Let us consider the following snippet of code illustrating the same. File: clock_gui.py Explanation: In the above snippet of code, we have called the display_time() function to start the clock. We have then used the mainloop() method with the object of the Tk() class, i.e., gui_root, to run the application. The coding section of the application is completed. We will save the Python project file and type the following command in the command prompt or terminal to execute the program. Syntax: Before we see the output, let us consider the complete code of the 'Digital Clock using Tkinter' project. The Complete Project CodeThe following is the complete code of the 'Digital Clock using Tkinter in Python' project. File: clock_gui.py Output: 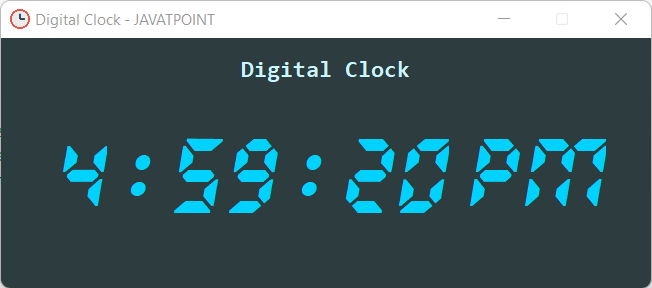
Next TopicPlot Correlation Matrix in Python
|
 For Videos Join Our Youtube Channel: Join Now
Feedback
- Send your Feedback to [email protected]
Help Others, Please Share


