| |

Speech Recognition pythonHave you ever thought about how Google Assistant or Amazon Alexa recognizes whatever you say? You must be thinking about some complex smart technologies working behind bars. Apart from a massive hit in the market of tremendous technological growth of recognition systems, the majority of the cellular device has the feature of speech recognition all through some inbuilt applications or third party applications. Not necessarily; most such speech recognition systems are built and deployed with the help of python packages and libraries. To a certain level, Python has proven that it is an essential aspect of the foreseeable future. The reason is pretty obvious. To incorporate speech recognition in Python, you need a certain level of interactivity and accessibility to match technologies. The concept of accessibility is worth considering because the recognition allows the elderly, physically challenged, or visually impaired humans to interact with machines and solve their problems with state-of-the-art services and products quickly without choosing random GUI applications. In this article, you'd be learning to create a speech recognition system in Python. To ease the process of understanding how it is built, this article is designed to teach you how to build the system with less effort and more enthusiasm. But before moving into the project, let's talk about some more important aspects to know as a developer. Overview- How it worksBefore moving into the nooks and complications of the project, you will build and take a moment to understand the nitty-gritty overview about the working of speech recognition. Although there are no pre-requisites for you to get started, yet it is good to know the fundamentals of the python programming language. Speech recognition has evolved from the research conducted at Bell Labs back in 1950 with limitations to just a single speaker and had a limited vocabulary database. Modern speech recognition applications have come a long way ever since the onset of ancient counterparts. Talking about the components of the speech, the first component is the speech. It must be converted from a sound to a signal that can travel through a microphone and can be transcribed to digital data. This is done using an analog to digital converter. Once the form of data is digitized, several trained models can easily transcribe the audio to text. 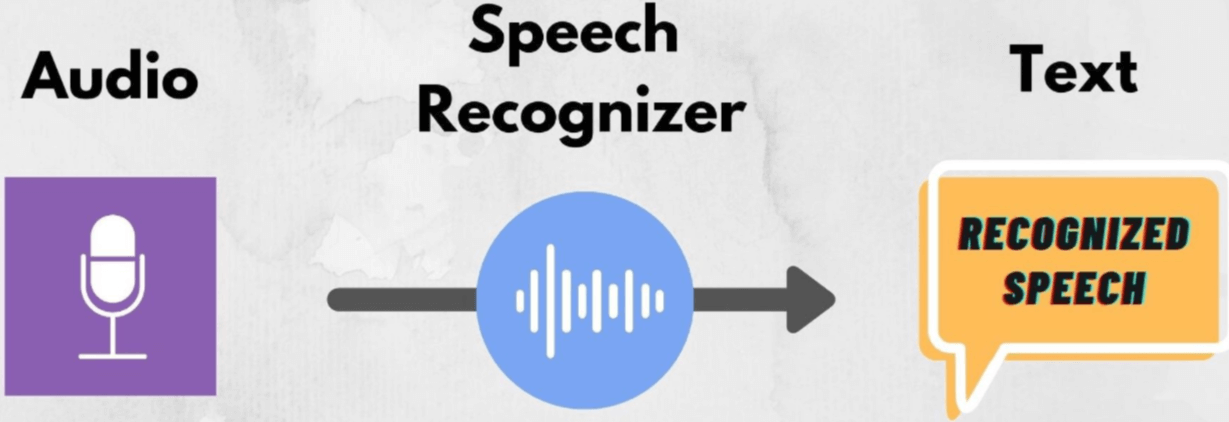
Modern-day speech recognizer relies on the less-known concept of the Hidden Markov Model (HMM). The approach is based on the assumptions formulated for a speech signal when it persists for a short period (say five milliseconds) and can be possibly termed a stationary process, i.e., a process based on the statistics that don't change over time. In a typical HMM, the default signal division of speech is about ten milliseconds divided into various fragments. The power spectrum of each fragment helps the signals to plot a function and generate a frequency that is later mapped to the vector of real numbers called cepstral coefficients. The dimensions of the mapped vector are quite small, as low as ten as compared to some accurate systems that may have dimensions touching 32 or more. The generated final output of HMM comes in to form of vector sequences. The Group of vectors plays an important role in decoding the speech into text with the help of phonemes which are fundamental units of speech. The calculation of phonemes depends on the training since there are speaker variations, and even for the same speaker, the utterance is different sometimes. Therefore, to cope with this issue, a special algorithm is considered that determines the most relative words producing a phoneme sequence. The whole process that you just learned is quite expensive in terms of computation. Neural Networks are used to transform features and dimensions in modern speech recognition systems, reducing the need for HMM. Additionally, Voice Activity Detectors (VAD) are also used to reduce some portion of the audio signal that might contain some speech. It is mainly used to recognize unnecessary parts of speech and stop them from being taken into consideration. Speech Recognition PackagesThere are a handful of packages for speech recognition that exist on the chain of PyPI. Some of them are:
The above-given packages, such as apiai and wit, offer a feature like natural language processing. Their in-built feature helps identify the speaker's intent and goes beyond generic speech recognition. Other packages primarily focus on speech-to-text conversion. Only one package that stands out from the above-given packages is SpeechRecognition. Recognizing speech needs some input in the form of audio, and the SpeechRecognition package retrieves these kinds of input effortlessly. It needs no hardcore scripts to access microphones and then process the audio from scratch. Another advantage of this package is that it will save your time and in few minutes it can execute the instructions. The SpeechRecognition library behaves like a cover or a wrapper for various APIs solely built for speech. It is tremendously flexible and agile. One such API is the Google Web Speech API that supports hard-coded default speech recognition. The SpeechRecognition library is super easy to use, and the package is easy to be imported as the python project. It is also important to note that this package may not wrap all the APIs available today. Thus, you need to identify exactly what kind of package you need to build your speech recognizer. You might have theoretically understood the strengths and flaws of some of the speech recognizers and an overview of how the speech Recognizer works, let's proceed with the installation of the SpeechRecognition package into the local environment using the installation procedures given below. SpeechRecognition InstallationSpeechRecognition package is compatible with various versions of python language like 2.6, 2.7, and 3.3+. It may also need some other installations if your python version is old. Assuming that you have the Python 3.3+ version on your local system, you can carry out your installation methods from the terminal with pip. After installation, you must verify if the installation is properly interpreted using the following code given below. SpeechRecognition may work exceptionally well if you are working with audio files in the package. However, it might also need some dependencies. Therefore, to ease this process, the PyAudio package comes in handy in capturing the inputs from the microphone. The Recognizer ClassThe magic of SpeechRecognition comes into play only in the presence of the Recognizer class. The main purpose of Recognizer is to recognize speech along with reading variations of different speeches and then driving the functionalities and validating the speech coming from the audio source. To create a Recognizer, you need to create its instance. So, type the below code in the python interpreter. There are various methods to create Recognizer instances that can recognize speech from an audio source with API support. Some of them are enlisted below. Out of these packages, the package recognize_sphinx() is designed to serve offline if used with CMU Sphinx Engine. The rest of the packages need internet connectivity to work. Note: It is important to be cautious about the default key provided in the SpeechRecognition. It is mainly used for testing, and for security purposes, and it might get revoked by Google. Thus, SpeechRecognition has an API interface that can translate these default keys to be used with care.The each_recognize_*() method might throw an exception named speech_recognition.RequestError exception. This might happen because the API might be unreachable because of the corrupt installation. For the rest of the methods shown above, RequestError might be generated if the limits under their quota are reached, or the server or internet connection might be an issue. There might arise an issue that looks something like this. Functioning with Audio FilesBefore working out with the SpeechRecognition package in Python, you first need to download an audio file. SpeechRecognition makes it easy to work with audio files by saving them to the same directory of the python interpreter you are currently running. It does that by using the AudioFile class. This class needs to be initialized and set with the audio file path so that the context manager provides a good interface to read files and their contents. Supported File TypesThe types of file formats that SpeechRecognition supports are given as follows:
If you have an x-86 based Windows, Linux, or macOS, it is easier to work with FLAC files. Apart from these operating systems, you may need to install a FLAC encoder that gives you access to the command-line tool. Capturing data using record()The record() function is used to capture data from a file using the python interpreter in your file. For instance, the file's name is "harvard.wav", the python interpreter code for encoding this method will be as follows. This code would open up the context manager to read the contents of the file and will store the data in the AudioFile instance known as the source. The record() method then records the real data from the file. To confirm whether the data is recorded, you can check it using the following code. Alternatively, you can also invoke recognize_google() so that the audio is recognized. It may depend on your internet speed, how the audio is captured, and how many seconds the results are displayed. This code would transcribe all the data present in the file and write the recognized audio in the text format. Duration and Segment offset CapturingConsider that you want to capture only a particular segment of a speech in a file. The record() method can do that by recognizing the duration keyword followed by the argument that stops the speech after some seconds. For instance, you might need to capture the first 5 seconds of speech from the "harvard.wav" file; you can do this using the following method given below. When used inside a block, the record() method always intends to move ahead in the file stream. This usually means that the recording happens again for four seconds and returns the first four-second audio if you are recording for the first four seconds. The phenomenon can be illustrated with the code snippet given below. You can notice that audio2 contains a part of the third phase of the audio. There are also some instances where you specify the duration, and the recording is stopped midway, which usually hurts the audio's transparency. Additionally, while specifying the record() method, you can even set a specific starting point using the argument through the offset keyword. The starting point represents the number of seconds from the file before the recording is started. Thus, to capture the second phrase from the audio file, you can opt for 5 seconds or 3 seconds depending on your need using the below method. The importance of duration and offset keyword fall for the segmentation of the file containing the audio. If you already know the audio frames, you can hastily fall for poor transcription results. To visualize this effect, use the following code by trying with the python interpreter. The above code snippet states that the recording starts at 4.7 seconds and the beginning phrase will be missed. Similarly, when recording ends, the captured phrase will not match the beginning phase. Another reason for missing out on the phrases that are resulting in the inaccurate transcription is Noise. The above might work well because it is clean audio, but there's no such place without Noise in the real world. Effects of Noise on Speech RecognitionNo place is Noise free. All the speech recognition techniques have been developed to address and remove the unwanted Noise present in the speech that dampens the power of capturing the audio frames. Noise can wreck up the precision of applications. To understand how Noise impacts speech recognition, you need to download a file named "jackhammer.wav" and ensure to save it in your working directory of the interpreter. Assuming that this file has the phrase "JavaTpoint is the best java training site" spoken loudly, you need to transcribe it in the background. To do that, consider the below method. To deal with Noise, another method to try out after the above step is by using the method of adjust_for_ambient_noise() of the Recognizer class. The above code snippet misses the initial output, and the output is printed without the first word. Hence, when the record() method captures the audio, the first portion of the audio file is consumed, and the later data is captured. The adjust_for_ambient_noise() method reads the first second of the audio file and the Recognizer calibrates the noise level of the audio. If you want to adjust the time frame using the adjust_for_ambient_noise(), you can use the duration keyword in your code snippet by assigning it the numerical value in seconds. If you don't assign any value, one is taken as a default value, but it is recommended to lower the value to 0.5. The following code snippet shows the same technique. The above code snippet will return the whole audio file that you previously missed at the beginning. Although, there are some cases where it is very difficult to handle or remove the effect of Noise because the signal can be possibly too noisy to deal with. Therefore, you may have to resort to some other techniques to pre-process the audio to deal with such an issue. To do that, you can use audio editing software or a Python package like SciPy. The package can pre-process the audio file and can filter the Noise. Additionally, while working with noisy files, it is helpful that you use the actual API response since most of the API return JSON strings that have many transcriptions. Similarly, the recognize_google() method is bound to deliver similar transcripted files unless it is forced to deliver the full response. This method can be practically implemented using certain arguments and keywords like show_all that returns for the recognize_google() method. In the above code snippet, the recognize_google() method returns a dictionary with an alternative key that points to various transcriptions shown above. Although the response structure may have different forms because of the variations from API to API, this is primarily used for debugging. By now, you might have learned the basics of speech recognition and its package in Python. The next phase of learning involves transcribing the audio files by making a project a little more interactive by taking input from the microphone. Working out with microphone inputYou can access your microphone using the SpeechRecognizer package by installing a package named PyAudio. To do that, save the changes as of now and close the interpreter. Go ahead and install the PyAudio with a similar process as you did with SpeechRecognizer. After the installation, to test whether it is compatible with the version of the speech Recognizer you are using, type the below command. After this step, you need to ensure that your default microphone is turned on and is unmuted. If you didn't face any problem in the installation and testing, you should see something like this on the terminal. Try playing with by seeking into the microphone and testing how the SpeechRecognizer package transcribes your speech. The Microphone ClassThe microphone class is used to create an instance for the system to recognize the audio file from the source. To use this class, you need to import it by opening another interpreter session and creating a recognizer class, as shown below. You need to use the default microphone on the system instead of using the audio file from the source. You can do that by using the method as shown. If you cannot recognize the default microphone of your system, you may need to specify one of the device indexes. You can get the list of all the available microphone names using the list_microphone_names() method in the microphone class. The device index is defined in the above code is known as the index having the list of available microphone names on a system. For instance, in the above-given output, the microphone having the name "front" is positioned at index 3 in the list. This can be done using the method given below. The above code is just an example, and hence it is recommended not to run in the interpreter. For most of the projects, you should use the default system microphone. Capturing microphone input using listen()Another method that you will learn here is to listen () method used to capture input from the microphone. Since you have already created the microphone instance, it is the right time to capture some input. Like most of the AudioFile class, the microphone is also treated as a context manager. It captures the input through the Recognizer class having a block inside it by accepting it as the first argument and then recording input from the source until a moment where the microphone detects silence. To frame this out, let's see how it is applied using the given code. Once the above code is executed with the block, you should try speaking something into the microphone and wait for some time. The interpreter might prompt to display after some time. Once you see ">>>" as returned prompt, it is assured that the Recognizer can recognize whatever you say. If the Recognizer fails to return the prompt, there might be some ambient noise picking up. You can stop that by pressing Ctrl+C to prompt back. To adjust the Noise prevailing in your speech, you may need to use the same method of adjust_for_ambient_noise() of the Recognizer class. Since the microphone input is unpredictable compared to the audio file, it is always a good idea to always do these while listening to the microphone input. To get precise and noise-free output, you can try it with the listen() method as shown. When the run the above code, wait for few seconds so that the adjust_for_ambient Noise () method does its tasks. After the code is compiled and run, try speaking something into the microphone and wait for the interpreter to recognize the speech. If it recognizes and returns the prompt, it is working fine. You can also use the duration keyword and try to use it again for getting a particular frame of the speech you want to be recognized. Meanwhile, the SpeechRecognizer documentation recommends using the duration keyword if the duration keyword has duration of 0.5 or less. You might also find that the duration keyword is not used in some cases, and hence one is used as the default value for generating better results. Also, it is notably possible that the minimum value is dependent on the input by the microphone's environment. Hence, the duration of one second is preferably considered best for this kind of task. Unrecognizable SpeechWith thebcodebase, you have created some tangible code in the interpreter using the microphone to put some unintelligible noises. It is bound that you may receive an error like this. This error is because of the unrecognized nature of the speech captured through the microphone as input, and hence the API codebase is not advanced enough to transcribe these short grunt noises or vocal sounds. There might also be the case that the interpreter may prompt by recognizing the current input and displaying something not even close to what is captured through the microphone. Hence, the activities like clapping, clicks, or other bars might raise an exception or no correct output, respectively. SummaryIn this long tutorial about speech recognition in Python, you learned how the schedule works from scratch. You covered from conceptual knowledge to hands-on experience in creating a real-time and simple python speech recognizer that can hear your speech and display it in the textual format on the console. You also learned some of the critical methods to deal with the issue that commonly occurred while using the SpeechRecognizer package and learned how to rectify these issues. Python being widely-used programming and scripting language covers most speech recognition applications because of its ambient libraries and frameworks that display its ability to handle critical problems with just a few lines of easy and readable codes.
Next TopicYield vs Return in Python
|
 For Videos Join Our Youtube Channel: Join Now
Feedback
- Send your Feedback to [email protected]
Help Others, Please Share


