Creating a real-time chat application using FirebaseIn this tutorial, we will use Firebase to build a real-time chat application. The most important aspect of building a messaging app is to learn to set up Firebase for iOS apps and to save the chat data into the database. Firebase can be defined as a service that acts as a backend provider. In other words, we can say that it is a web service that provides us a cloud-based infrastructure that allows us to save and retrieve our data from google web service. We don't need to maintain our servers and writing server-side code. It provides many features, including data storage, authentication, analytics, notifications, hosting, crashalytics, etc. It is free to use up to most of the extent. In this tutorial, we will be using two of Firebase's core features, I.e., Real-time database and Authentication. We will save our real-time chat messages, retrieved on all the devices on which the app is installed. In this iOS app, we will provide Sign-up and login features to the user by using the Authentication feature on Firebase. Setting up Firebase for the developmentTo set up a firebase for the development, we need to register our project on the console. For this purpose, browse https://console.firebase.google.com/ into the browser, and click on Add Project to add a project. This will prompt us to provide the name for the project, as shown below. 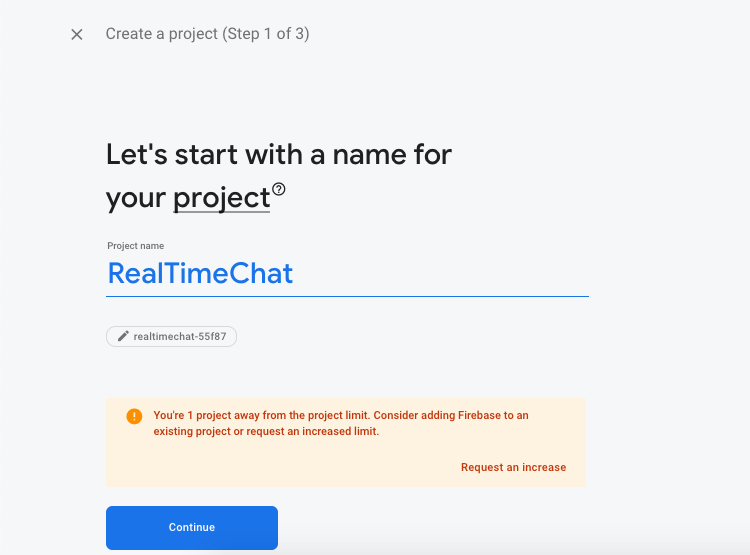
Now, click Continue to continue with setting up the Firebase. The next window prompts us to enable Google Analytics in the project, as shown below. 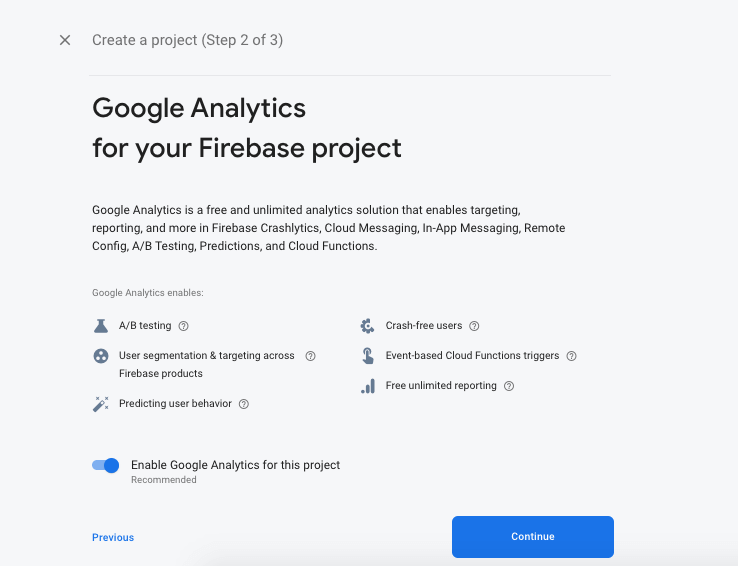
In step 3, select a google account to continue with the process. Once we choose the account from the dropdown, we are done with creating the project on Firebase. 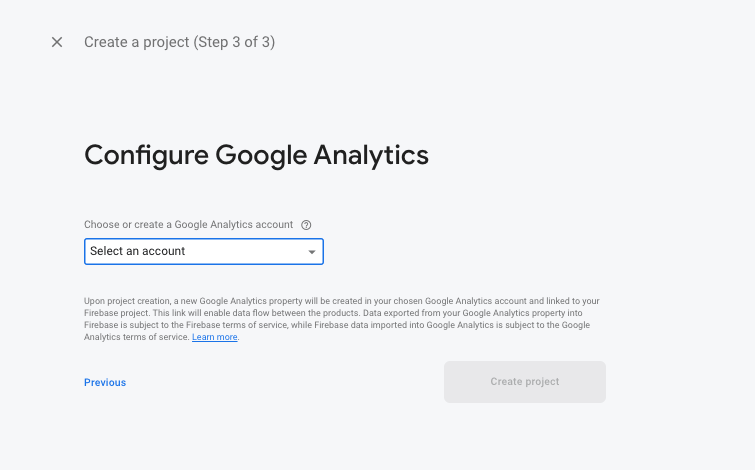
Now, our project is ready. We need to add our iOS app to this project. For this purpose, click iOS on the project dashboard screen, as shown below. 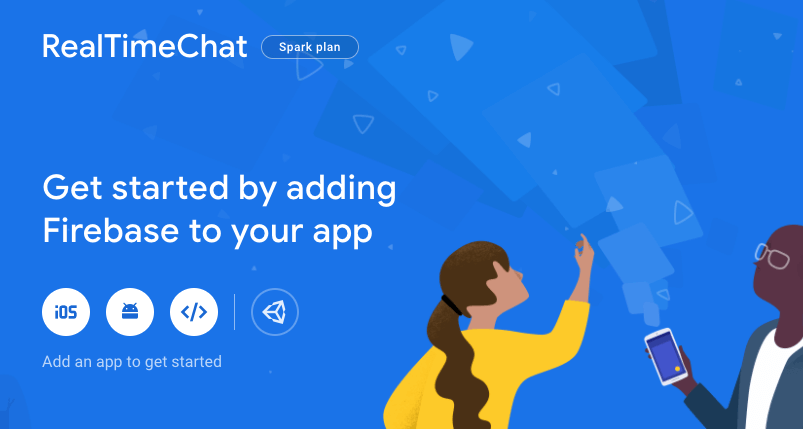
This will prompt us to provide the application's bundle id, App nickname, and App Store Id. However, the nickname and store id is optional, but we have to provide the bundle id, which must be similar to the one we will be using on the Apple developer account and XCode app. 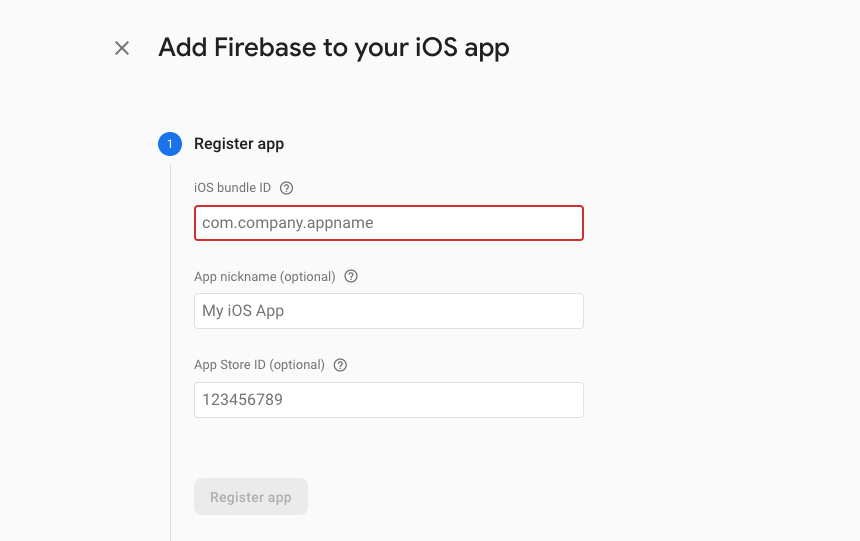
Now, download the GoogleService-info.plist file from the dashboard and add it to the XCode project. 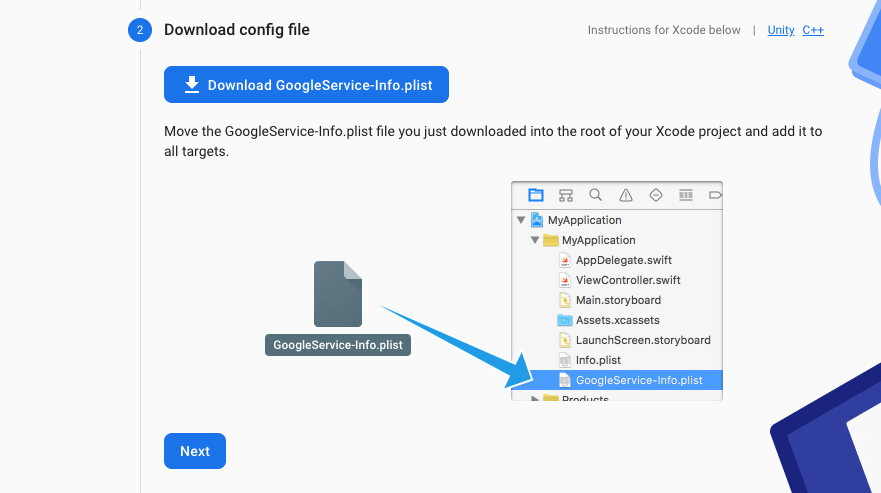
Now, add firebase SDK into the project. The process to add firebase SDK is given in the below image. 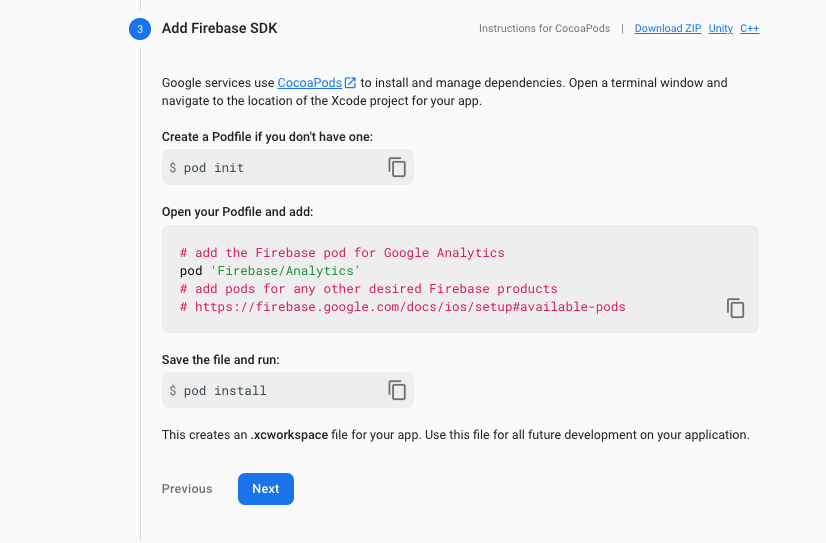
Along with the Firebase/Analytics pod, we also need various other dependencies to use the database and Authentication services of Firebase in our iOS app. For this purpose, add the following code to the Podfile. Now add the initialization code to the AppDelegate in XCode. 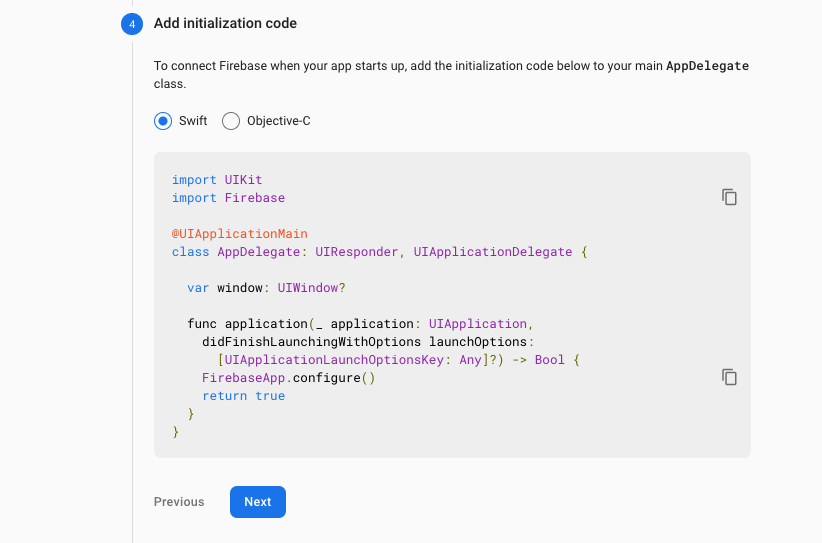
Once we add the initialization code to the AppDelegate, we are all set to use Firebase in our iOS app. Create an XCode project and perform all the above steps to connect to Firebase. Make sure to use the same bundle id we have been using in Firebase for our iOS app. Set up Firebase Realtime DatabaseTo create our real-time chat application, we need to setup Realtime Database on our Firebase. For this purpose, click on Realtime Database on the project console. We will be prompted to create a database, as shown below. 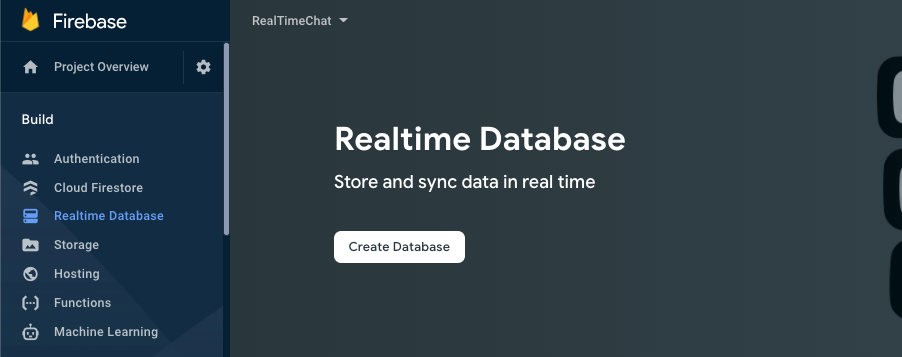
Click on Create Database to create the one. In the first step, we will be prompted to choose the Country, that is, the United States, by default. Let it be the United States and click Next. 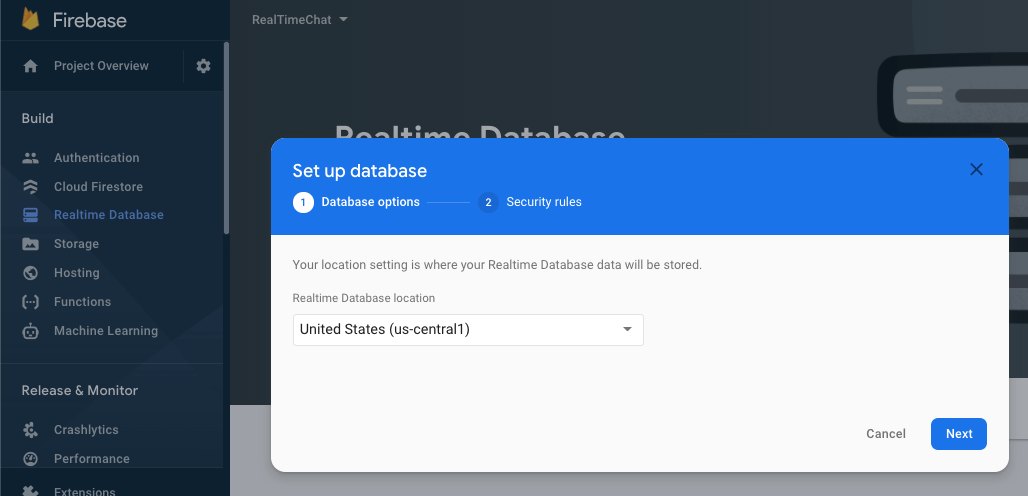
Once we click Next, we will be prompted to choose the Database Rules, I.e., locked and test mode. For now, we will start in test mode. Choose test mode and click Enable to continue with the database. 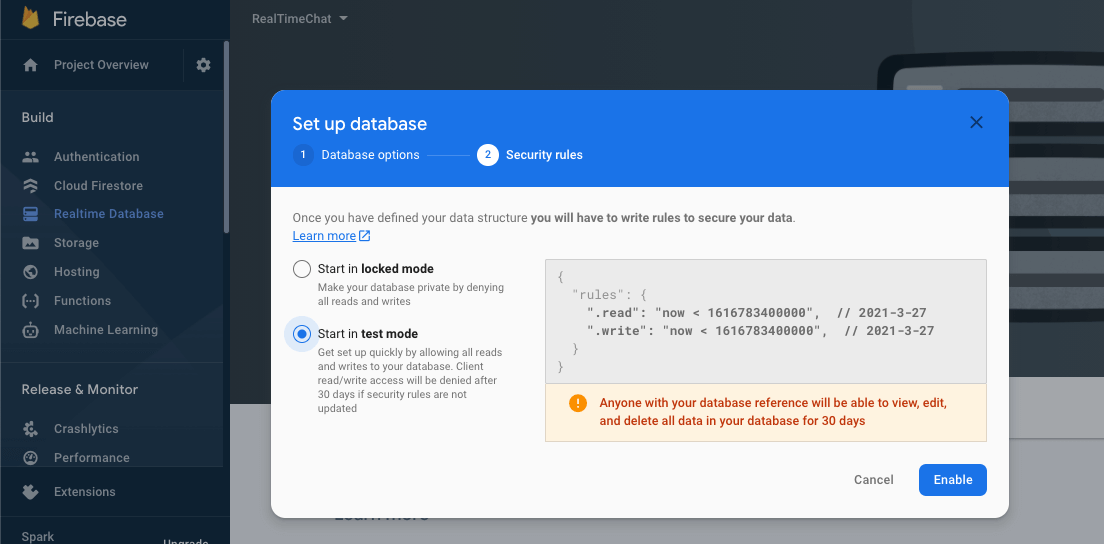
Configure iOS app to use firebase databaseNow, we will configure our iOS app to use the firebase database. For this purpose, add the following code into the didFinishLaunchingWithOptions(: ) method (just before the return statement) in AppDelegate to create a reference of the firebase database test whether the data is being stored in the project dashboard on the firebase console. Make sure to delete this code once our testing is done since this will wipe out the database every time and store new data. We need to move back to the firebase console and check whether the data has been added to the database or not. For this purpose, go to Realtime Database on the firebase console and check the data. We should get the data shown below in the dashboard. 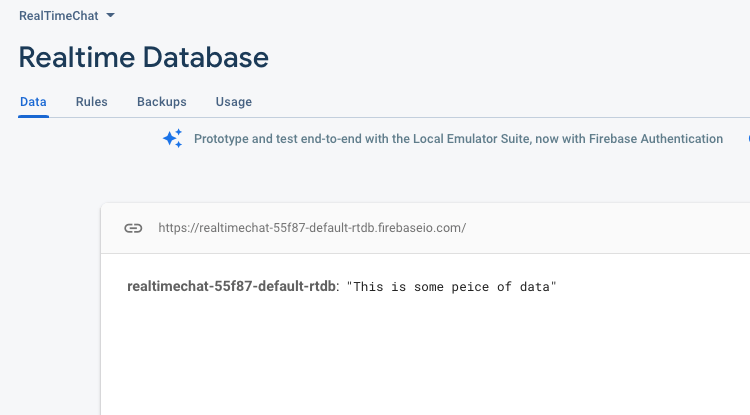
Adding users to our app on FirebaseNow, we will add users to our app by using the Firebase Authentication feature. For this purpose, go to Authentication on the firebase console. It will prompt us to get started, as shown below. 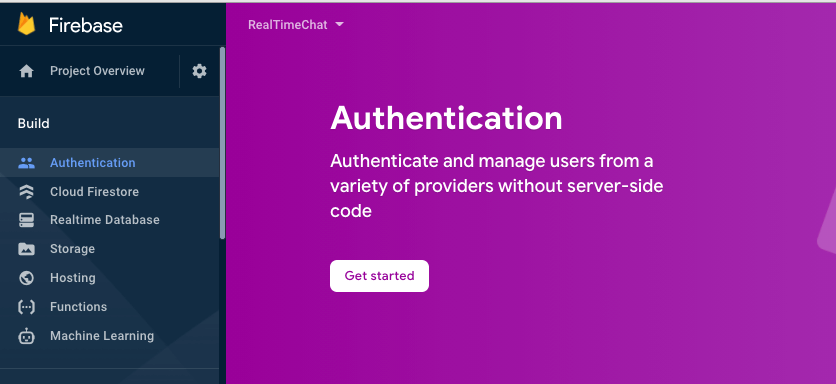
Once we get started with the Authentication Feature, we need to enable the Sign-in method to be used in our app. There is a variety of options, as shown below. 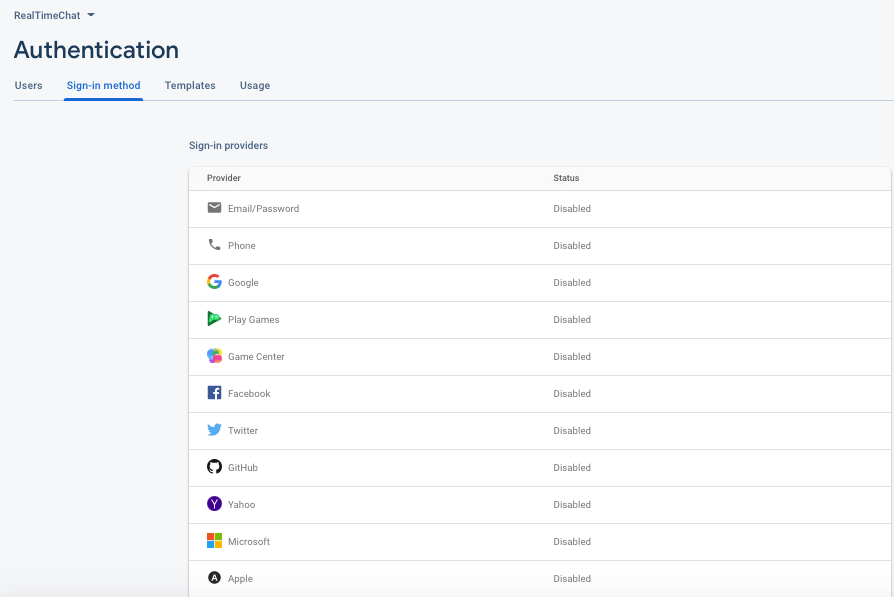
We will enable the Email/Password Sign-in method to use in our app. For this purpose, click on the Edit icon and enable the option as shown in the below image. 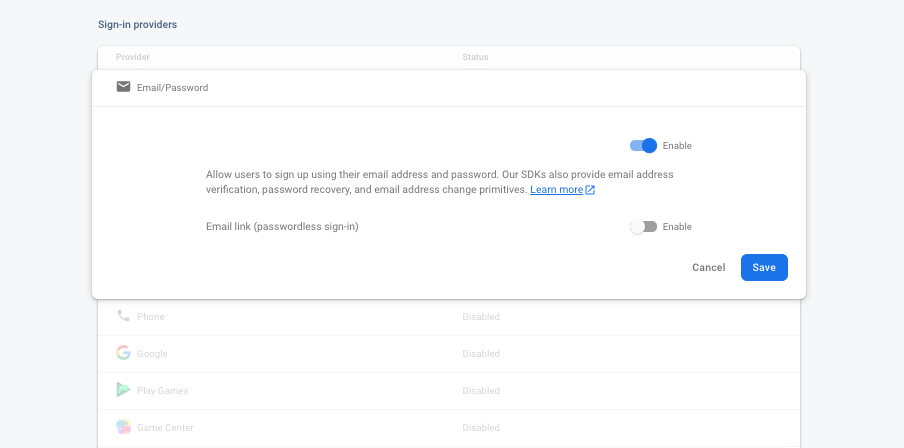
Now, our app will allow users to register and sign-in using their email and password combination. Create Interface Builder Our app will contain 4 Screens, I.e., Welcome Screen, Register Screen, Sign-In Screen, and Chat Screen. Welcome Screen: When a new user installs the app, it will land on the Welcome screen, where the user can choose to register himself into the application or log in to the application if already registered. The Welcome screen is shown in the image below. 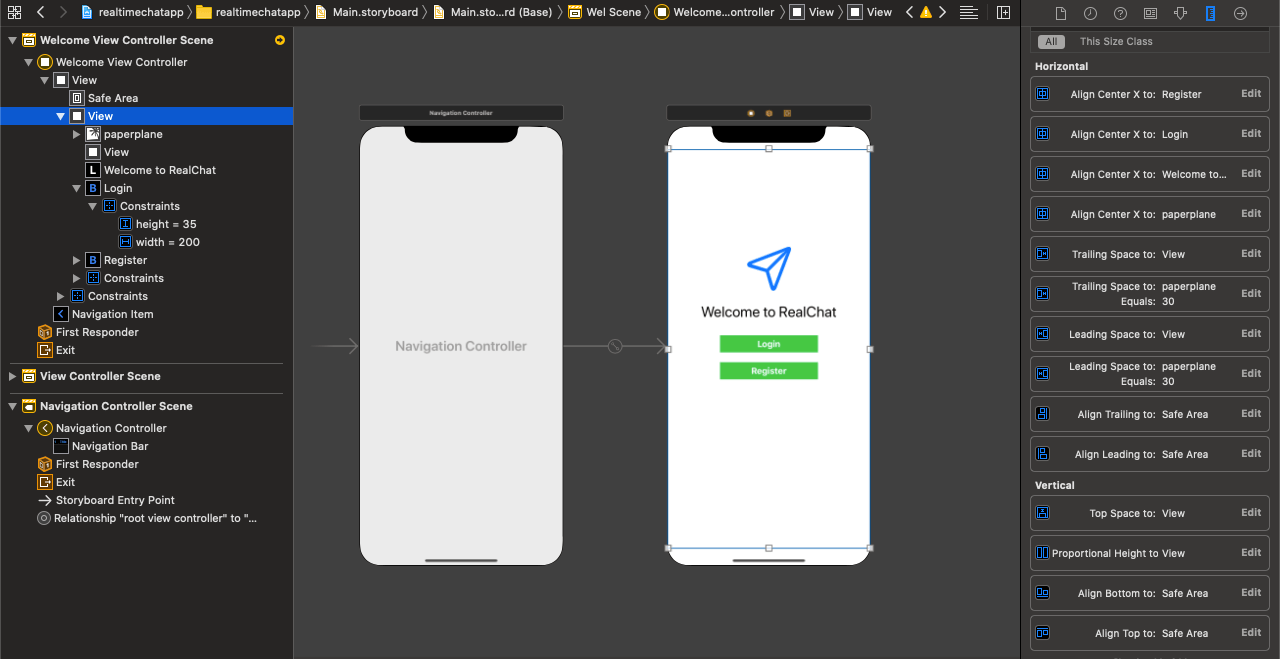
On iPhone 11 pro max, it will look like below. 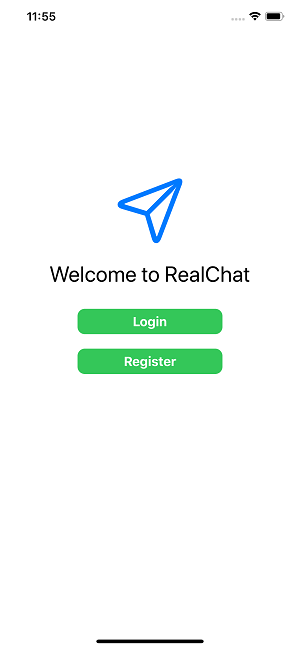
Register Screen: If the user is not registered on the app, they may need to register themselves into the application. 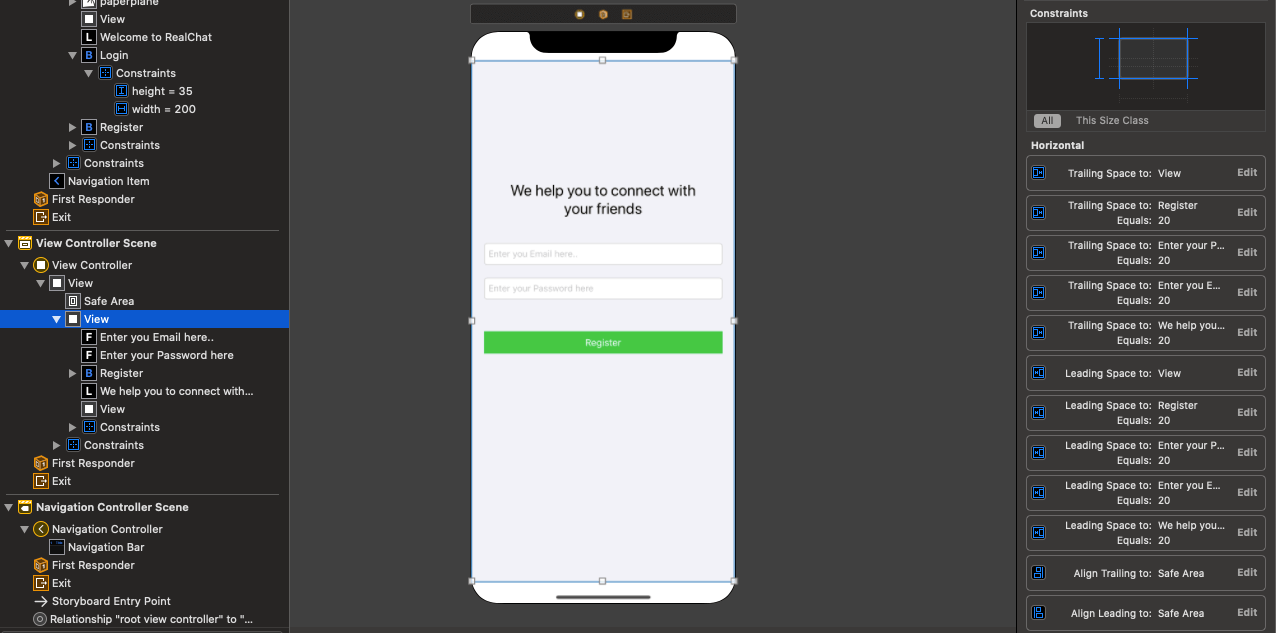
On iPhone 11 pro max, it will look like below. 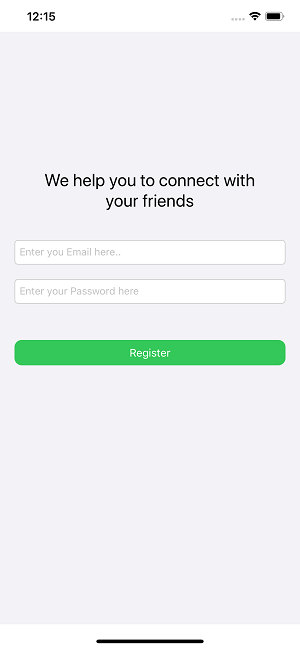
Login Screen: The login screen will look similar to the register screen up to an extent. The Login Screen in the Main.storyboard is given below, which contains a Label, two textfields, and a button to trigger the user's event. 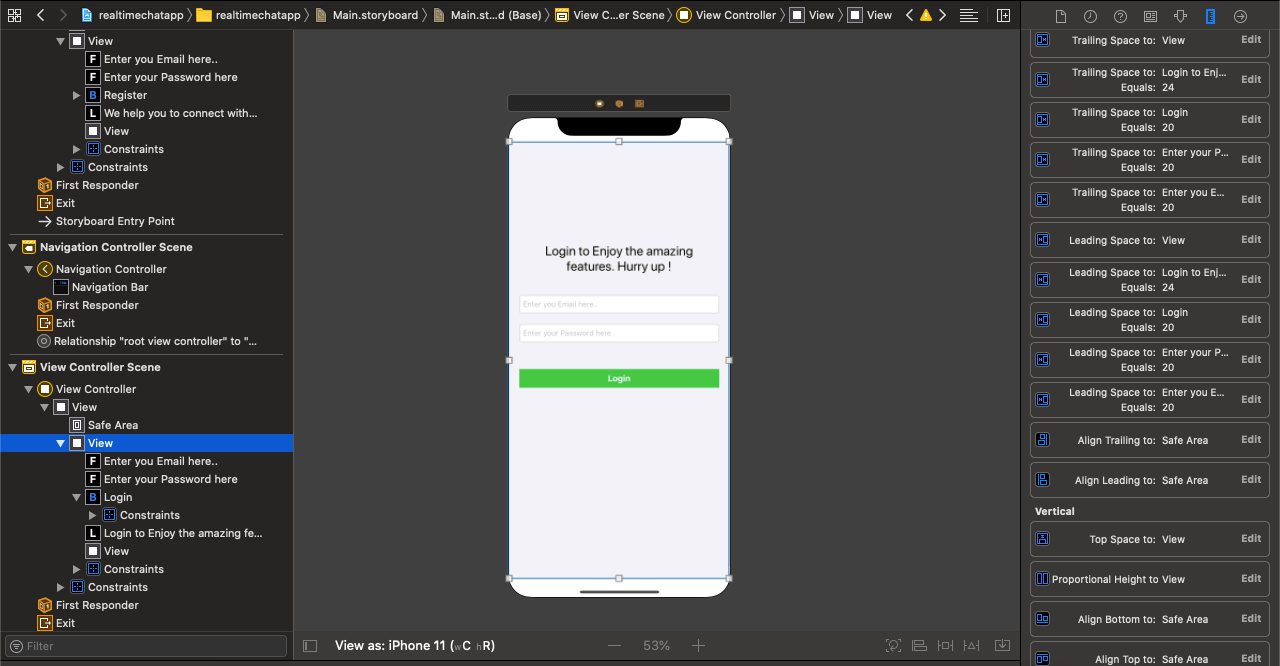
It will look like below on iPhone 11 pro max. 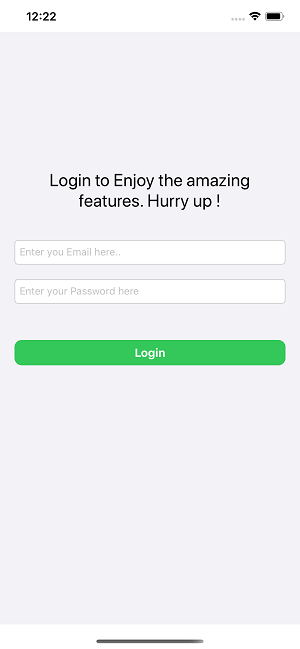
Chat Screen The chat screen will contain a title and logout button at the top, tableview to display the list of messages, a textfield and send button to type and send message to the other person. It is shown in the storyboard as given in the below image. 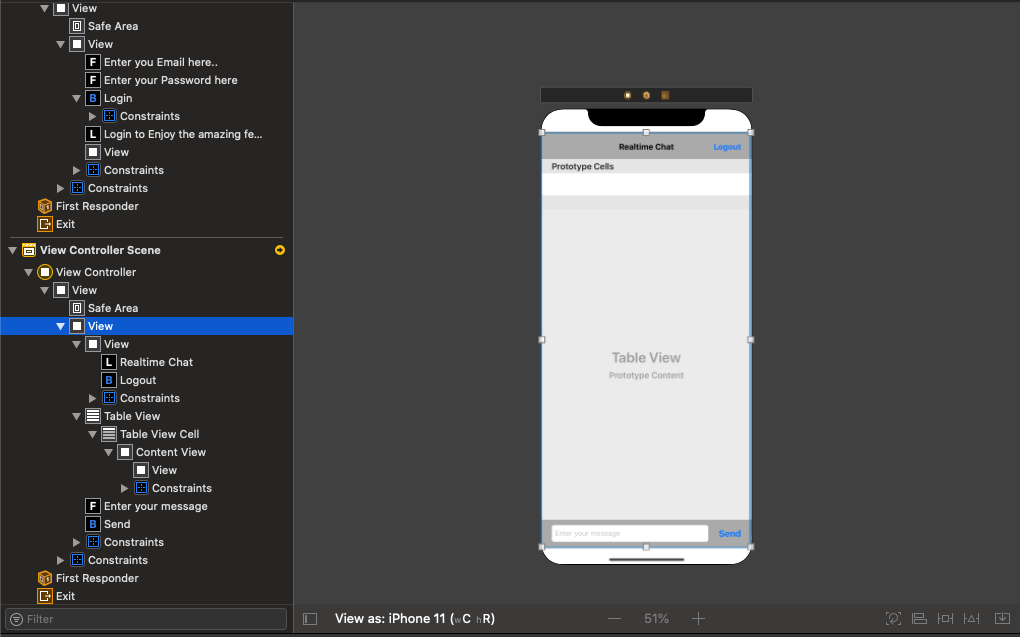
Now, we are done with designing the user interface for the application. Now we will create UIViewController classes for the XCode Uis and connect the respective outlets. Implementing the Code The first thing we need to do is to create a link among WelcomeViewController, LoginVC, and RegisterVC. For this purpose, add the following code into WelcomeViewController. Here, we need to ensure that we have given the same storyboard id to the view controllers in the storyboard. Register into the app To continue with the registration into the app, we need to make sure that we have connected outlets for the email and password text field. We also need to connect the outlet for the Register button to trigger the user event. To add a user to the firebase database, add the following code into the btnClickedRegister() method. This will add the user to the firebase database; we can check the entry in the Authentication section as the user on the firebase console. To add a user, build and run the application, choose register, and enter the credentials (email and password) as shown below. 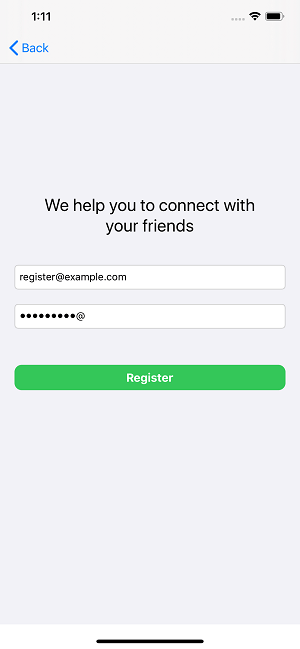
Now, if we click Register and check the users on the firebase console, we will get an entry as [email protected] in the Authentication section, as shown below. 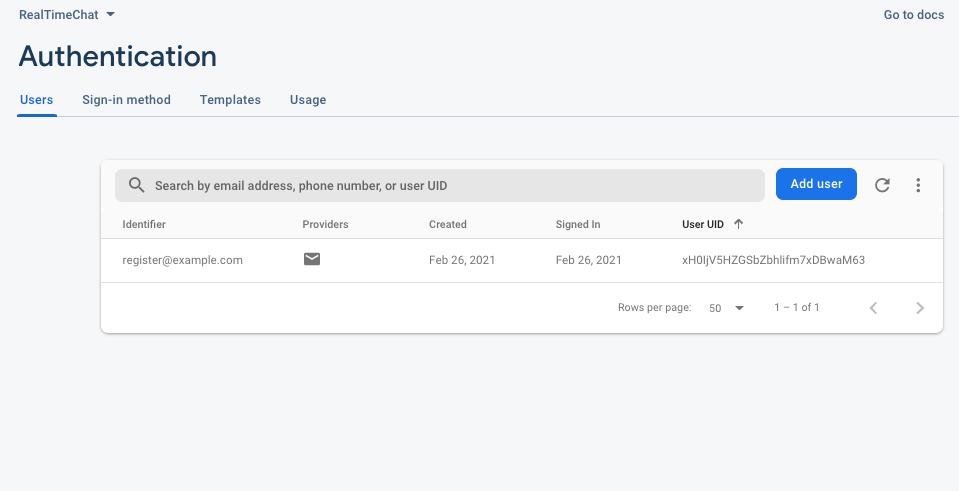
Now, we must notice that the registration is successful, but nothing happens on screen. We must be able to navigate the user to the chat screen directly once the registration is successful. For this purpose, add the following code just after we print the success message on the console. Now, we will see the chat screen as shown below. 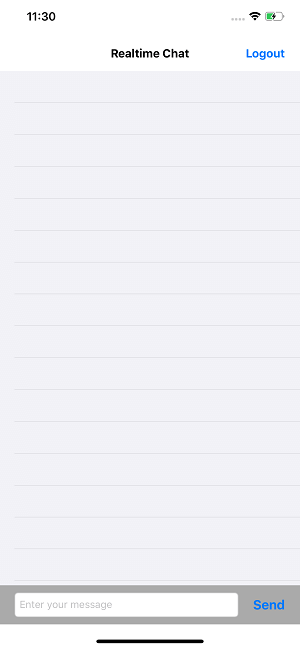
Logout from the app Now, we should be able to logout from the chat screen to implement the login functionality in the application. For this purpose, let's implement logout first, which will be done when the user pressed the logout button on the chat screen. Let's create the action outlet for logout the ChatVC. For logging out the user, Firebase provides the signOut() method by using which we can escape from the app. Let's add the following code in the ChatVC. This will let us logout from the application and navigate us back to the Welcome screen of the application. Login Functionality Now, we have to implement the login functionality to login back to the application with the credentials we are registered with. To code up the login screen, we need to create the outlet for the login button in LoginVC. To implement login, add the following code to the LoginVC. This will let the user login to the application. However, this will also show the error to the user as an alert if there is an error with the provided credentials, as shown below. 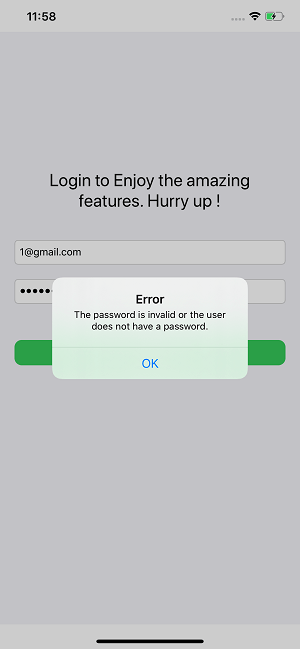
Chat Functionality Now, we are done with implementing login and logout functionality; we are ready to implement the chat functionality in the app. Let's look at the ChatVC in the storyboard as we haven't added any cell UI to the tableview, which will show the chat messages between the users. Now, let's add a XIB file which will be the subclass of UITableViewCell, and register it to the tableview. To create a XIB file, we need to check the "Also Create the Xib" option while creating a CocoaTouch Class, as shown below. 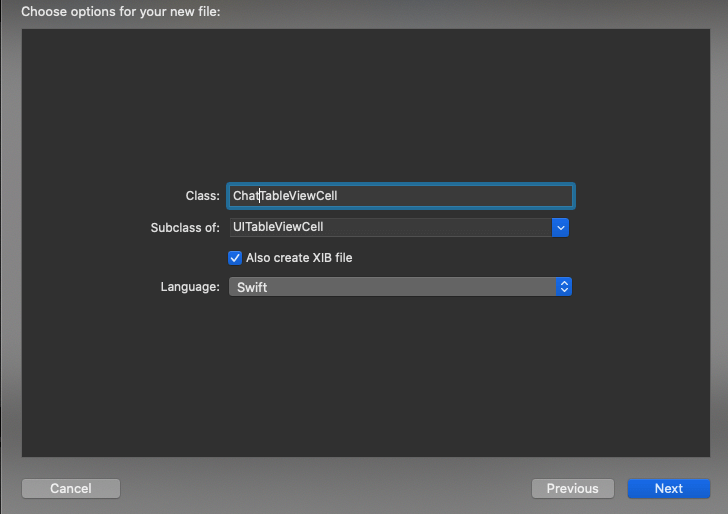
This will create the ChatTableViewCell XIB and class. Let's configure the design first. In ChatTableViewCell, we will add an image view to show the profile pic of the user, and we will also add the UILabels to show the name and message of the user, as shown below. 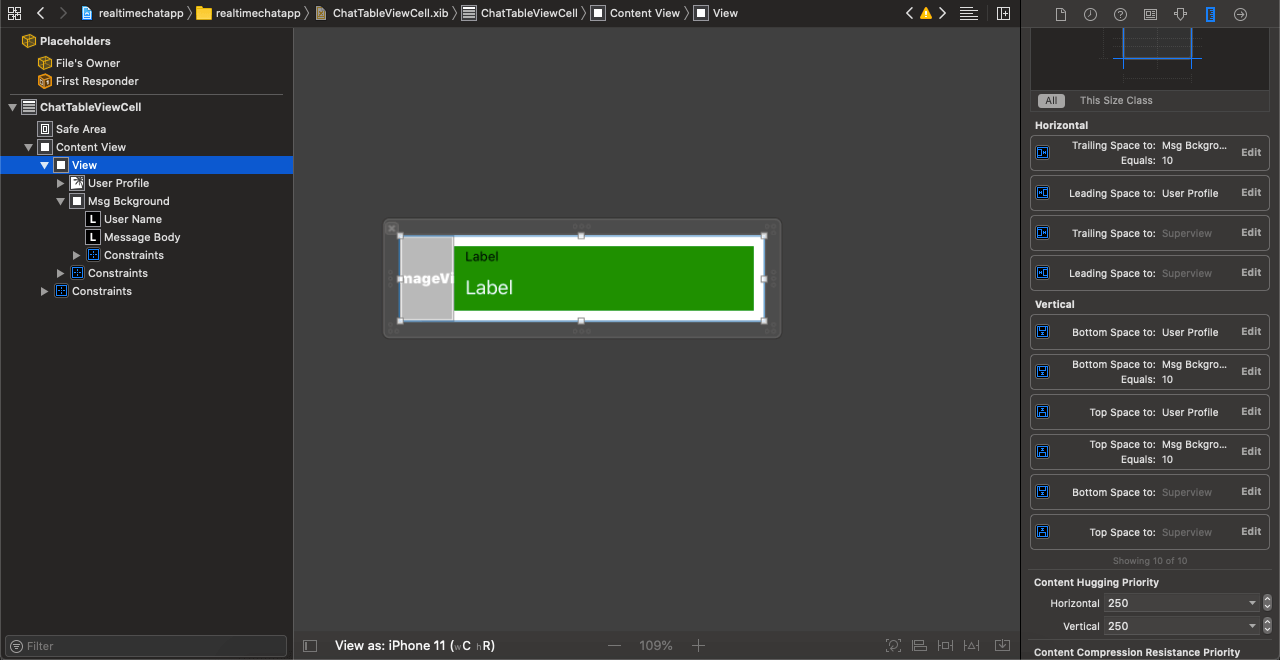
We need to create the outlets in the ChatTableViewCell, which will have the following code. To register the XIB file with the tableview, add the following code into the viewDidLoad() method of ChatVC. Now, let's implement the delegate and datasource methods of tableview to create the cells in tableview. For this purpose, add the following code into ChatVC. Once we build, run, and log in to the application, we will see the following Chat screen, which contains the dummy messages with default label usernames and blank user profile images. 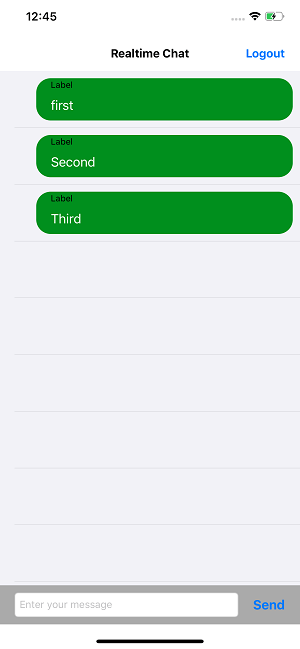
Now, let's create a Model class for setting up the custom message. Our model class will contain our messages. Create a new Swift file as Message.swift and add the following code into it. Let's send some messages using our Real-time chat app. Till now, we are using dummy text to display the UI. However, we will use the firebase database to send and retrieve the actual messages in the application. In our app, when the user types any message in the message textfield in ChatVC, the message will get saved in our firebase database. Let's implement this inside send button action outlet. Once we build and run the app after adding this code and send any message, we can check the firebase console whether the message is getting saved or not. 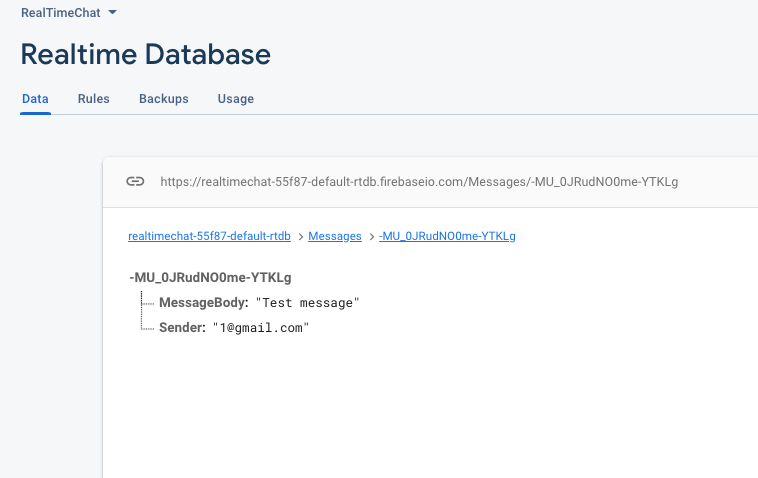
We need to populate the messages in the tableview to show sent messages instead of displaying dummy text. For this purpose, let's create an array of Message objects in ChatVC. Now, add the following method to ChatVC for retrieving messages. We are reloading the tableview as well inside the getMsgs() method. We also need to change the delegate and dataSource implementation of tableview to use messageArr for data population. Now, we are all done with setting up our Realtime Chat app. We need to call getMsgs() method from viewDidLoad() method in ChatVC. Build, run, and log in to the app on two different simulators or devices and see if we can send the messages or not. 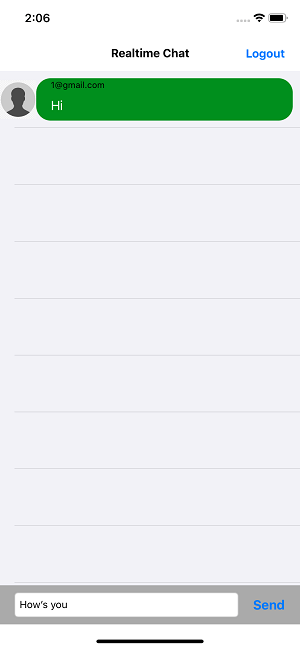 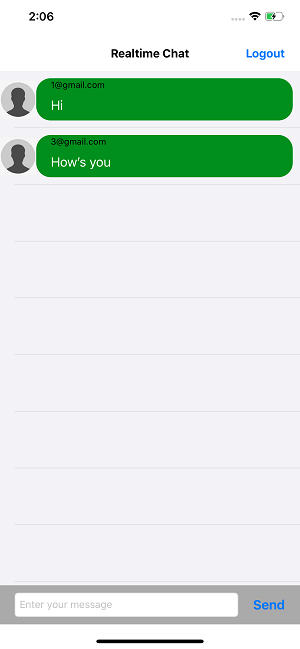
Our ChatVC will contain the following code.
Next TopicUsing Realm database in iOS app
|
 For Videos Join Our Youtube Channel: Join Now
Feedback
- Send your Feedback to [email protected]
Help Others, Please Share


