Setting up Cocoapods for XCode ProjectsCocoapods can be defined as a dependency manager for the swift and objective C projects, which can be used to install various third-party libraries in the XCode project. It is a very critical skill on which every iOS developer would have worked. In this section of the tutorial, we will discuss how to set up cocoapod in the system, and how can we use it to install various dependencies in the project. What is Cocoapods?Cocoapods is a dependency manager used to install dependencies for swift and objective C projects in XCode. It is similar to the maven or griddle, which are used to install dependencies in Java. However, a dependency manager is a tool that manages the set of frameworks to make life a few easier for the developers. In iOS, Cocoapods installs third-party libraries like Firebase, Alamofire, etc. However, if we do not use Cocoapods to install a third-party library like Firebase, we need to install it manually, which is a very tedious process. Here, we need to install all the dependencies of firebase along with firebase, and if Firebase makes changes to its SDK, then we need to redownload it into our project. With using Cocoapod as the dependency manager, our task becomes a lot easier; now we need to maintain a file (Podfile), it automatically downloads all the libraries mentioned in it. Setting Cocoapods on the mac.To install cocoapods on the mac, we need to run a simple command. This process is very simple and straightforward. Go to the terminal, and type the following command. This will install the cocoapods gem on the system. As, cocoapods is built with Ruby, so it depends on the default ruby that is already installed on the system. 
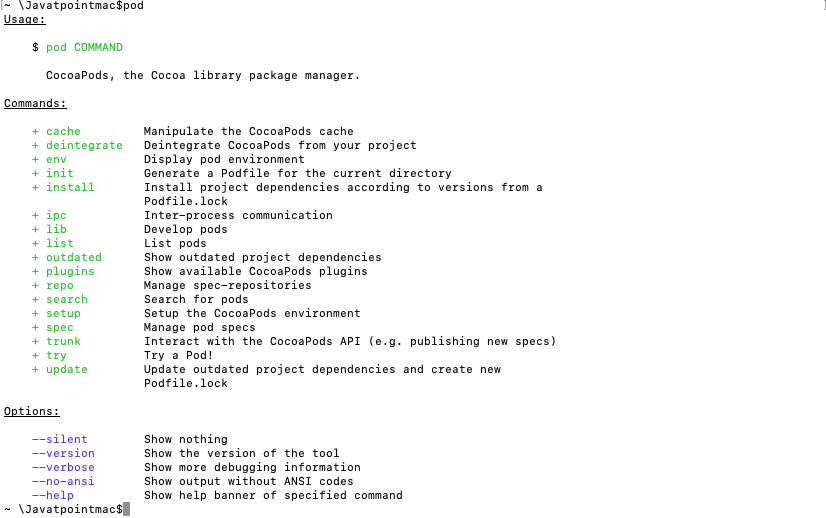
Now, we have successfully installed Cocoapods on our system to check whether it has been successfully installed or not, type pod command on the terminal, and it will give the following output. 
Next TopicUsing Cocoapods for the XCode Projects
|
 For Videos Join Our Youtube Channel: Join Now
Feedback
- Send your Feedback to [email protected]
Help Others, Please Share


