| |

Creating the first iOS applicationTill now, we have seen the basics of how an iOS application can be developed using XCode on the macOS. We have also discussed about the need of interface builder, View Controllers, and storyboard. In this section of the tutorial, we will create our first iOS application and discuss some of the basic building blocks of an iOS application. To create the first iOS application, we need to create a new project in XCode by double-clicking the XCode icon in the applications. This will open the XCode, we need to choose the option as Create a new project given at the left pane of the window. The following window will be opened. XCode provides us various project type options to choose from. Here, we need to select the Single View App. We will discuss other types of projects as well, later in this tutorial. 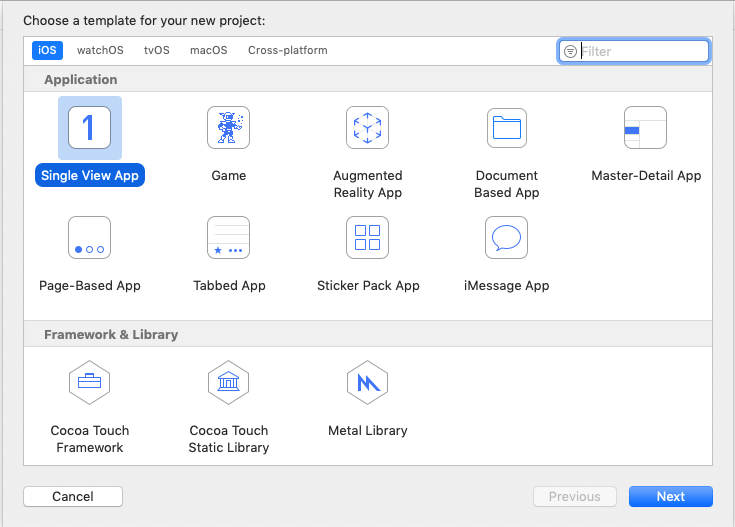
Now click on Next. The following window will appear, which prompts us to fill the project related information. Fill all the details regarding the product, including name, team, Organization Name, etc. Here, we must notice that default selection for the team is None. Here, we can select the developer name, for this, we have to sign in with the Apple ID. However, I have kept it as None. In Organization name, we can fill the name for which we are developing the application. I have entered Apple Inc for this project. In organization identifier, we need to fill the identifier that is reverse of the domain name of the organization. For example, for organization Javatpoint, we will enter it as com.javatpoint The bundle identifier will be created by concatenating the organization identifier and product name. The bundle identifier is the unique identifier that will represent the application on a specific platform like firebase. We can't install two iOS applications on an iPhone with the same bundle identifier. In the language, select the language with which we are planning the development. In this tutorial, we will use Swift as our programming language. 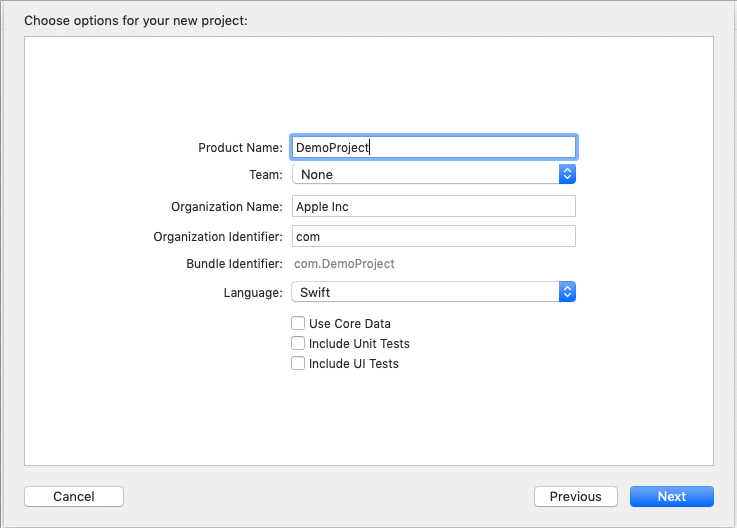
At the bottom, we are prompted to check three options. Initially, we will not select any one of them. However, the options are required when we will use CoreData in iOS applications. 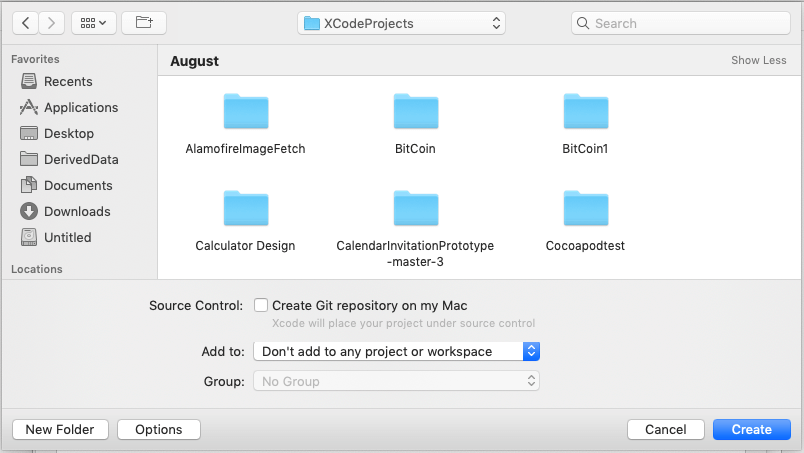
Now, it will prompt us to select the location in the system to save the project. Select the location on which you want to save the project and click Create. However, it will also prompt us to select the version control tool that is whether we need to maintain the Git repository on our system. We will remain unchecked and click on Create. This will successfully create our first iOS application. Now let us program our first iOS application to show a message to the user on the screen. We will start with the Hello World application for iOS. First iOS applicationOur first iOS application will show a decorated and popular first message to the iPhone User, i.e., Hello World. We will create this application by using a storyboard. After creating this application, you will get an idea of how can you use storyboard efficiently to create an iOS application. In this project, for a better understanding, we will not apply the constraints to the Views as they will be covered in the later part of this tutorial, I.e., Auto Layout in swift. When we open the main storyboard from the project navigator, it will look like the following window. Now, we can drag and drop the widgets from the media library. As we have discussed earlier in this tutorial, the ViewControllers are the basic building blocks of any iOS application. Initially, any iOS project is associated with a View Controller in the storyboard and a class assigned to the View Controller i.e., ViewController.swift. We can add The UIViews into this ViewController and program the Views in the Corresponding class file by creating the outlets. 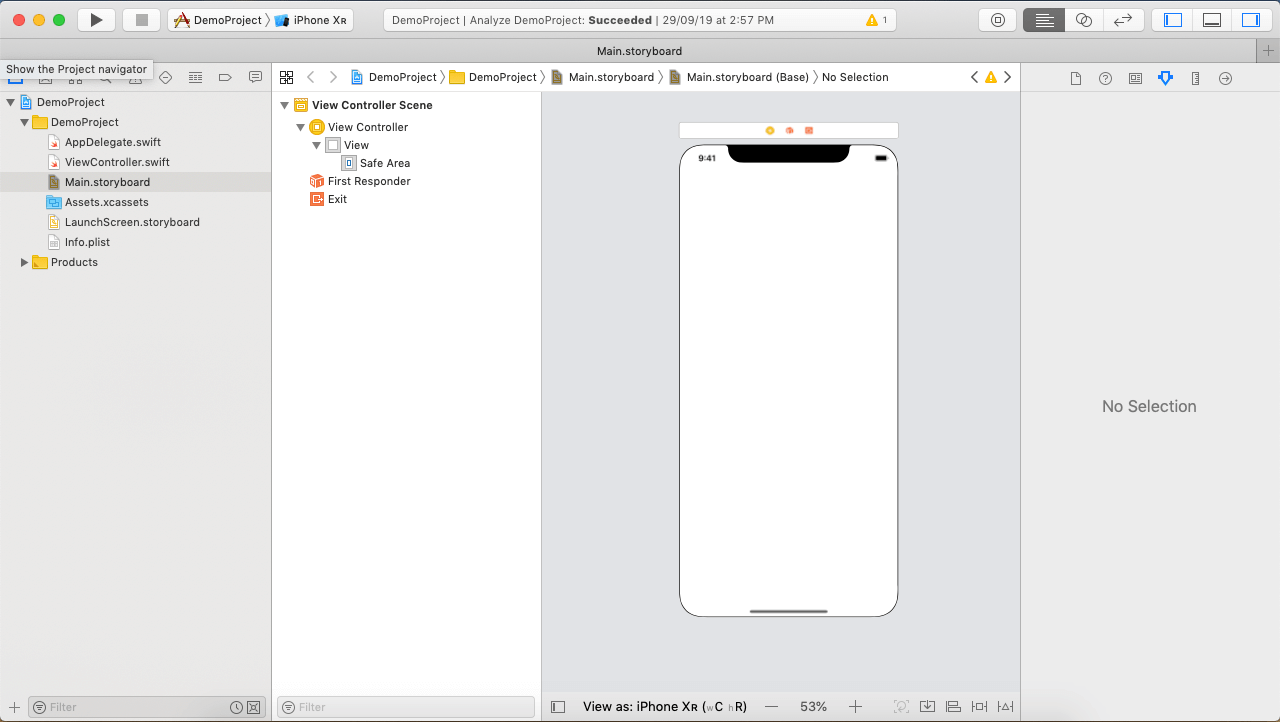
If we look at the requirement of this application, we need to show some decorated message Hello World to the iOS user. For this purpose, we will follow the following steps. Step 1: Add a UiView to the ViewController in the storyboard. To add a UIView to the ViewController, open the media library by pressing the Command+Shift+L short key. Search for UIView and drag the result to the storyboard in the ViewController. 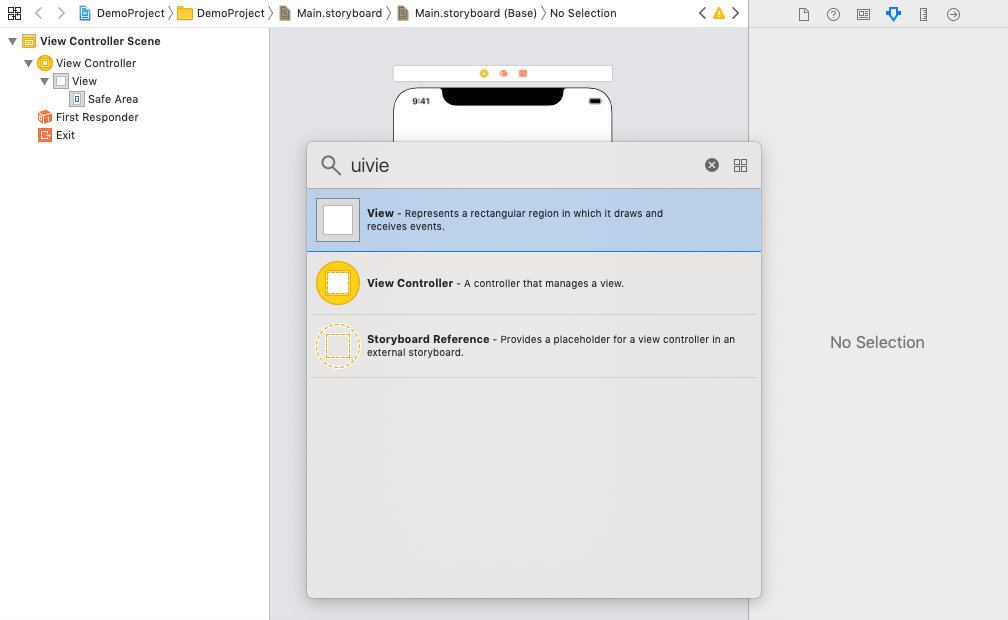
This will add a UIView to the ViewController in the storyboard. 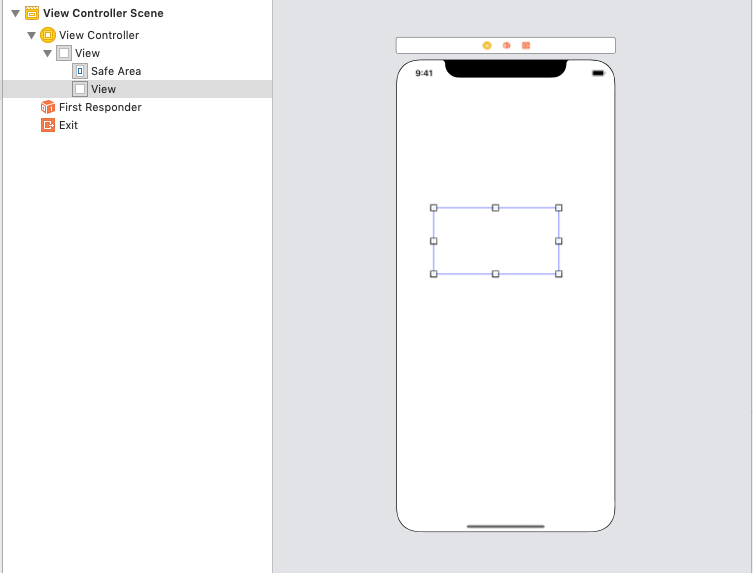
Now decorate the UIView by Assigning some background color and size for the View. This will be done by using the attribute inspector in XCode, as shown in the right pane of the following window. 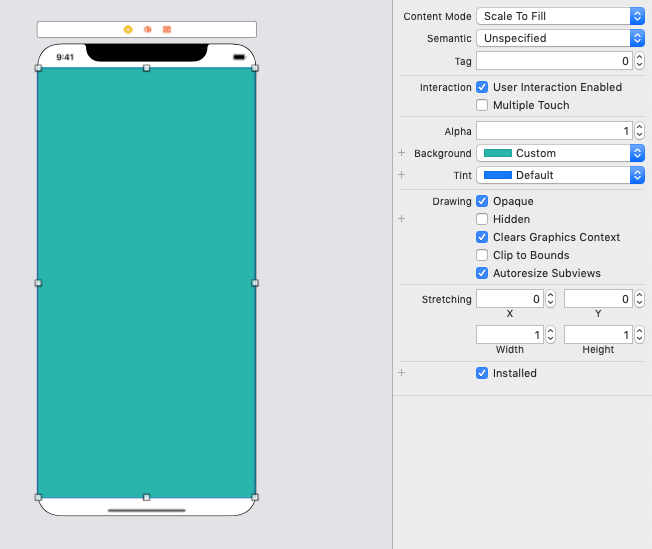
Step 2: Add a UILabel to the ViewController in the storyboard. Now add a UILabel to the ViewController in the storyboard from the media library. Search for UILabel in the media library and drag the result to the Storyboard.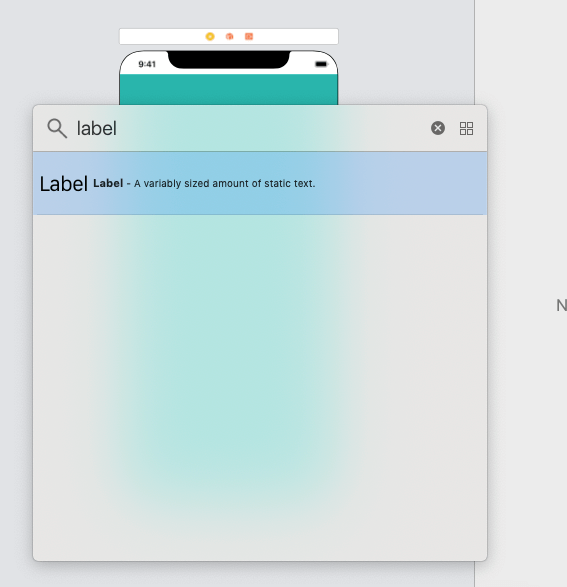
This will add a label to the Storyboard. Step 3: Decorate the UILabel. Now, we will decorate the UILabel by giving some attributes to it from the Attribute inspector. In this project, we will use the same background color as the View does. We will assign a custom font to the label, and we will position the label to the center. We will also change the text of the UILabel to Hello World as shown in the following window. The attributes given to the UILabel can be shown in the Attribute inspector. The View Controller scene is shown in the left pane of the window which shows the hierarchy of Views used in the storyboard. 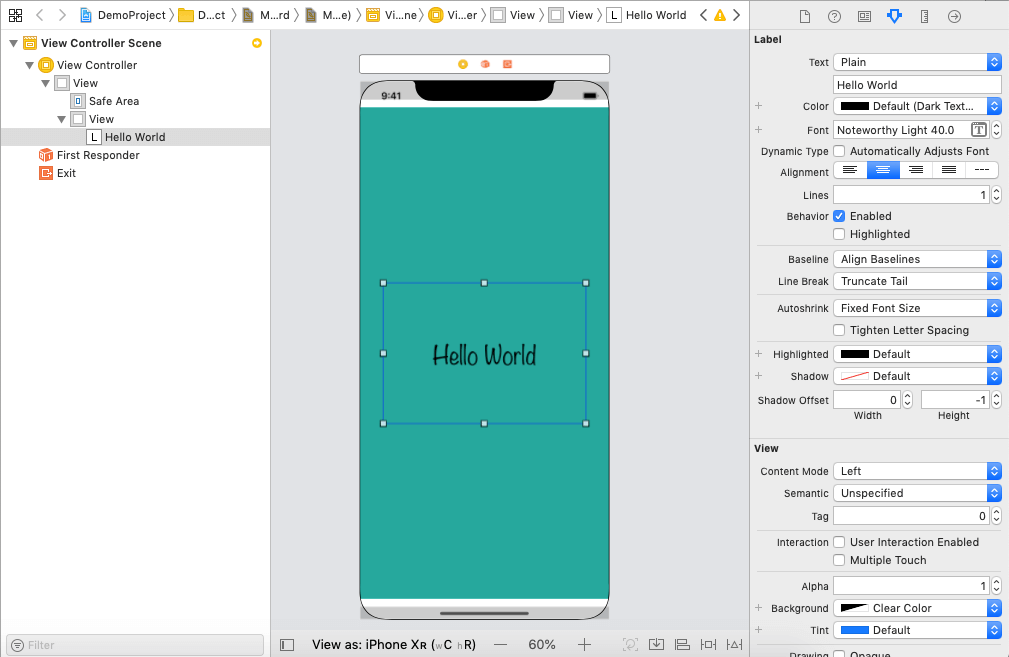
To run the project, Use the short key Command + R, this will open the simulator to run the project. The simulator simulates the iPhone in the macOS. There is a wide range of simulators available in XCode to run the iOS application in the macOS. By default, iPhone XR is selected in the XCode to run the iOS application. Let's run the above application on the iPhone XR. 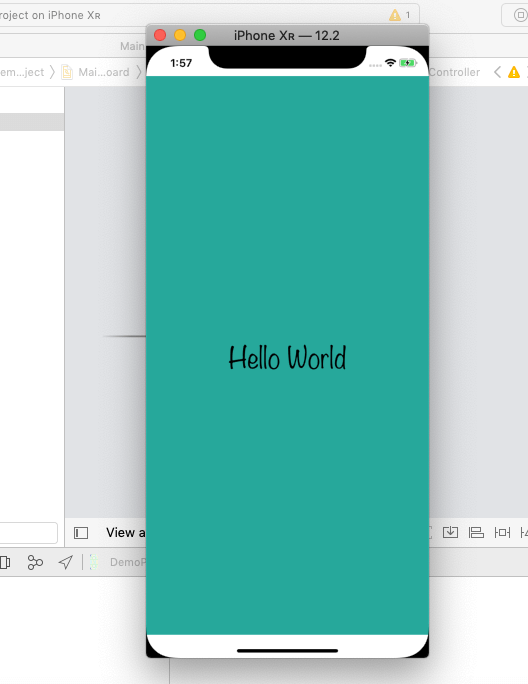
Hence, we have successfully created and run our first iOS application using Simulator.
Next TopiciOS Label
|
 For Videos Join Our Youtube Channel: Join Now
Feedback
- Send your Feedback to [email protected]
Help Others, Please Share


