| |

ZenmapNmap(Network Mapper) is the second program that we're going to look. It is a huge tool and has many uses. Nmap is used to gather information about any device. Using the Nmap, we can gather information about any client that is within our network or outside our network, and we can gather information about clients just by knowing their IP. Nmap can be used to bypass firewalls, as well as all kinds of protection and security measures. In this section, we're going to learn some of the basic Nmap commands that can be used to discover clients that are connected to our network, and also discover the open ports on these clients. We're going to use Zenmap, which is the graphical user interface for Nmap. If we type zenmap on the Terminal, we'll bring up the application like this: 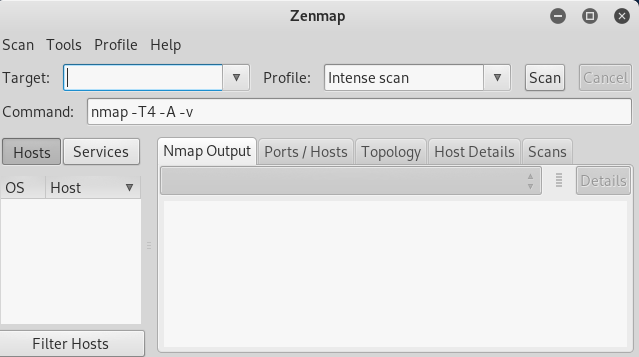
In the Target field, we're going to put our IP address. In the Profile drop-down menu, we can have various profiles: 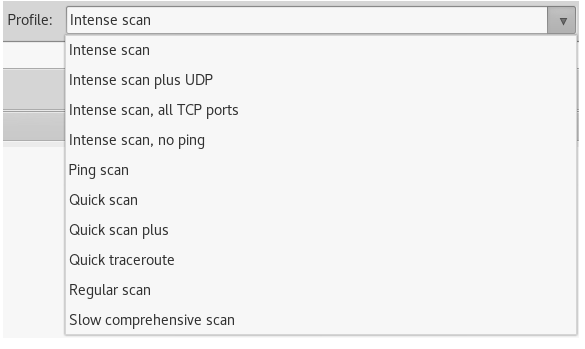
In the Target filed, if you want to gather information of only one IP address, we can just enter that address. We can also enter a range like we did with netdiscover. We're going to enter 198.168.1.1/24. Then we are going to select the Ping scan from the Profile drop-down menu and hit the Scan button: 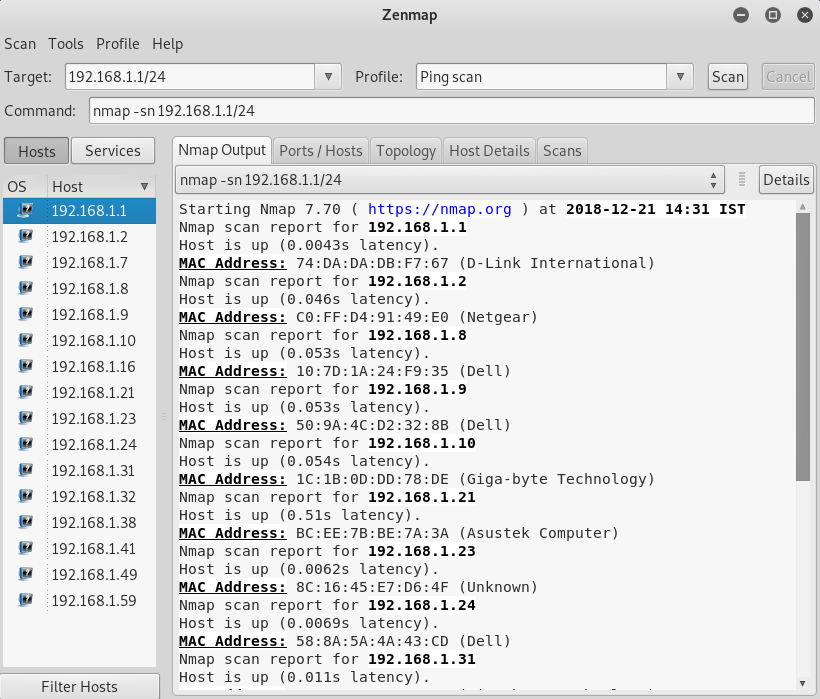
The preceding scan is kind of a quick scan, but it doesn't show too much information, as we can see in the preceding screenshot. It only shows the connected devices. This scan is very quick. We are able to see the connected devices on the left-hand panel, and we can see their IP addresses, their MAC addresses, and their vendors. The next scan we're going to learn is the Quick Scan. Now, the Quick scan is going to be slightly slower than the Ping scan. But in Quick scan, we will get more information than the Ping scan. We're going to be able to identify the open ports on each device: 
In the above screenshot, we can see that it shows the open ports on each one of the discovering devices. The main router has an open port called 53/tcp. 80/tcp is the port used at the router setting page because it runs on a web server. Now, let's take a look at the Quick scan plus, which take the Quick scan one step further. It's going to be slower than the Quick scan, but it will show us the programs that are running on the opened ports. So, in Quick scan, we saw that port 80 is open, but we didn't know what was running on port 80, and we saw that port 22 was running, but we didn't know what was running. We knew it was SSH, but we don't know what SSH server was running on that port. So again, Quick scan plus will take longer than Quick scan, but it will gather more information, as shown in the following screenshot: 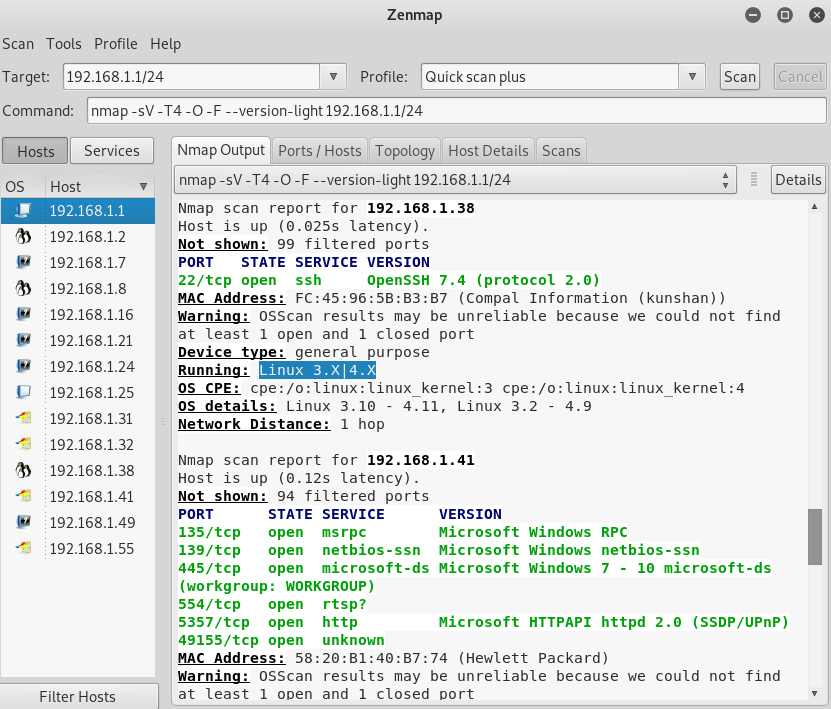
In the preceding screenshot, we can see that we have a Linux device connected. We can see that the operating system of the device is connected and that it also got us the version for the programs. In Quick scan, we only knew that port 22 was open but now we know that it's running, and the server is OpenSSH 4.7. Now we know that it was Apache HTTP server 2.2.8 and it was a Linux device. We can go ahead and look for exploits and vulnerabilities.
Next TopicMan-in-the-Middle Attacks
|
 For Videos Join Our Youtube Channel: Join Now
Feedback
- Send your Feedback to [email protected]
Help Others, Please Share


