| |

How to run a C program in Visual Studio Code?A visual studio code is a lightweight software application with a powerful source code editor that runs on the desktop. It is a free source code editor developed by Microsoft for Windows, Mac OS and Linux. It is a software editor that has a rich extension of various languages like C++, C+, C, Java, Python, PHP, Go, etc. and runtime language extensions such as .NET and Unity. It is easy to edit, build, syntax highlighting, snippets, code refactoring and debugging. In visual studio code, we can change the application's background theme, keyboard shortcuts set on our preferences, install an extension and add additional functionality. Prerequisites for running a C program in Visual Studio Code
We have already installed the Visual Studio Code in our system. The user interface of VS code look like the following: 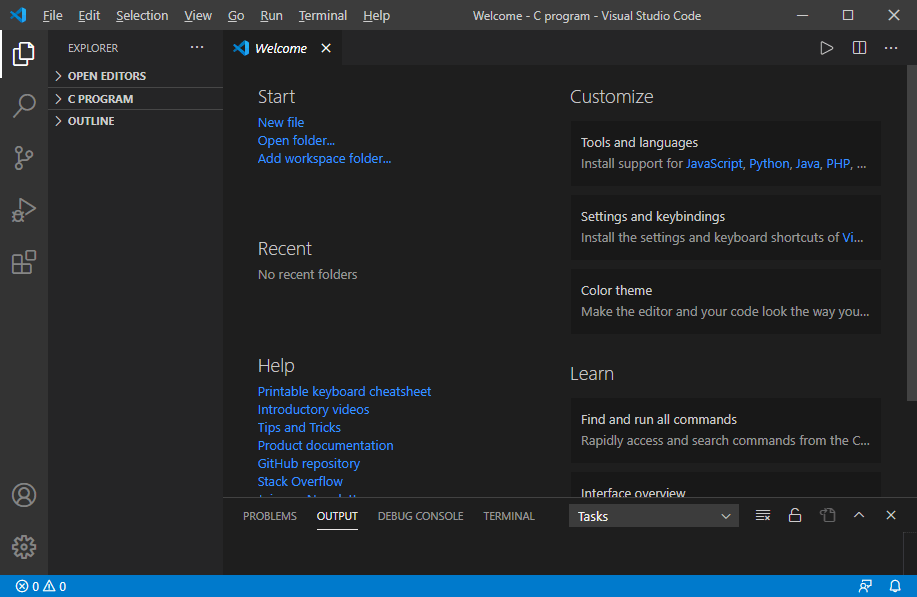
Download & Install the C/C++ Extension1. We need to click on the extension button that displays a sidebar for downloading and installing the C/C++ extension in the visual studio code. In the sidebar, type C Extension. 
2. After that, click on the C/C++ 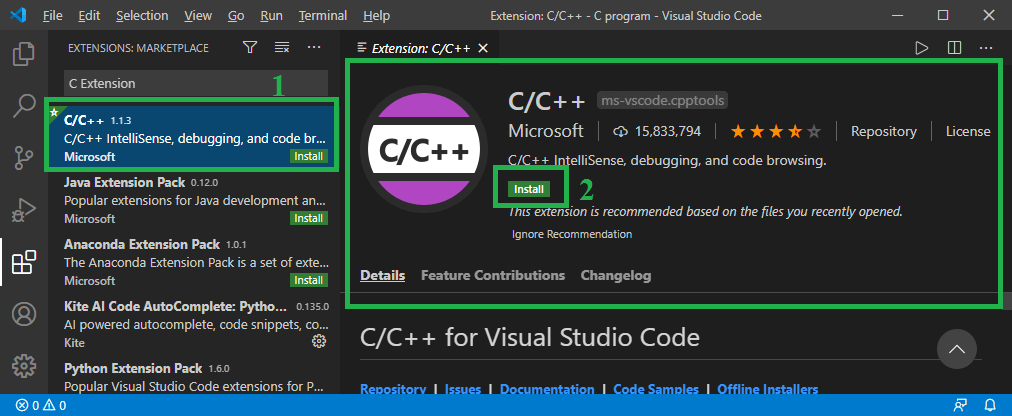
In this image, click on the Install button to install the C/C++ extension. 3. After clicking the Install button, it shows the below image. 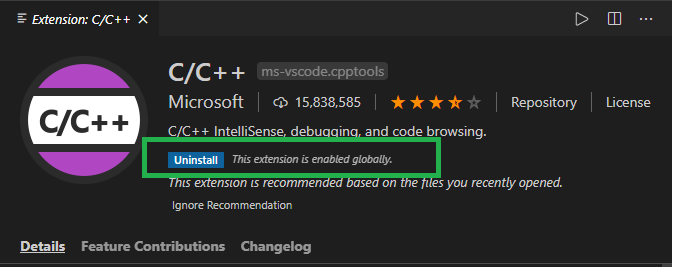
In this image, we can see it shows the Uninstall button that means the C/C++ extension has been successfully downloaded in the visual studio code. In this image, we can see it shows the Uninstall button that means the C/C++ extension has been successfully downloaded in the visual studio code. Download and Install Compiler ExtensionA MinGW is an advanced GCC compiler software used to compile and execute code. It is software that supports only the window operating system. Download the MinGW-w64 Compiler1. Go to the https://sourceforge.net/projects/mingw We land on the following page. 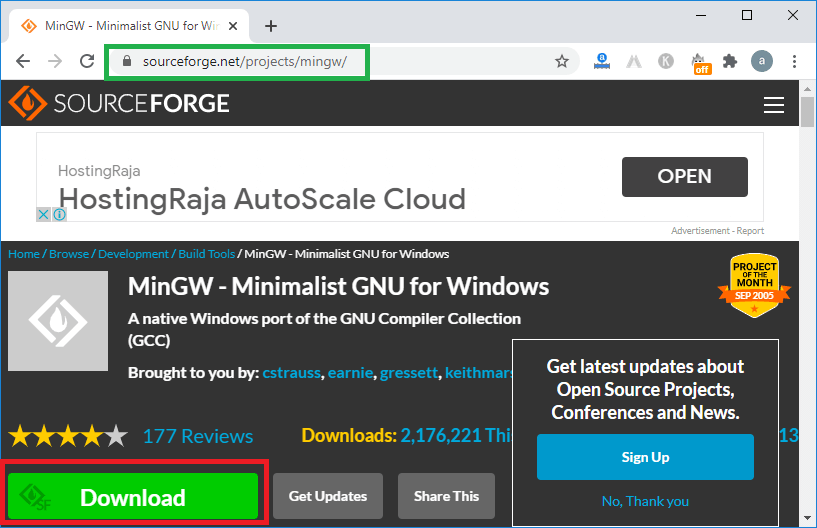
2. After that, click on the Download button, then it starts the downloading of the MinGW GCC compiler, as we can see in the below image. 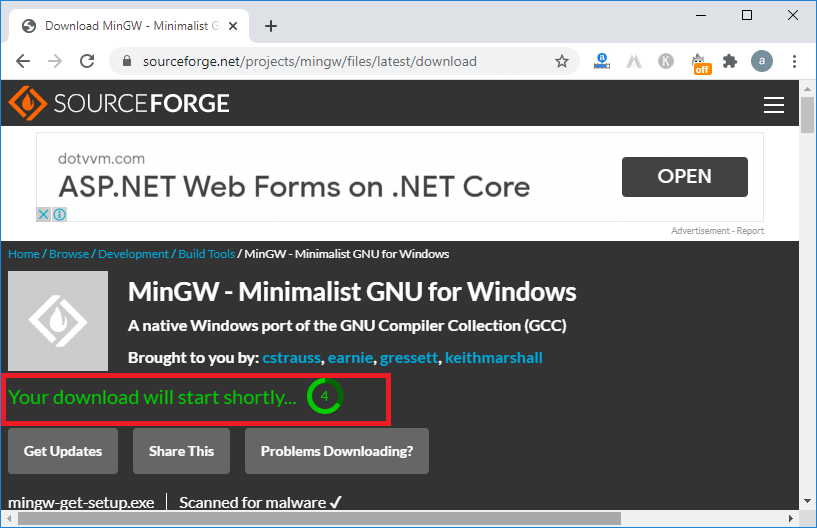
3. MinGW software has been successfully downloaded into the system. 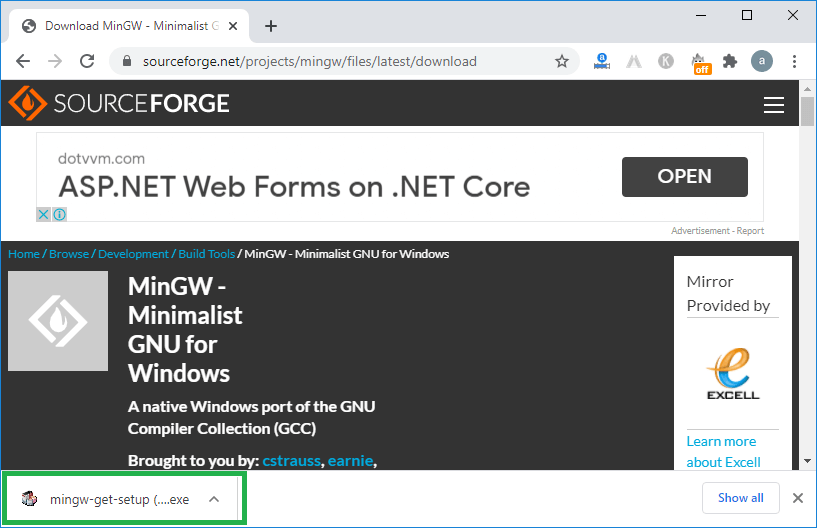
4. Now we double-click on the MinGW set up to install the compiler. 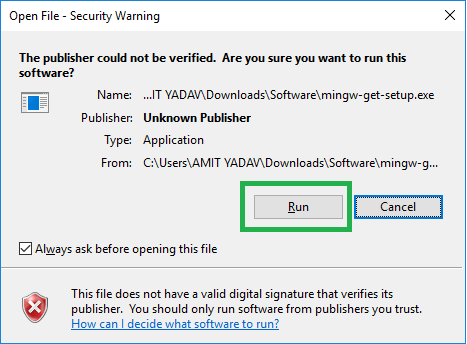
As we can see, it shows that it is a harmful file click on the Run button to proceed with installing the setup. 5. Click on the Install 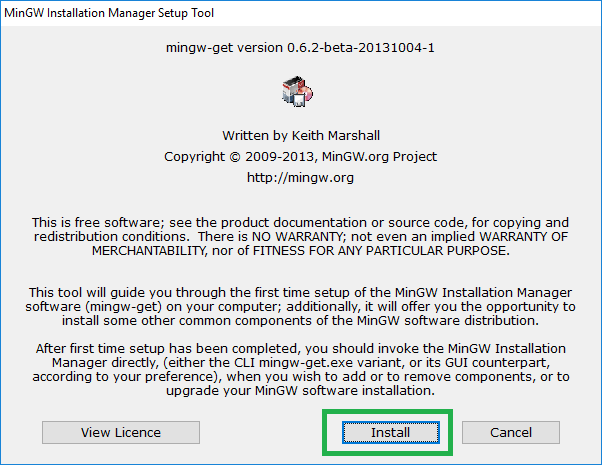
6. Set it defaults, or we can change the storage location of the setup. After that, click on the Continue 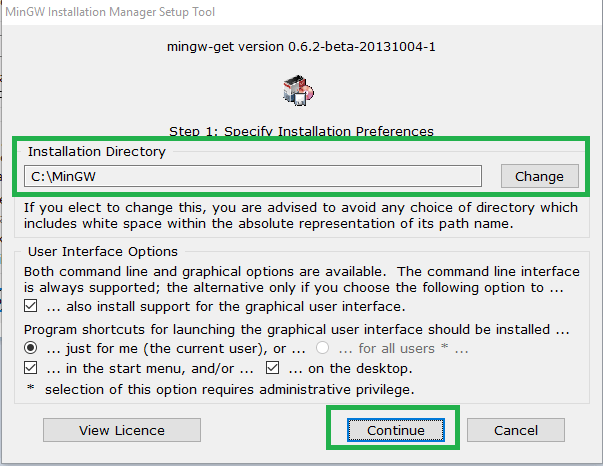
7. After clicking the continue button, it shows step 2 of MinGW Installation Manager. 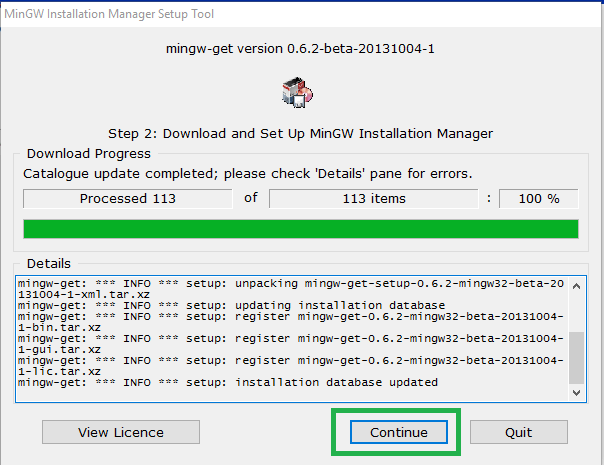
8. As we click on the Continue, it shows the below image. In the MinGW Installation Manager, we need to check the Mingw32-base package and Ming32-gcc-g++ package to run and compile the C/ C++ program in the visual studio code editor. 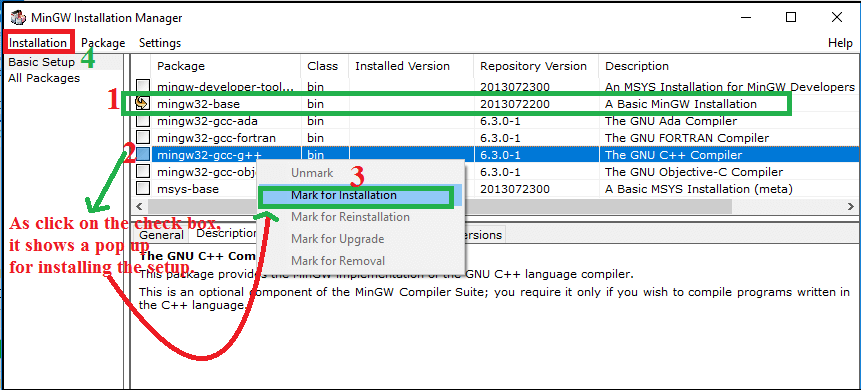
9. After selecting the checkbox, click on the Installation tab (at the top left corner of the dialog box). 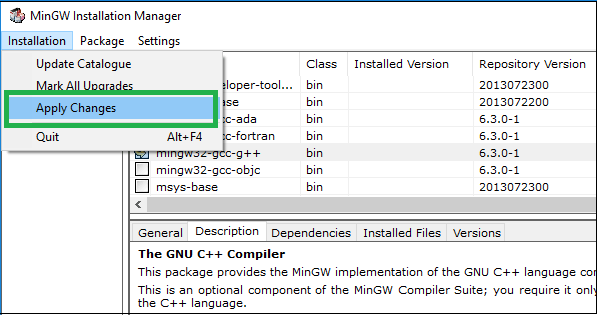
Here we click on Apply Changes to set the package's installation in MinGW, as given below. 
10. After click on the Apply button, it shows the below image. 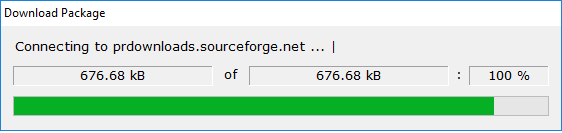
11. After downloading the packages, it shows the installation process of the package, as shown below. 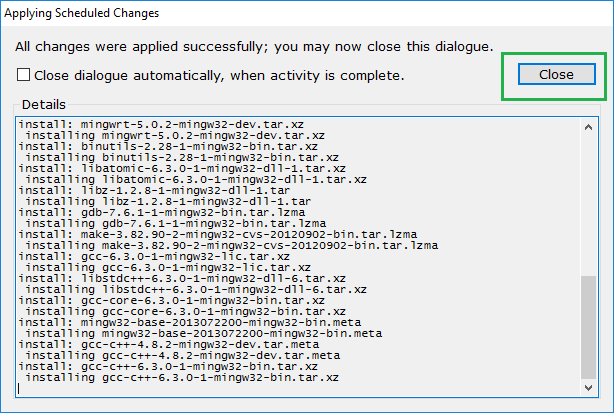
Here we can see all the changes have been successfully applied and then click on the Close button. Set the Environment Path for the MinGW Set UpAfter downloading and installing the MinGW compiler, we now set the environment path to include the C/C++ compiler directory. 1. Go to the installation directory of the MinGW Set Up. Here we installed the setup at the C drive, as shown below. 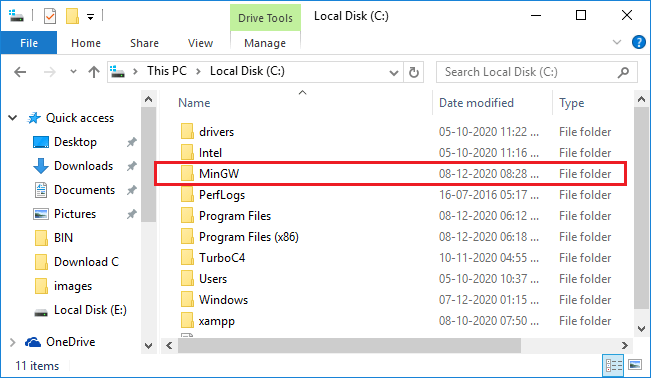
2. Double click on the MinGW folder. It shows the below image. 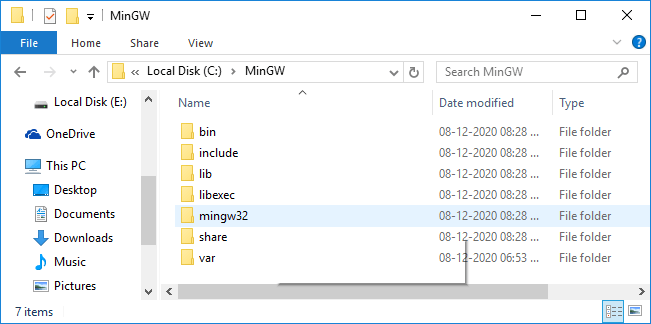
3. After that, click on the bin folder and then copy the directory path, as shown below. 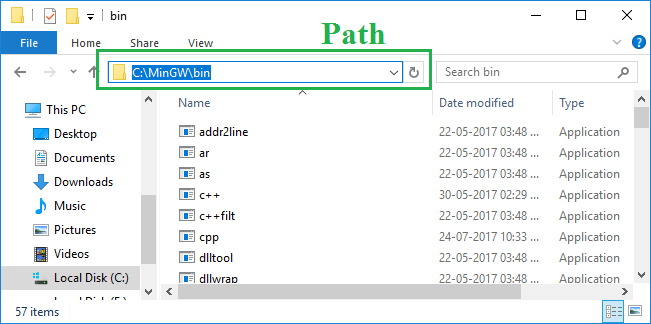
Here is the path of the MinGW folder path: C:\MinGW\bin 4. After copying the directory path, go to This PC -> Right Click on This PC -> Select/ Click on the Properties. It shows the below image. 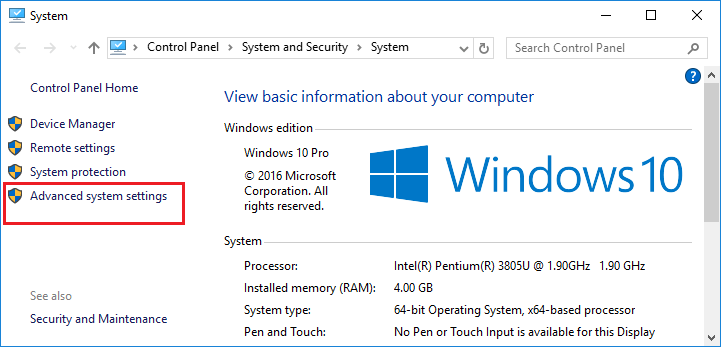
5. After that, click on the Advanced system settings to display a popup box of System Properties, as shown below. 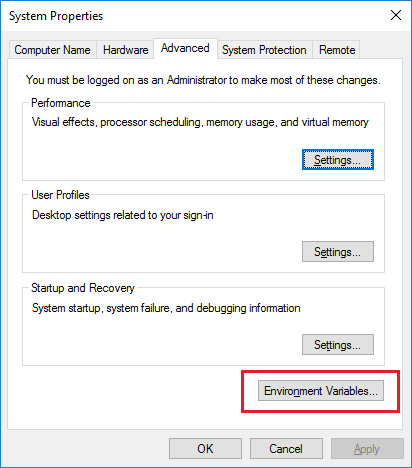
6. Click on the Environment Variables to set the directory path, as shown below. 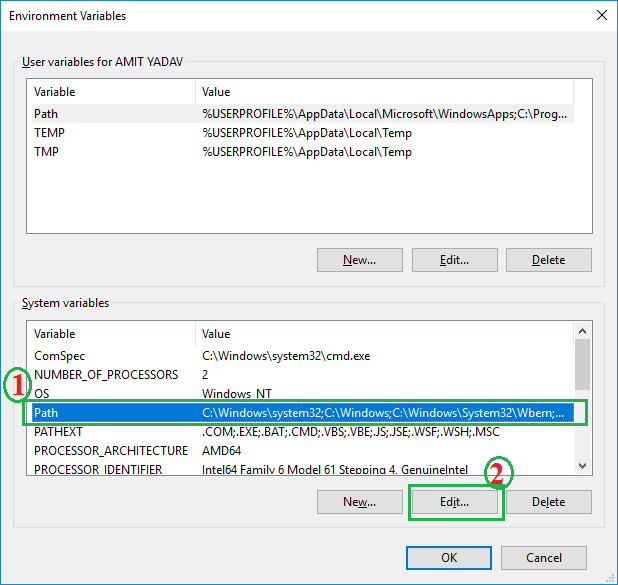
First, we have to click on the System Variables Path and then click on the Edit button, as shown in the above image. 7. As we click on the Edit button, it shows a popup window to set a new path, as shown below. In the above image, first, we click on the New button and then paste the C:\MinGW\bin path; after that, click the OK button. 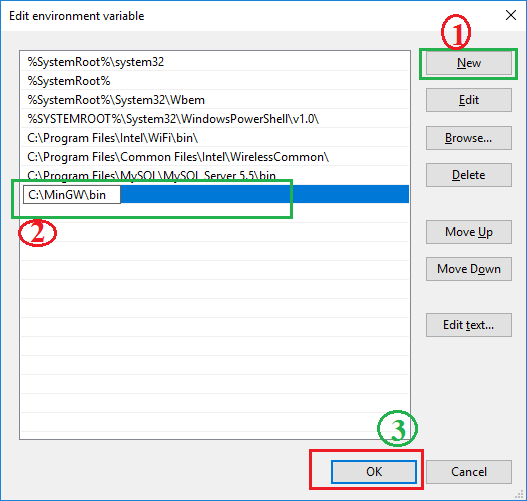
8. Similarly, click the OK button to the Environment Variables and System Properties. 9. If we want to check that the MinGW has been successfully installed in the system: go to the Command Prompt or cmd, write the gcc -version, and press the Enter 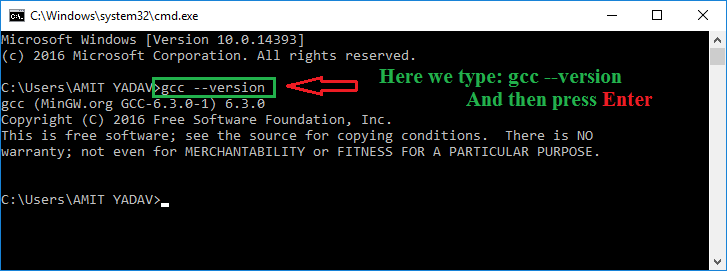
Start Coding in the Visual Studio Code Editor1. Here we created a C Program folder to store all program code. We can create a folder with any name in any directory. 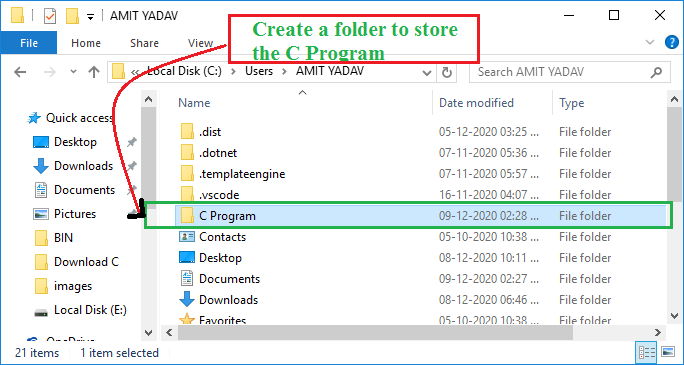
2. Go to the VS Code and click on the Add Folder. 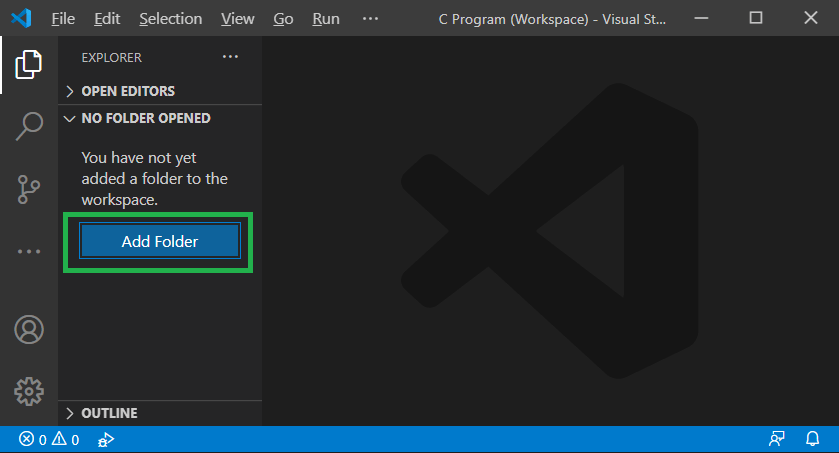
3. As we click on the Add Folder, it shows a popup dialog box to select the folder to store the program. 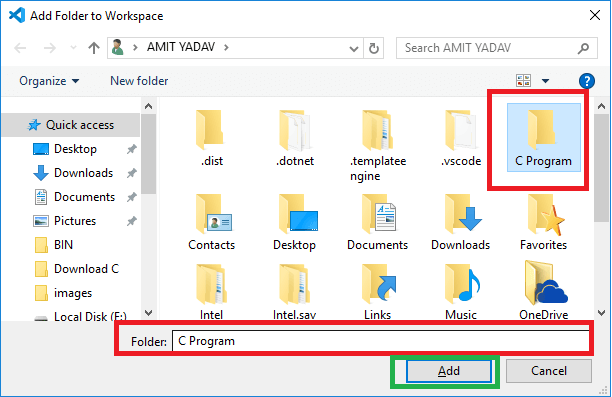
4. After selecting the folder, click on the Add The selected folder appears in the explorer section, as we have shown below. 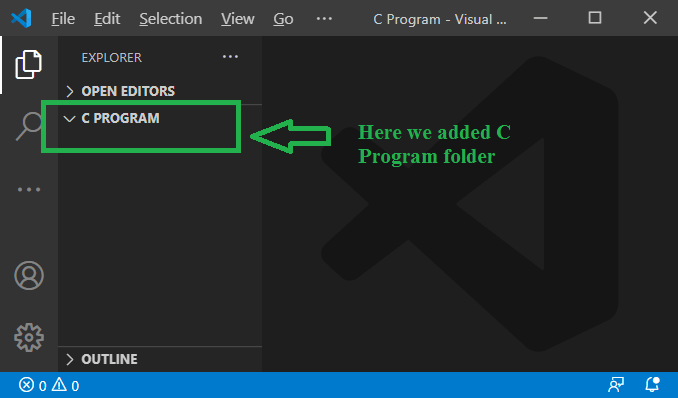
5. Move the mouse over the C PROGRAM folder; it shows a + Click on the button and write the file name as JavaTpoint.c, as shown below. 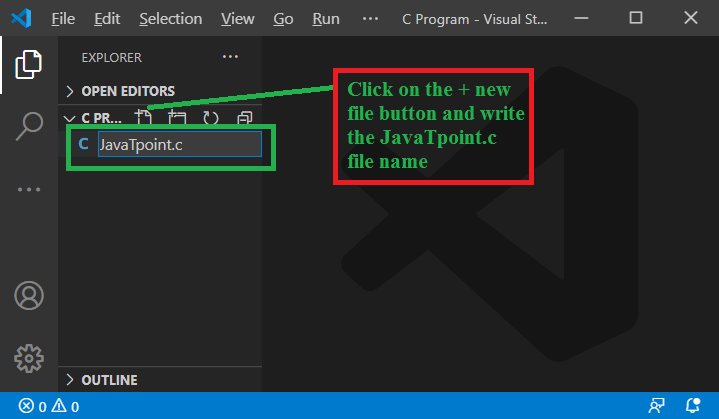
Now write and understand simple C programming in the VS Code editor. JavaTpoint.c 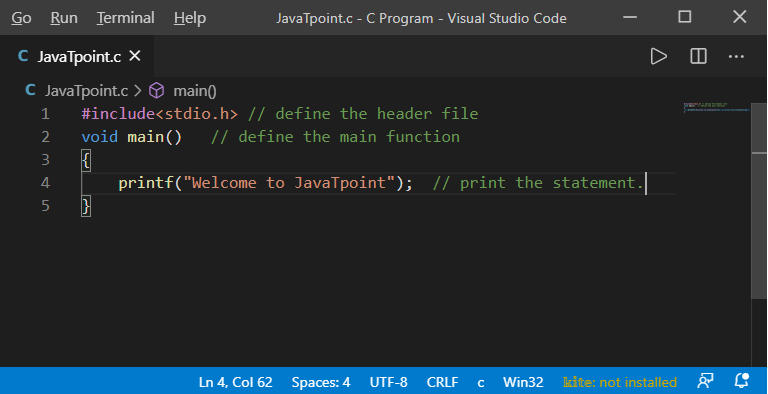
After writing the code, right-click on the program, as shown below. 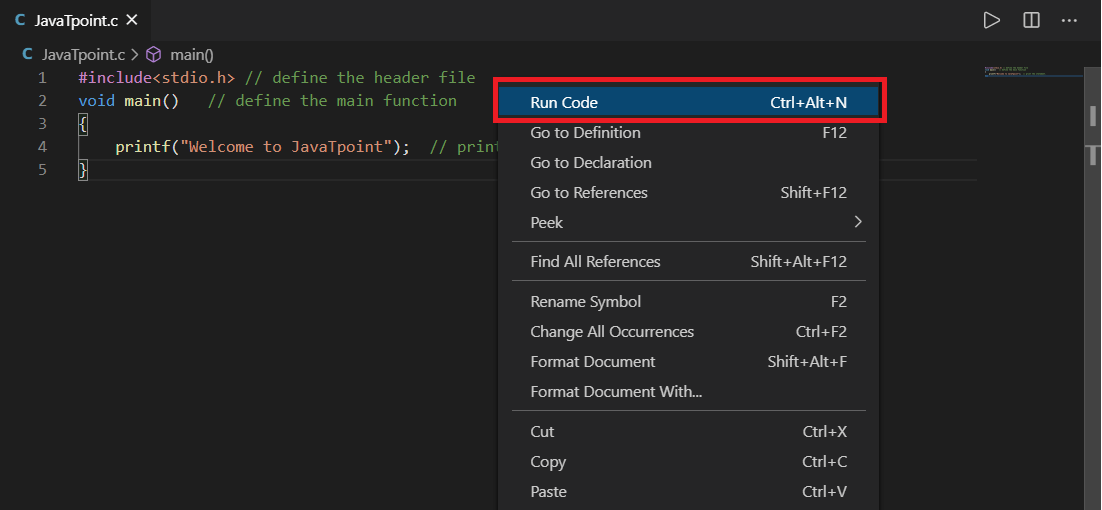
Click on the Run Code option or press Ctrl + Alt + N from the button. It shows the following output. Let's write a program to calculate the area and perimeter of the rectangle in the VS Code editor. Rectangle.c We can click on the Run button or press the Ctrl + Alt + N from the keyboard. It displays the below output. 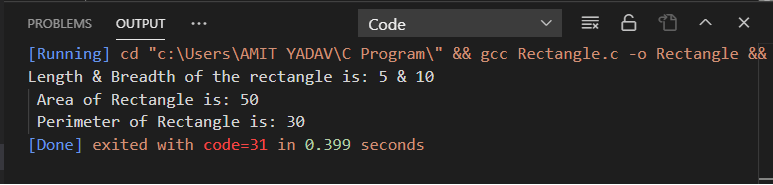
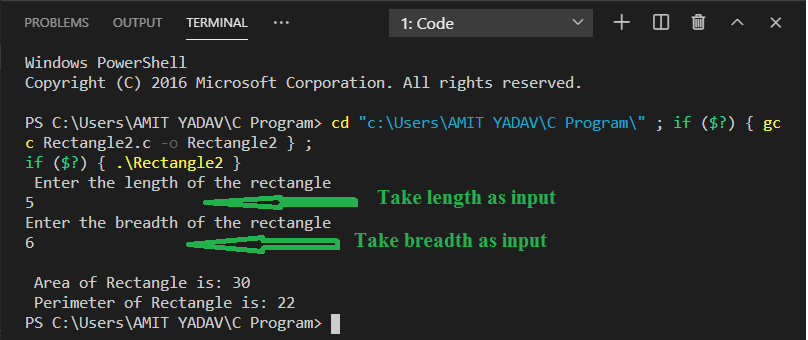
Let's write another C program to take an input from the user in the Visual Studio Code Editor. Rectangle2.c When we click on the Run button or press the Ctrl + Alt + N, it displays the below output. In the above program, we take length and breadth as input from the keyboard. As the program is compiled, it produces the below statement. 
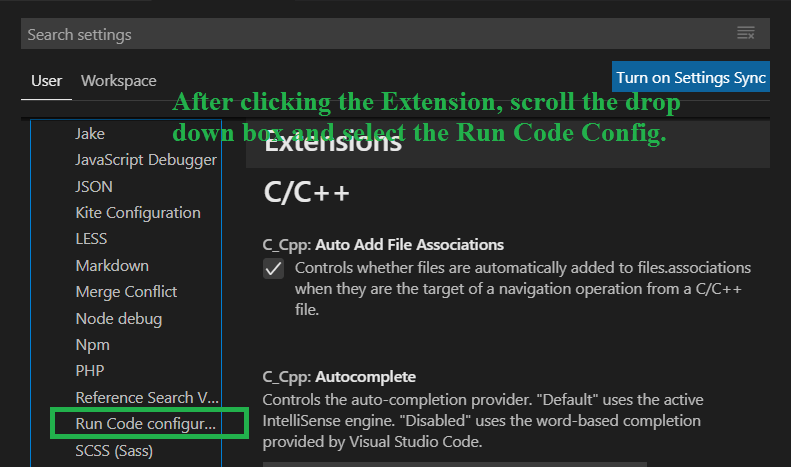
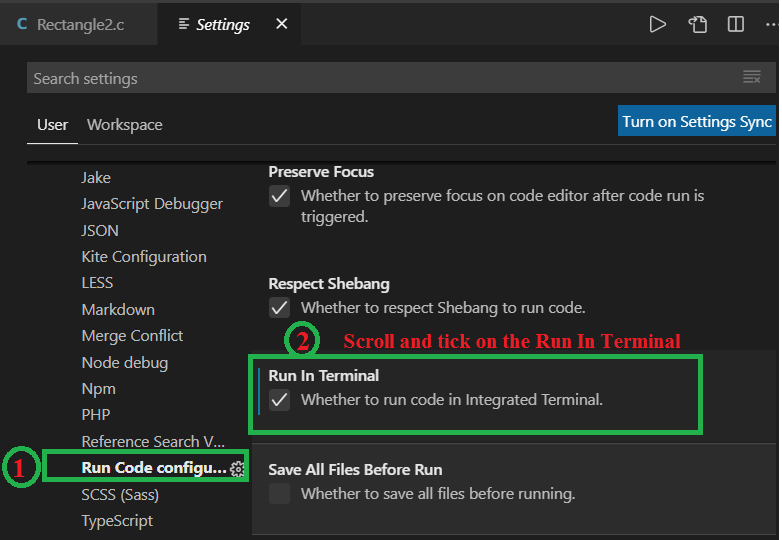
Here Output tab is read-only, and hence we cannot take any input from the user. So, we need to add some steps in the code editor to take user inputs from the console/user. Following are the steps to take input from the user.
Next TopicModulus Operator in C/C++
|
 For Videos Join Our Youtube Channel: Join Now
Feedback
- Send your Feedback to [email protected]
Help Others, Please Share


