| |

How to change margins in WordMargins are the blank area around your word document. Margin can be adjusted at the top, bottom, right, and left of your document. Note: In Microsoft Word, each page has set a one-inch margin automatically.There are the following steps to change margin in Word document - Step 1: Open the Word document in which you want to set the margin. Step 2: Go to the Page Layout tab on the ribbon and click on the Margins option in the page Set up group. 
Step 3: A list of margins appears on the screen. Select margin according to your requirement. 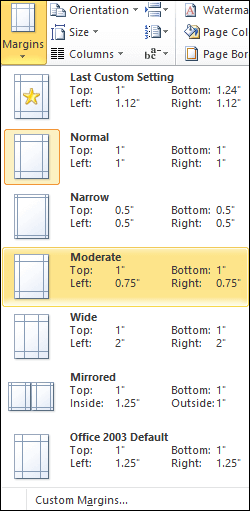
Now, you can see that your selected margin is applied to your word document. Create a custom marginIn Microsoft Word, You can also create a custom margin based on your own requirement. There are the following steps to create a custom margin in Word - Step 1: Open the Word document. Step 2: Go to the Page Layout tab on the ribbon and click on the Margins in the page set up group.M Step 3: A margins window appears on the screen. Click on the custom margins at the bottom of the screen. 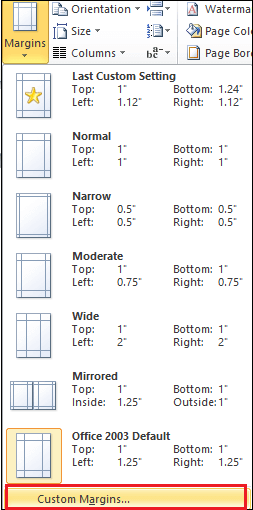
Step 4: A page set up window appears on the screen with the selectedmargin tab. Under the margin, select margin based on your requirement and click on the OK button at the screen's bottom. 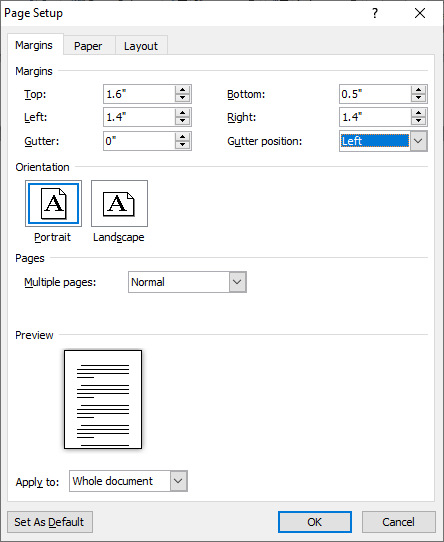
Step 5: The following pop up window appears on the screen. Click on the Fix button. 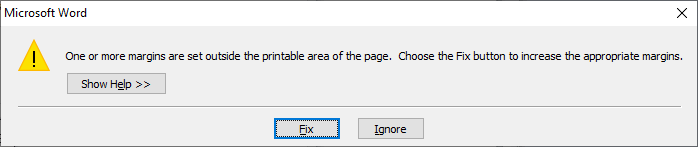
Step 6: Again, click on the OK button at the page setup menu.
Next TopicHow to create a hanging indent in Word
|
 For Videos Join Our Youtube Channel: Join Now
Feedback
- Send your Feedback to [email protected]
Help Others, Please Share


