How to insert a header and footer in Microsoft Word documentIn Microsoft Word, Headers and Footers are used to insert additional information such as title, file name, date, page numbers, etc. The presence of both header and footer in the Word document makes your document more professional and easier to read as well as understand. Headers appear at the top margin of the Word document, while Footers appear at the bottom margin of the Word document. To insert a header and footer in Microsoft Word, follow the below given basic steps - Step 1: Open the new or an existing Word document in which you want to insert header and footer. Step 2: Go to the Insert tab at the top of the Ribbon. Step 3: Click on either header or footer drop-down menu in the Header & Footer section. 
Note: In our case, we are going to use Header drop-down option.Step 4: A Header or Footer drop-down menu will display on the screen with a list of built-in Header or Footer options. Select your desired option from the Built-in list. Note: In our case, we select the Blank option.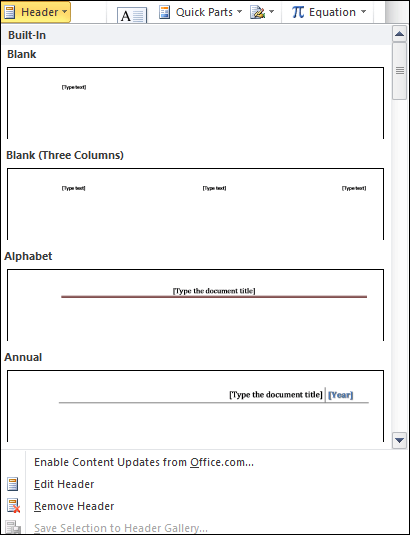
Step 5: A Design tab with Header & Footer option will appear at the top of the document (on the Ribbon), as shown in the below screenshot. 
Step 6: Type your desired information into the header or footer section. 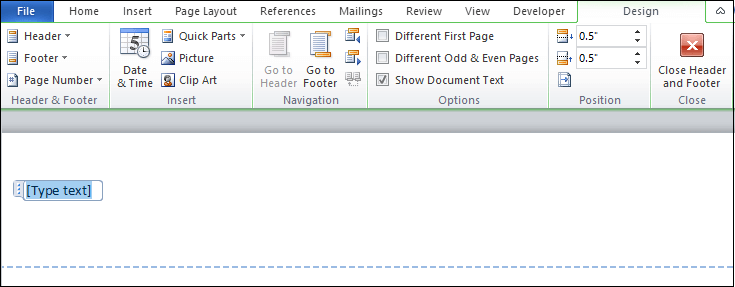
Step 7: Once you type your desired text in the Header section, click on Close Header and Footer under the Design section on the Ribbon or press the Esc key from the keyboard to remove the dotted underline. Now, you can see that the Header is inserted to the Word document. 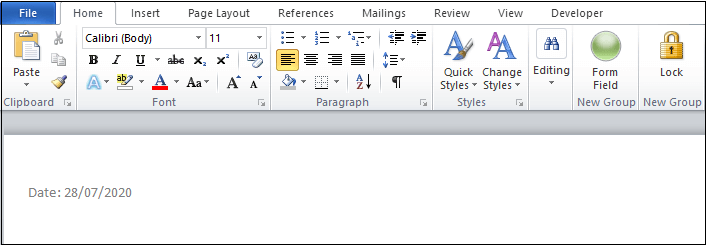
Insert the Date or Time in a Header or FooterTo insert the Date or Time in a Header or Footer, follow the below instructions - 1. Go to the Insert tab on the Ribbon and click on the Date & Time option in the Text section. 
2. A Date and Time dialog box will appear on the screen in which do the following -
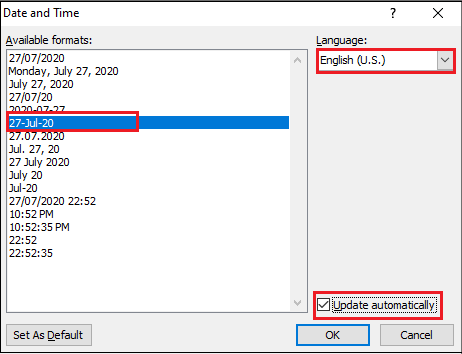
Now, you can see that your selected format will appear on the Word document. Edit Header and Footer in Word documentOnce you create Header and Footer in Word document, you can also edit it based on your requirement. There are the following steps to edit Header and Footer in Word document. Step 1: Go to the Insert tab on the Ribbon and click on either Header or Footer drop-down menu that you want to Edit. Note: In our case, we are going to edit a Header, so we select Header drop-down option.Step 2: A Built-In Header option window will appear on the screen. Click on the Edit Header option. 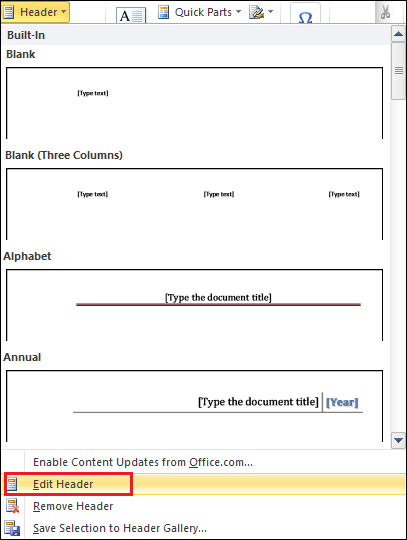
Step 3: Edit Header based on your requirement. Once you edit Header, click on the Close Header and Footer option at the top right corner of the document to disappear the blue dotted lines. 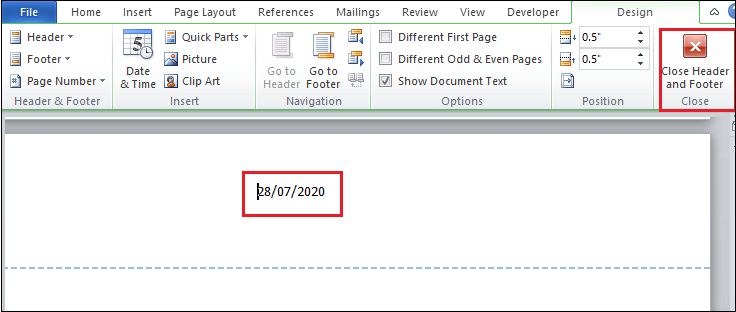
Now, you can see that Header is edit based on your requirement. 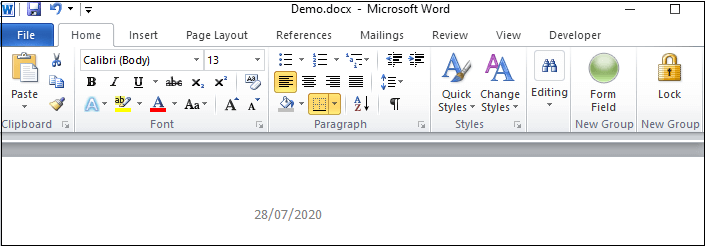
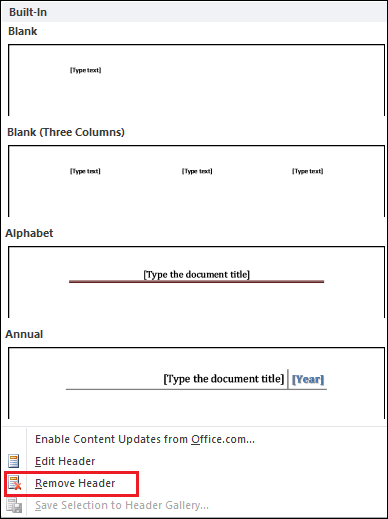
Delete Header and Footer from Word documentTo Delete Header and Footer from Word document, follow the below steps -
Next TopicTo Insert Table
|
 For Videos Join Our Youtube Channel: Join Now
Feedback
- Send your Feedback to [email protected]
Help Others, Please Share


