| |

How to create a hanging indent in WordIn Microsoft Word, the indent is used to adjust the margins in the Word document. Note: To create the indent in Microsoft Word, we need to enable the ruler.Enable RulerTo enable ruler, go to the View tab on the Ribbon and tick on the Ruler checkbox in the Show group. 
Now, you can see that ruler is added in the Word document. 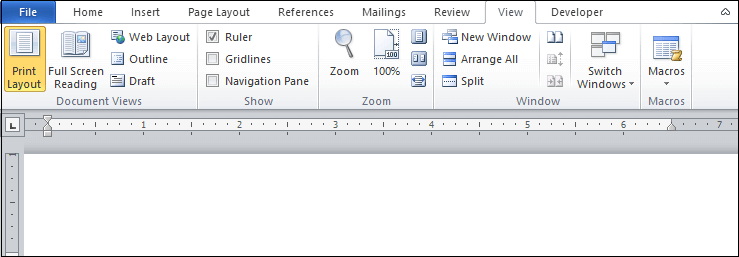
There are the following types of intent that you can use in Microsoft Word: 1. Hanging IndentHanging indent is also referred as a second line indent or hanging paragraph. It allows you to change the paragraph's remaining lines without changing the first line of the paragraph. There are the following methods to create a hanging indent in a Word document - Method 1: Using Ruler bar 1. Open the Word document. 2. Place cursor in the paragraph where you want to create a hanging indent. 3. Go to the ruler bar and select the Hanging line indent, as shown in the below screenshot. 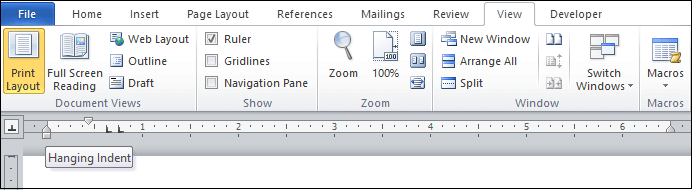
4. Move the cursor on Hanging indent ruler to adjust the paragraph. A dotted line appears on the screen. 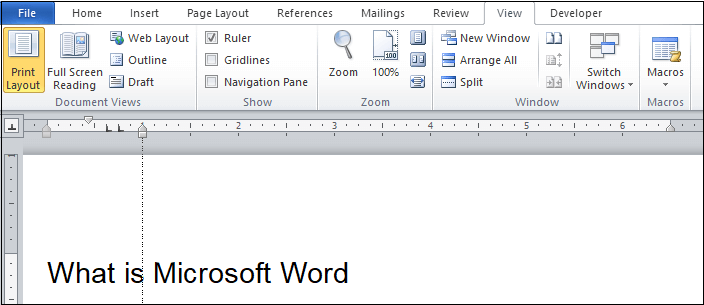
The below screenshot shows that a hanging indent ruler is created in the Word document. 
Method 2: Using the paragraph dialog box There are the following steps to create a hanging indent using paragraph dialog box- Step 1: Open the Word document. Step 2: Select the paragraph where you want to create a hanging indent. 
Step 3: Go to the Home tab on the Ribbon and click on the Show the Paragraph dialog box in the Paragraph group. 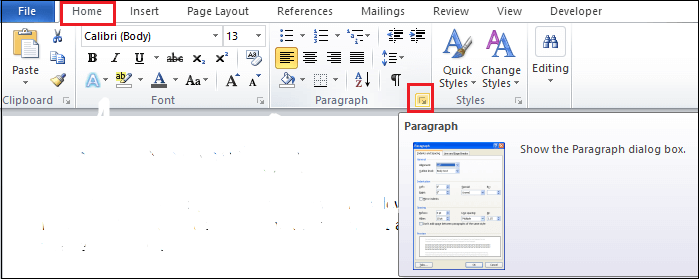
Step 4: A paragraph setting dialog box will appear on the screen in which select Hanging from the drop-down menu, select the depth of the indent using By option, and click on the OK button, as shown in the below screenshot. 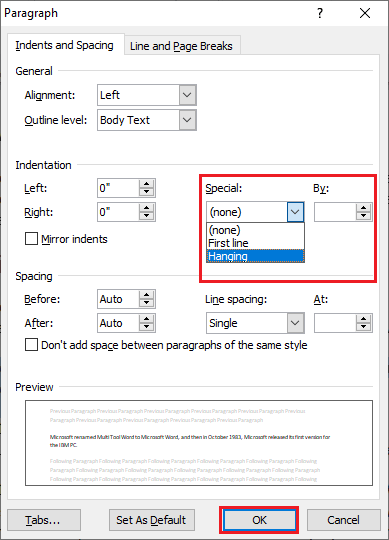
Note: By default, the depth of indent is 0.5.The screenshot below shows that the hanging indent is created in the Word document. 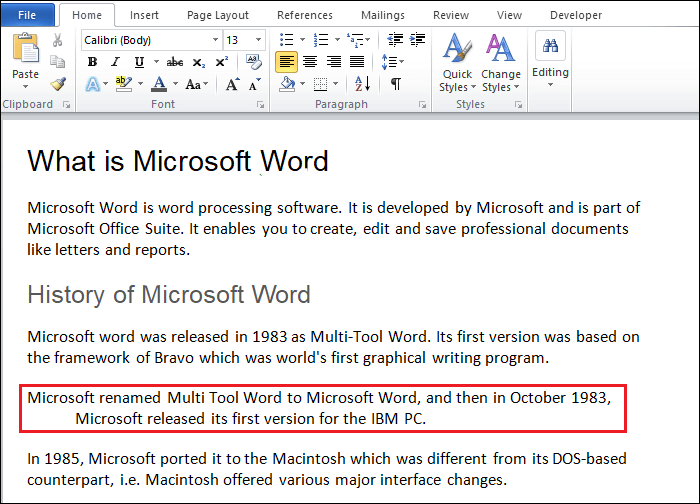
Method 3: Using Keyboard shortcut key It is the easiest method to create a hanging indent in Word document. Place the cursor on the paragraph where you want to create a hanging indent. 1. Press Ctrl + T key from the keyboard to increase the hanging indent of a paragraph. 2. Press Ctrl + Shift + T key from the keyboard to decrease the hanging indent of a paragraph. 2. First Line IndentFirst line indent is used to indent the only first line. Method 1: Using Ruler bar Follow the below steps to create first line indent using the ruler bar - Step 1: Place the cursor before the first line of your paragraph. Step 2: Go to the ruler and select the First line indent, as shown in the below screenshot. 
Step 3: Move your cursor left on the ruler. A dotted line will appear on the screen. 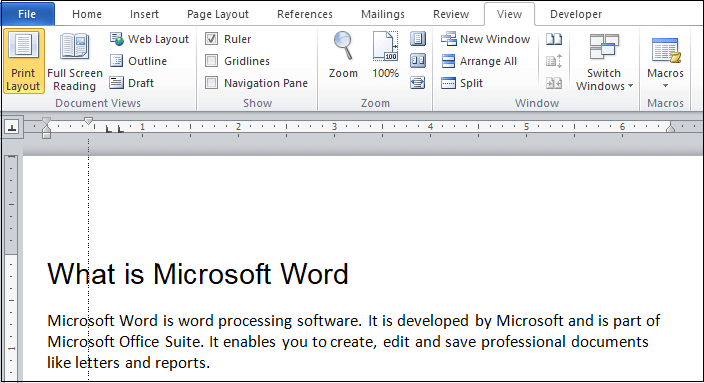
Now, you can see that First line intent is created in the Word document. 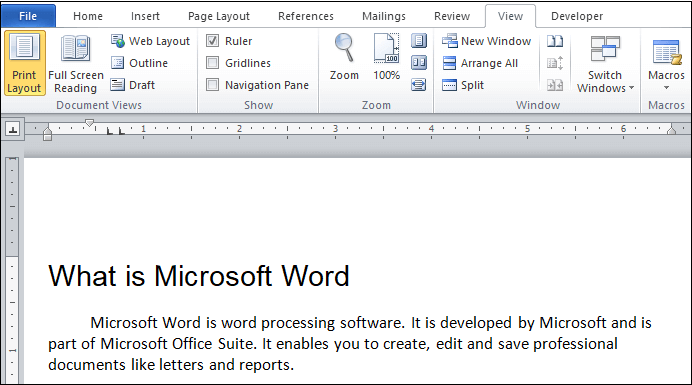
Method 2: Using the paragraph dialog box Note: Follow step 1 to step 4 mentioned in Create hanging indent using the paragraph dialog box.A paragraph setting window will appear on the screen in which select First Line from the drop-down menu, select the depth of the indent using By option, and click on the OK button, as shown in the below screenshot. 
The below screenshot shows that a First line indent is created in the Word document. 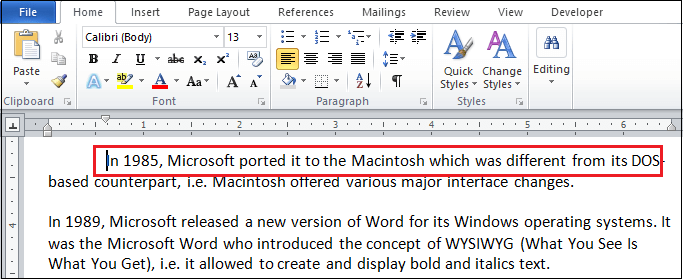
3. Left & Right indentsNote: Follow step 1 to step 4 mentioned in Create hanging indent using the paragraph dialog box.A Paragraph setting window appears on the screen.
Once you select the left or right indent value, click on the OK button at the bottom of the screen. 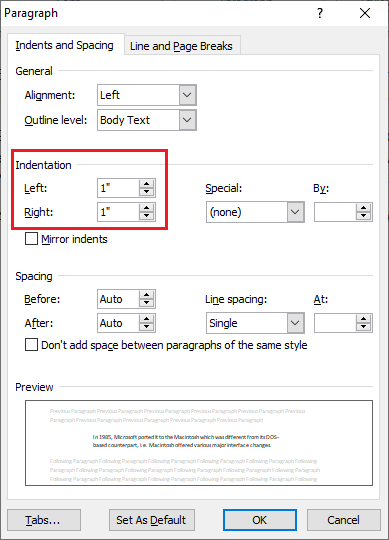
Remove IndentUsing Shortcut Key To remove the indent, you can press the Ctrl + Q key from the keyboard. Using the Paragraph dialog box Follow the below steps to remove the indent using paragraph dialog box - Step 1: Open the Word document. Step 2: Select the paragraph from which you want to remove indent. Step 3: Go to the Home tab on the Ribbon and click on the Show the Paragraph dialog box in the Paragraph group. Step 4: A paragraph setting window will appear on the screen. Select None from the drop-down menu and click on the OK button, as shown in the below screenshot. 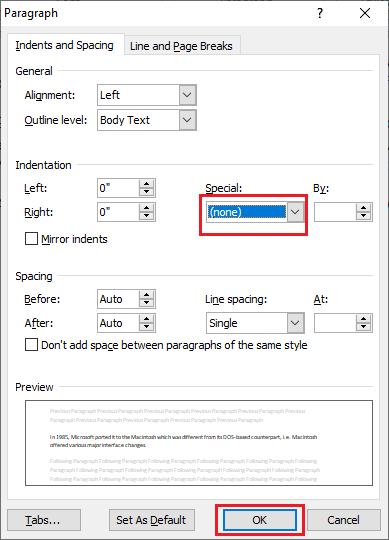
Now, you can see that indent is removed from the Word document.
Next TopicHow to enable Spell Check in Word
|
 For Videos Join Our Youtube Channel: Join Now
Feedback
- Send your Feedback to [email protected]
Help Others, Please Share


