How to create a logo in wordLogo is a graphic mark or symbol which is made up of stylized texts, shapes, images, or combinations of the three. It is used to identify the company, organization, product, or brands. A well-designed logo helps you to establish a connection with your target audience and invites them to interact with your brand. Components of a logoA well designed and attractive logo contains the following components - 1. Colors The combination of attractive colors used in the logo to attracts the audience to your brand and enhances your brand communication. In the logo, you can use black, white, or multicolor based on your requirement. 2. Typography Typography is one of the most important components of the logo. It is a craft that tells customers what you are offering to the audience. 3. Images In the logo, the image can be an icon or a symbol. It helps users to clearly identify the brand. 4. Tagline Tagline is used under a logo. It is a sentence or catchphrases that easily clarify your audience that what your brand does. 5. Text Text is the most commonly used component in the logo. Always try to add stylish and unique text in the logo. Create a logo in Word documentMicrosoft Word provides various stylish texts as well as shapes to create pretty and good looking logos. There are the following methods to create a logo in Word document - Method 1: Create a simple logoThere are the following steps to create a logo in Word document using shapes and text box - Step 1: Open the new Word document or an existing Word document. Step 2: Go to the View tab on the Ribbon and click on the Gridlines checkbox in the Show group. 
Step 3: Go to Insert tab on the Ribbon and click on the Shapes option in the Illustrations group. 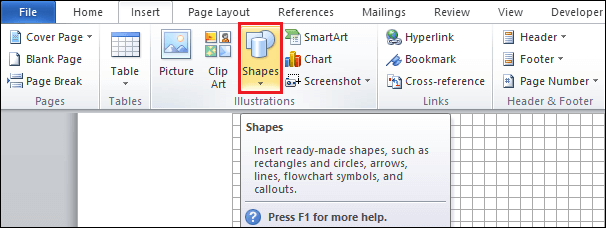
Step 4: A recently used shape dialog box will appear on the screen. Select the shape that you want to add and drag it into your current document. 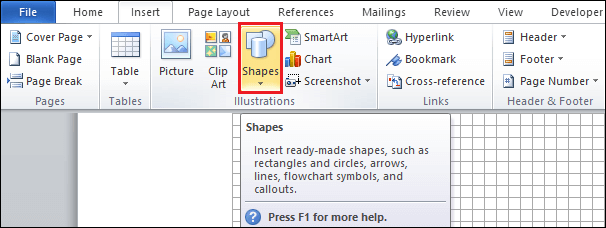
Step 5: Once you drag the shape in the document, a Format tab automatically appears on the screen. Click on the Shape Fill option under the Shape Style, A Theme color window appears in which select the color that you want to apply in the logo. 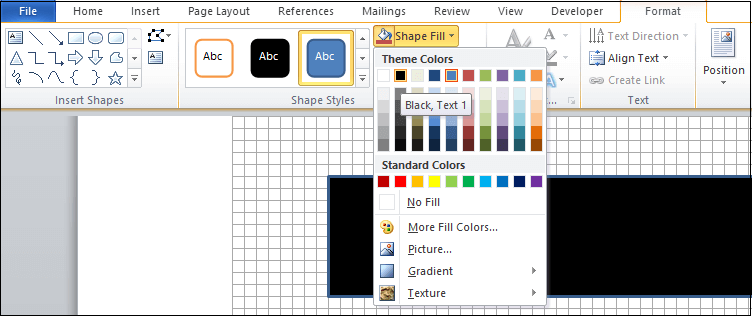
Step 6: To add text in the logo, go to Insert tab on the Ribbon and click on the Text Box icon in the Text group. 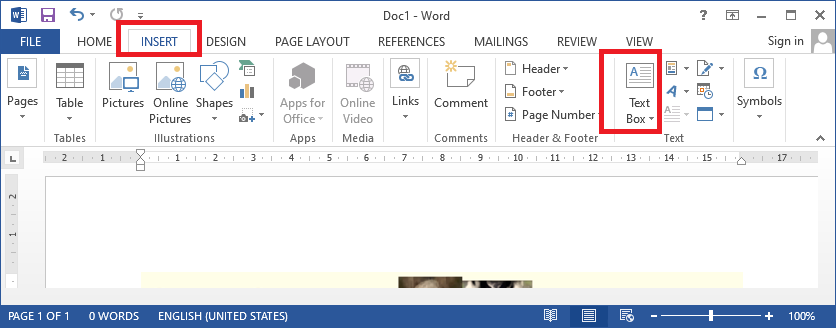
Step 7: The following window will appear on the screen in which click on the Draw Text Box at the bottom of the screen. 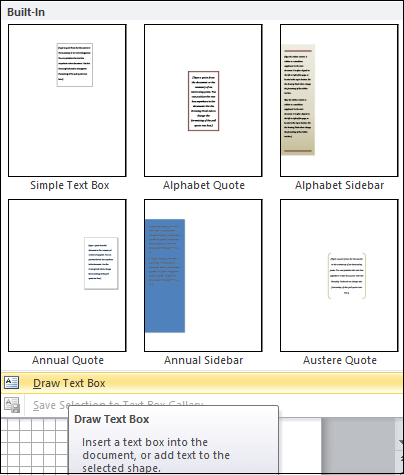
Step 8: Draw a text box inside your shape and start writing the text that you want to add to the logo. 
Step 9: Highlight the text and go to the Home tab on the Ribbon. Select the theme font and size that you want to apply to the text. 
Step 10: Once your logo is created, go to View tab on the Ribbon and uncheck the gridlines check button. The screenshot below shows that a simple logo is created in the Word document. 
Method 2: Create an attractive logo in Word documentAn attractive logo includes Shapes, Outlines, WordArt, Colors, and Images to grab customer's attention. Microsoft Word 2007 and its latest versions contain various drawing tools on the Ribbon that help you to create an attractive logo. To create an attractive logo in Word document, follow the below-mentioned steps - Step 1: Open the new blank Word document. Step 2: Insert Shapes
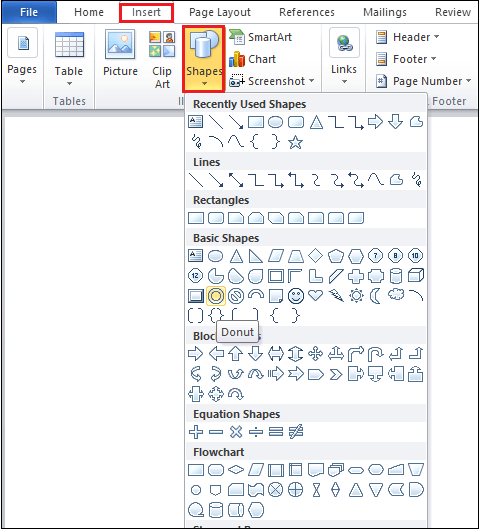
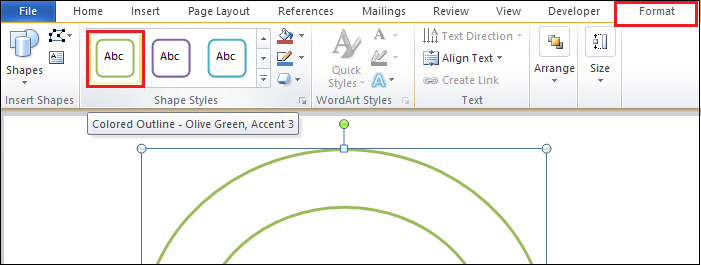
Step 3: Change the Outline
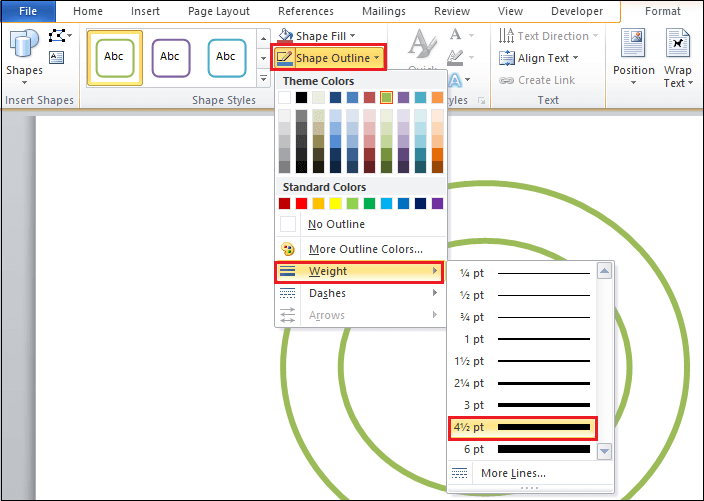
Step 4: Change outline weight
Step 5: Insert Word Art in logo Follow the below instructions to insert WordArt in Word 2010 - 1. To insert Word Art in the logo, go to the File tab on the Ribbon and click on the Save As option. 
2. A Save as dialog box appears, click on the drop-down icon associated with the Save as type, and select Word 97-2003 Template (*.dot) from the drop- down menu. 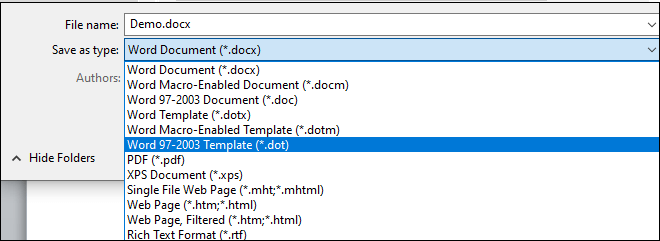
3. The following screen will appear on the screen, click on the Continue button. 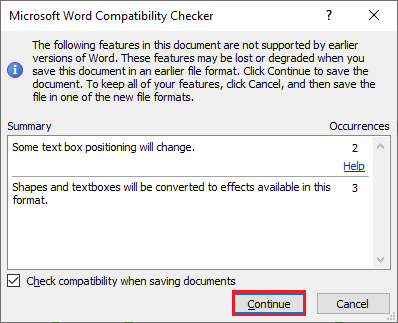
4. Now, go to the Insert tab and click on the WordArt icon under the Text group. 
5. A WordArt dialog box appears, select WordArt according to your requirement. 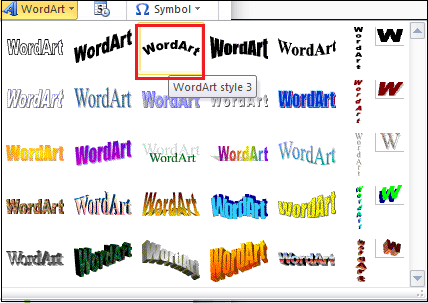
6. An Edit WordArt Text window appears, enter the text that you want to apply and click on the OK button at the bottom of the screen. 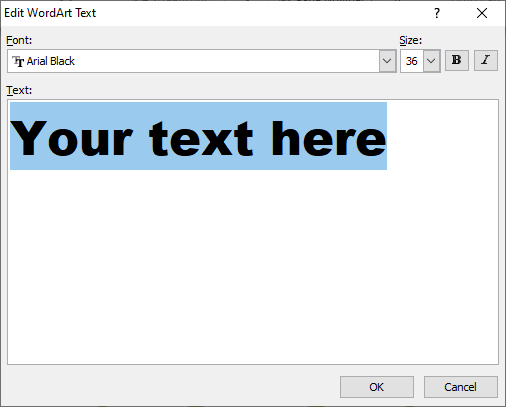
7. Click on the text, go to the Format tab, and click on the Wrap Text icon. A drop-down menu appears in which click on the In Front of Text. 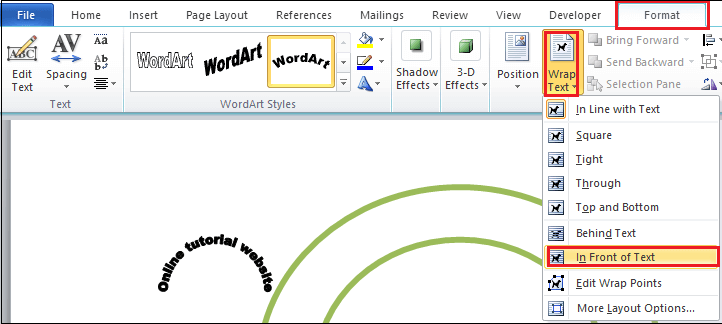
8. Adjust the text according to your requirement. The screenshot below shows that WordArt is added to the logo. 
Step 6: Insert Pictures in the logo Microsoft allows you to add pictures to the logo. Follow the below instructions to insert a picture in the logo. 1. Go to the Insert tab on the Ribbon and click on the Clip Art in the Illustration section. 
2. A Clip Art dialog box will appear at the right corner of the document. Type the name of the image in the Search for: textbox and click on the Go button. A list of related images appears in the dialog box. Select the image that you want to insert in the logo and drag it into the document. 
3. Click on the image. Go to the Format tab and click on the Wrap text. A Wrap text drop-down menu appears, click on the In Front of Text, as shown in the below screenshot. 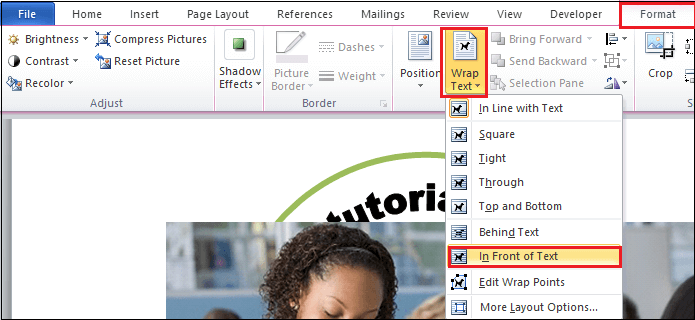
4. Adjust the image based on your shape. 5. The screenshot below shows that the image is inserted in the logo. 
Step 7: Add Colors in the logo In Microsoft Word, you can add colors in the logo to make the logo more attractive and beautiful. 1. Select the shape in which you want to add color. 2. Go to the Format tab and select color in the Shape Styles. 
The screenshot below shows that color is added to the logo. 
Note: You can adjust the size of the logo based on your requirement. |
 For Videos Join Our Youtube Channel: Join Now
Feedback
- Send your Feedback to [email protected]
Help Others, Please Share


