| |

How to insert a calendar in Word documentA calendar is a table, chart, device, or system which is used to show the numbers of days, weeks, months, and events in a particular year. To insert a calendar in Microsoft Word, follow the below mentioned easiest and quickest methods. Method 1: Using Word TemplatesFollow the below easiest steps to insert a calendar in Word document using Word Templates - Step 1: Open the new or existing Word document. Step 2: Go to the File tab at the top left corner of the document. A list of File options will appear on the screen. Click on the New. 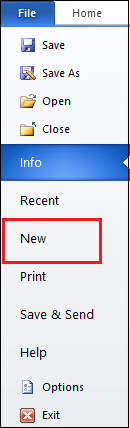
Step 3: An Available Template window will appear on the screen in which search the Calendars. Once you find the Calendars, click on it. 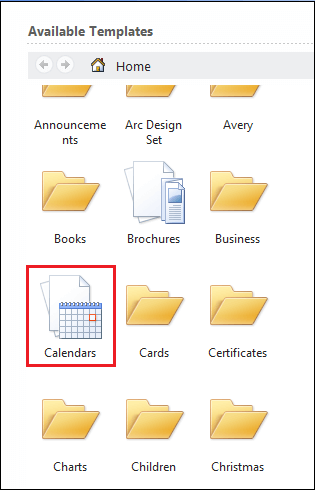
Step 4: A list of available templates will appear on the screen. Select the calendar according to your requirement. 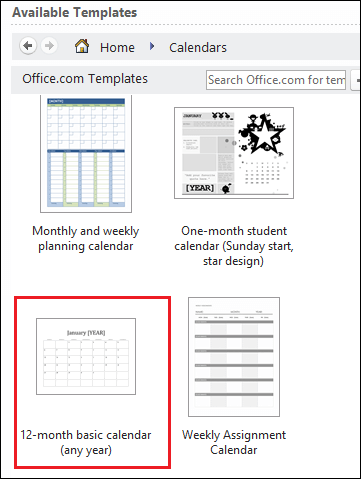
Step 5: Once you select your desired calendar, Click on the Download button. 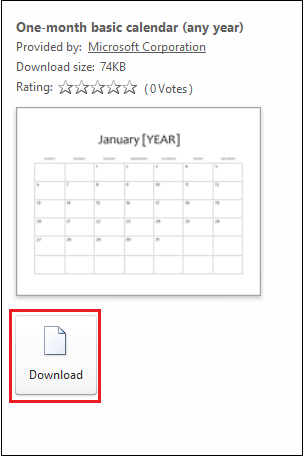
The screenshot below shows that a calendar is inserted to the Word document. 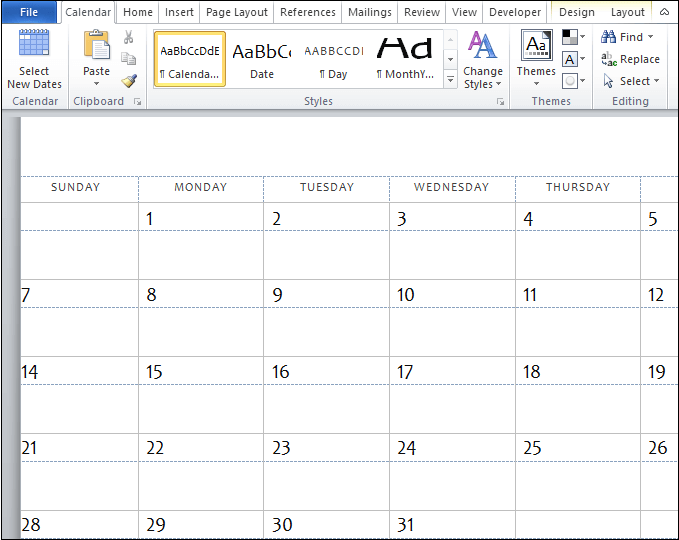
Method 2: Using Quick table optionIn Microsoft Word, you can also create a calendar manually using the below easiest steps - Step 1: Open the new Word document. Step 2: Place cursor in the document where you want to create a calendar. Step 3: Go to the Insert tab on the Ribbon and click on the Table option in the Tables section. 
Step 4: An Insert Tabel dialog box will appear on the screen. Click on the Quick tables. 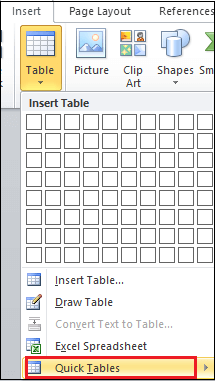
Step 5: A Buil- in window appears on the screen. Select a calendar according to your requirement. 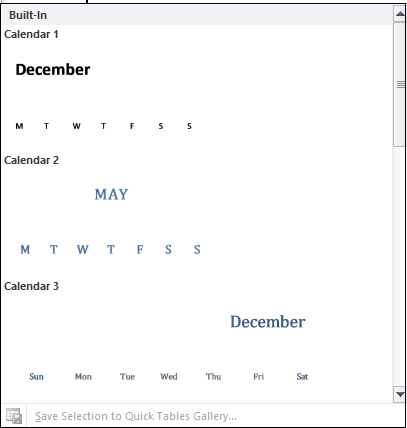

The screenshot below shows that the calendar is inserted to the Word document. 
Method 3: Create a calendar manuallyThere are the following steps to create a calendar manually in the Word document - Step 1: Open the new or existing Word document where you want to insert a calendar. Step 2: Go to the Insert tab on the Ribbon. An Insert toolbar window will open below the Ribbon. Click on the Table option in the Tables section. 
Step 3: An Insert Table dialog box will appear on the screen. Select the number of rows and columns based on your requirement and press the Enter key from the keyboard. Note: In our case, we are going to a seven by five (7*5) size table to create a calendar.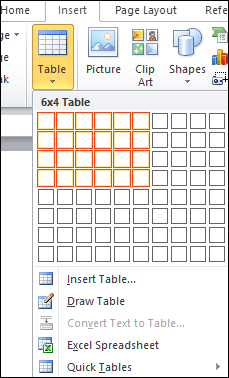
Step 4: At the top of the row, enter the names of days of the week, such as Sun, Mon, Tue, Wed, and so on. Expand the calender's all boxes to make the perfect shape of your calendar. To see the initial layout of the calendar, consider the below screenshot. 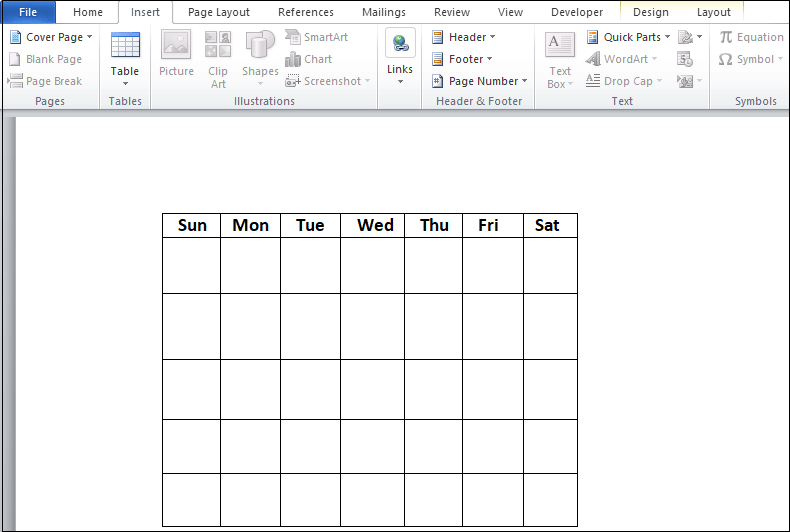
Step 5: Start adding the numbers in the box from which the first day of your month starts. To add numbers in the calendar, you can use the number keys from the keyboard. 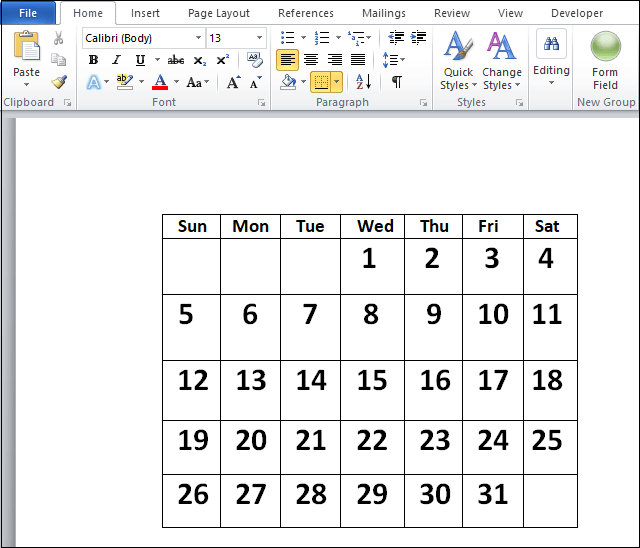
Step 6: Once you create your calendar successfully, you can save it in your desired location. Sava a calendarTo save the calendar, go to the File tab at the left corner of the screen. A list of File options will appear on the screen. Click on the Save As button. 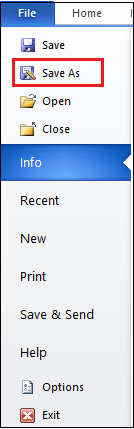
A save as dialog box appears, browse the location where you want to save the file. Once you find the location click on the Save button at the bottom of the screen. Now, you can see that your calendar is saved in your desired location. |
 For Videos Join Our Youtube Channel: Join Now
Feedback
- Send your Feedback to [email protected]
Help Others, Please Share


