| |

Blinking multiple LEDs using switch caseHere, we will discuss a project to turn ON one led from multiple LEDs based on the value in the variable. Let's start with the project. Hardware RequiredThe components required for the project are listed below:
We can use any color LED as per our choice. PrincipleWe will connect the four LEDs to pins 12, 11, 8, and 6 of the Arduino board. The resistors of 220 Ohm are connected in series with the LEDs. The switch statement will compare the declared value of a variable with statements in other cases. The code associated with the matching case will run. We will also change or rearrange the LEDs connected to the specified pin number on the board. Structure of the projectThe structure clearly shows the UNO board's pinout, and the four LEDs with resistors in series are connected to the board. It is shown below: 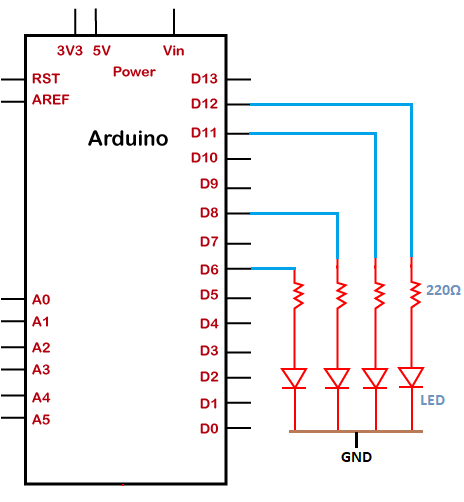
ConnectionThe connection of the above project is discussed below:
SketchConsider the below code: In the above code, the specified value of variable matches with case 3. Hence, the LED connected to pin number 11 will light up. Connection DiagramWe will show the connection using the Simulator because the connections become clearer and more precise. We can make the same connection using the hardware devices. 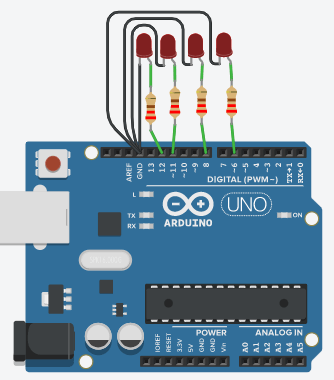
Output The LED connected to the PIN 11 will light up, as shown below: 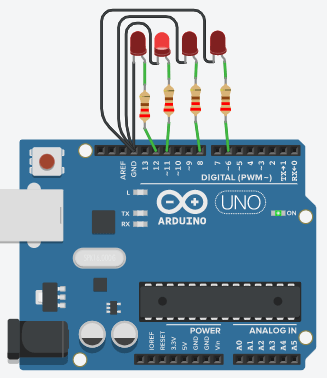
Next TopicArduino Simulator
|
 For Videos Join Our Youtube Channel: Join Now
Feedback
- Send your Feedback to [email protected]
Help Others, Please Share


