| |

Arduino switch caseThe switch case controls the flow of the program by executing the code in various cases. A switch statement compares a particular value of a variable with statements in other cases. When the statements in a case matches the value of a variable, the code associated with that case executes. The break keyword is used at the end of each case. For example, if there are five cases, the break statements will also be five. The break statement exits the switch case. The switch statement without a break will continue to execute all the cases until the end. Hence, it is essential to include a break statement at the end of each case. Let's understand with an example. where, variable: It includes the variables whose value will be compared with the multiple cases value: It consists of a value to compare. These values are constants. The allowed data types are int and char. Flowchart of the switch caseConsider the below flowchart: 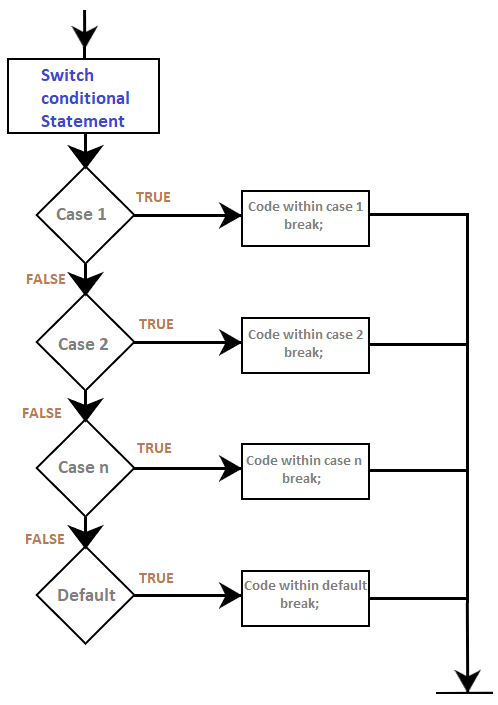
Can we use the if statement instead of a switch case? Yes. But for some cases, implementing a switch case is somewhat easier than if statements. It is recommended to use switch cases instead of if statement when multiple conditions of a non-trivial expression are being compared. The if statement allows us to choose between the two options, TRUE or FALSE. We can also use multiple if statements for more than two cases. The switch case allows us to choose between various discrete options. Code ExampleWe will include the switch case in the setup() function, as we do not require the repeated execution. Consider the below code: Output: 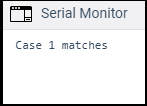
Next TopicArduino string
|
 For Videos Join Our Youtube Channel: Join Now
Feedback
- Send your Feedback to [email protected]
Help Others, Please Share


