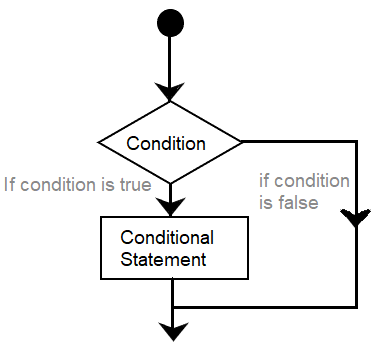
Arduino If statementThe if ( ) statement is the conditional statement, which is the basis for all types of programming languages. If the condition in the code is true, the corresponding task or function is performed accordingly. It returns one value if the condition in a program is true. It further returns another value if the condition is false. It means that if ( ) statement checks for the condition and then executes a statement or a set of statements. Let's understand the concept with the help of a flow chart. 
It clearly explains the process of execution of a statement. If the condition is False, it comes out of the if ( ) statement. If the condition is true, the function is performed. The if ( ) statement is written as: Here, condition = It includes the boolean expressions, that can be true or false. We can also use one or more operators inside the parentheses. The comparison operators that can be used as a condition inside the parentheses are listed below:
where, a and b are the variables. Code ExamplesLet's understand with the help of two coding examples. Example 1: Consider the below code. Output: a is greater than b The code shows the initialization of values to the two variables a and b. In this example, the first condition is True. Hence the corresponding information is printed. Example 2: Consider the below code. The example is of two LEDs. In the above example, we have initialized the value of x. Since the value of x is less than 100, the second condition is true. Hence, LED2 will light up. If the value of x is greater than 100, LED1 will light. Similarly, we can use the if statement according to our requirements. Note: We should be careful while using the = (equal) sign.
|
 For Videos Join Our Youtube Channel: Join Now
Feedback
- Send your Feedback to [email protected]
Help Others, Please Share


