| |

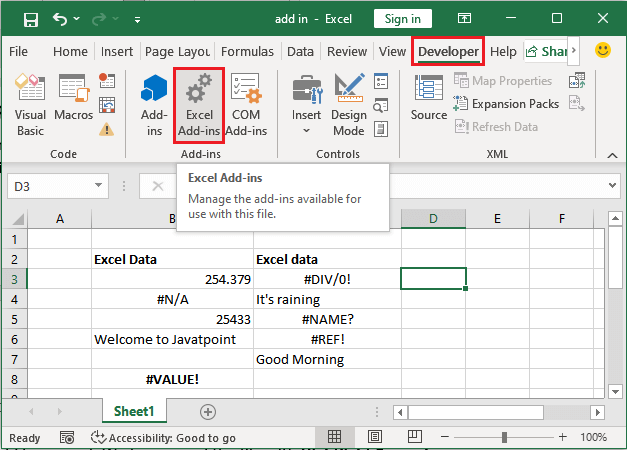
Excel add-insExcel add-ins enable the extra features for MS Excel users. Add-ins enhance the Excel functionality that is not directly available to Excel users by adding them in MS Excel across different platforms, including Windows, Mac, Linux operating systems. Add-ins enable those features that MS Excel does not directly offer and users also need them rarely. Whenever the users need it, they can activate, install, and use them. Excel users have to perform some extra steps to activate an add-in. Add-ins are optional, you can use them by installing if you need them. This chapter will discuss the Excel add-ins and how & when you can use them with your Excel application. What are Excel add-ins?Add-ins are additional features of Excel that are not immediately available to Excel users. The users have to activate them manually when they need. Excel offers some prebuilt add-ins and you can also create custom add-ins. Besides them, some website also offers downloadable Excel add-ins. Add-ins are also called plugins. They provide additional features to Excel users. An example of prebuilt Excel add-in to like Analysis ToolPak and some can be download from the Download center. These add-ins are designed by a third party. Category of add-insYou can put the Excel add-ins in three different categories - Learn these categories in detail. 1. Excel prebuilt add-insMS Excel offers prebuilt add-ins, but they are not activated by default. You have to manually activate these add-ins when you need to use them. They come with the MS Excel application when you install it in your system. You don't need to explicitly download these add-ins. Excel prebuilt add-ins are - Analysis ToolPak and Solver. Analysis ToolPak is used when the user requires to do complex analysis of Excel data. Follow the topic Activate prebuilt Excel Add-in in this chapter below to activate the prebuild add-ins to your Excel application. 2. Downloadable add-insSome add-ins are not available on MS Excel applications in offline mode. So, you have to manually download them from the internet and then activate them for your MS Excel application. These Excel add-ins are also available on the internet. You have to download and then activate to use them. They do not come with MS Excel. These add-ins are also available on official site of MS Excel and several other websites also offer to Excel users. Follow the topic Download and activate Add-in in this chapter below to activate the prebuild add-ins to your Excel application. 3. Custom add-insSometimes, custom add-ins are designed by the developers and solution providers themselves to provide the solution according to user requirements. These custom add-ins like custom Component Object Model (COM), VBA add-ins, automation add-ins, or XLL add-ins. You also have to install the custom add-ins to use them. Follow the topic Create a custom Add-in in this chapter below to activate the prebuild add-ins to your Excel application. Activate prebuilt Excel add-innExcel has some prebuilt add-ins which are disabled by default as they are not usually needed. Sometimes, Excel users have the requirement of these add-ins. Excel allows its users to activate the prebuilt add-ins at any time. Analysis ToolPak is one of the prebuilt add-ins of Excel. Analysis ToolPak is needed when the user requires to do complex analysis of Excel data. We will activate this add-in here in the below steps. Following are the steps to activate/enable this add-in. Step 1: Right-click on your Excel ribbon to customize it. 
Step 2: On the right side of the panel, click the Add-ins option to show the related options. 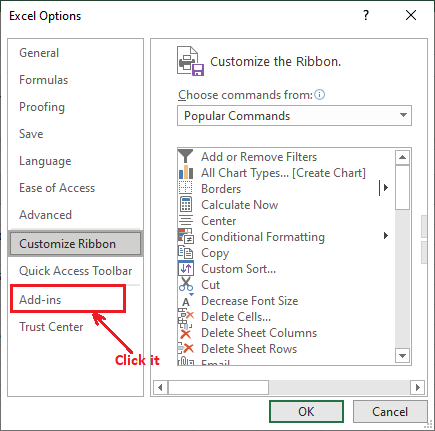
Step 3: Now, make sure Excel Add-ins are selected under the Manage dropdown list, then click the Go button. 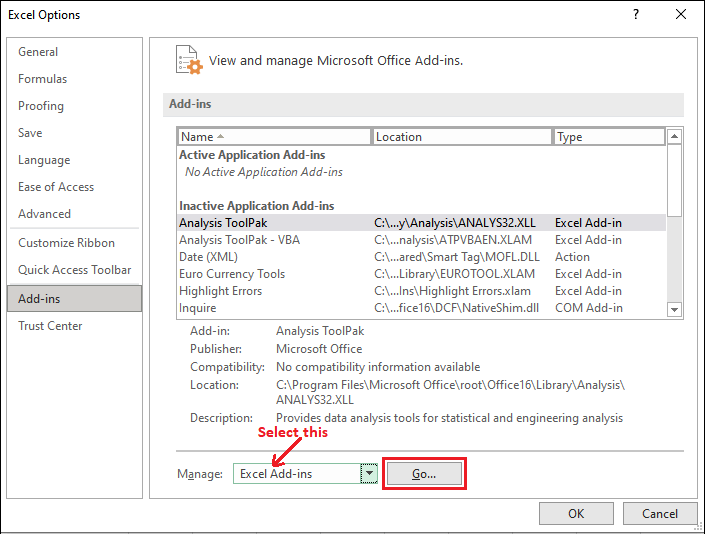
Step 4: Mark the Analysis ToolPak checkbox and click OK. This prebuilt add-in will insert inside the Data tab in the Excel ribbon. 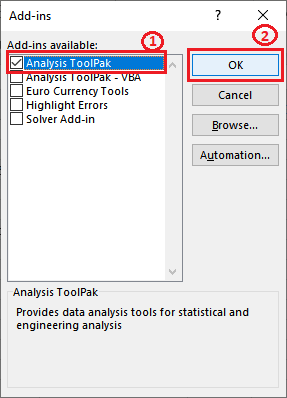
Step 4: Navigate to the Data tab and see that the Analysis ToolPak has been added to this tab in the end. 
Now, this add-in is available to use for complex data analysis. It is inserted for all the Excel workbooks. Download and activate Add-inWe have downloaded an Excel to JSON converter add-in for Excel to convert the Excel data to JSON format from the internet. This add-inn is not directly activated when we download it from internet, we have to load and activate it manually. It is available inside the Developer tab under Add-ins option. Follow the topic Download and activate Add-in in this chapter below to activate the prebuild add-ins to your Excel application. See the following steps to download and add an add-in to your MS Excel application. Step 1: Go to the Developer tab and click the Add-ins button here. 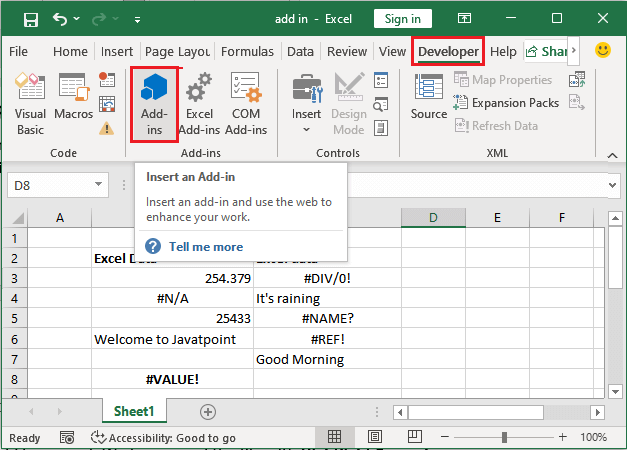
Step 2: You will see an Excel to JSON named add-in, click on it to select and then click Add. 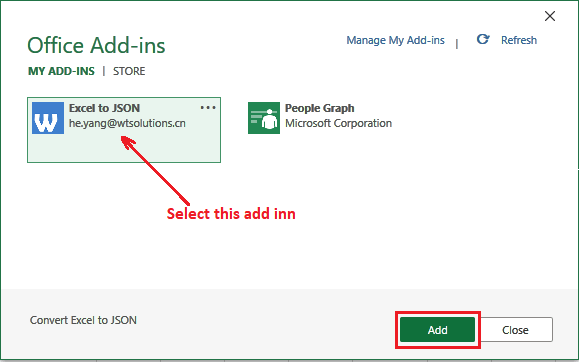
Step 3: A message like this will show you once the add-in loads to Excel. 
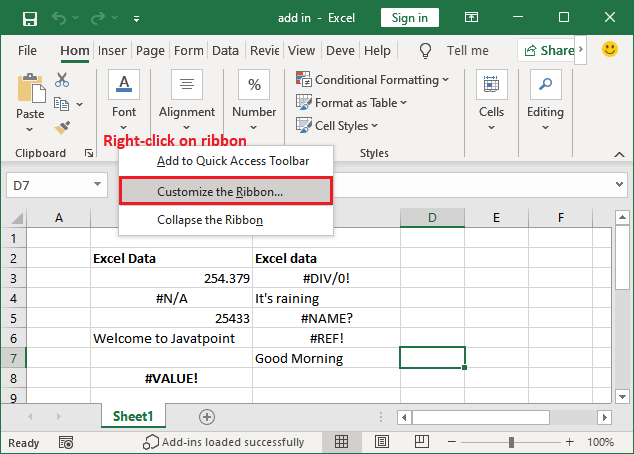
Note: Excel automatically creates a new tab for the downloaded add-in when the add-in is loaded to the Excel application. But you have to add it to the ribbon manually.Step 4: Customize your Excel ribbon if this downloaded add-in is not included in the Excel ribbon as a new tab or in the existing tab. (Right-click on the ribbon to customize the ribbon) 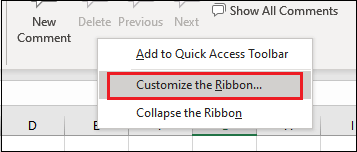
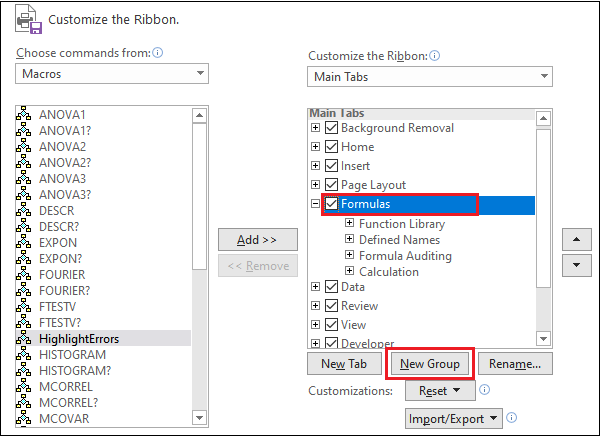
Step 5: Now, to include the downloaded add-in to the Excel ribbon, select Main Tabs inside the dropdown list. Then Choose Excel-to-JSON tab and click Add button. 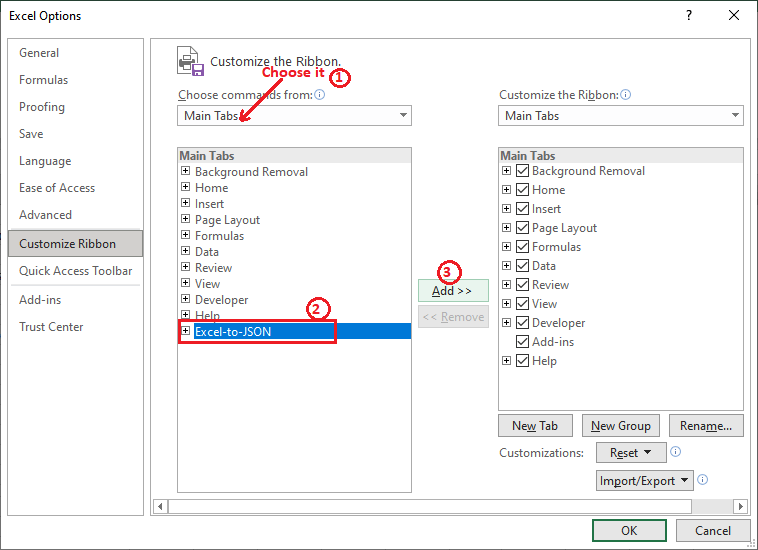
"By default, tab name is same as the add-inn name, i.e., Excel-to-JSON" Step 6: Your downloaded add-in is now added to the Excel ribbon in a new tab. Now, click OK to keep the changes. 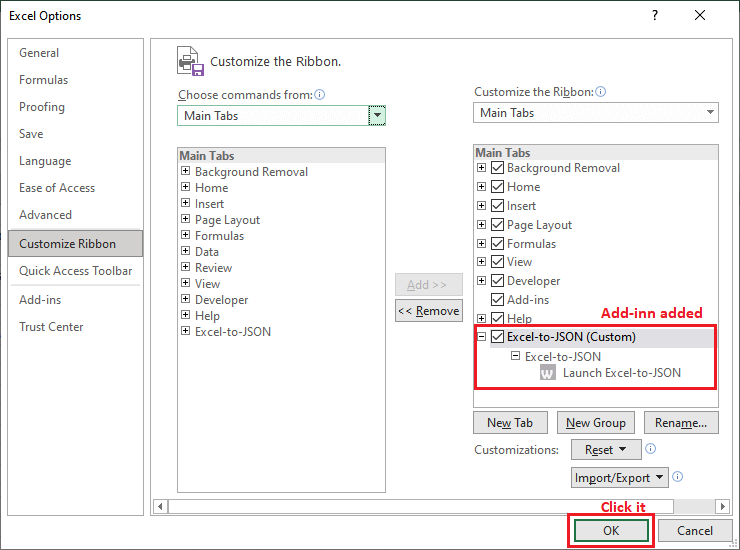
Step 7: Now, you can see that the Excel-to-JSON tab with Excel-to-JSON add-in is now added at the end of the Excel ribbon. 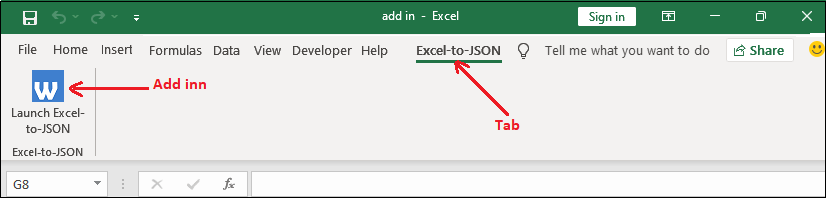
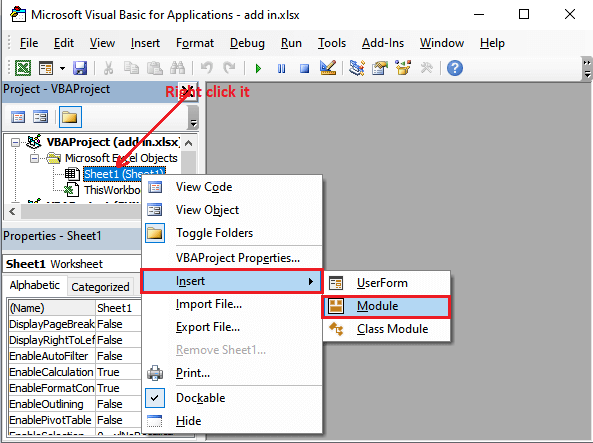
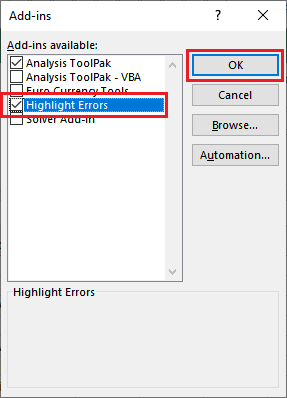
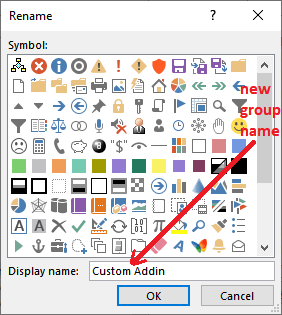
Similarly, you can download other add-ins available on the internet as per your requirement and activate them. Create a custom Add-inExcel allows the users to create custom add-ins by creating a macro. An Excel can be more useful when a user needs to run a macro in different workbooks. Suppose you have an Excel worksheet containing some data. It might also contain some errors. You want to highlight the cells that have an error. With the help of a custom add-in, you can do it very easily with a button click. Create an add-in using programming. You have to follow these three steps for it: Step 1: Write a code in VBA module
Sub HighlightErrors() Selection.SpecialCells(xlCellTypeFormulas, xErrors).Select Selection.Interior.Color = vbGreen End Sub 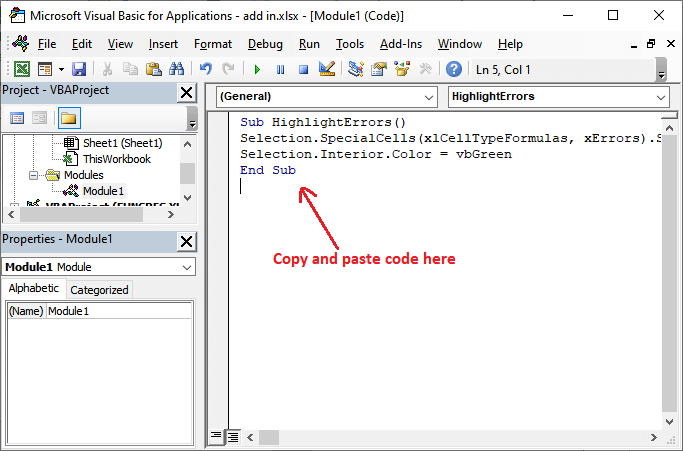
Press Alt+F11 to go back to the Excel worksheet. 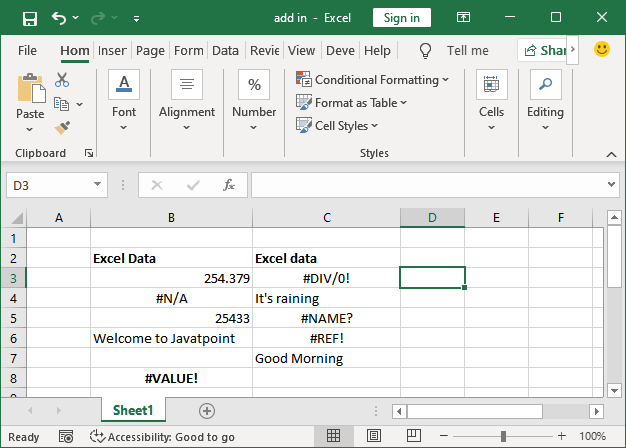
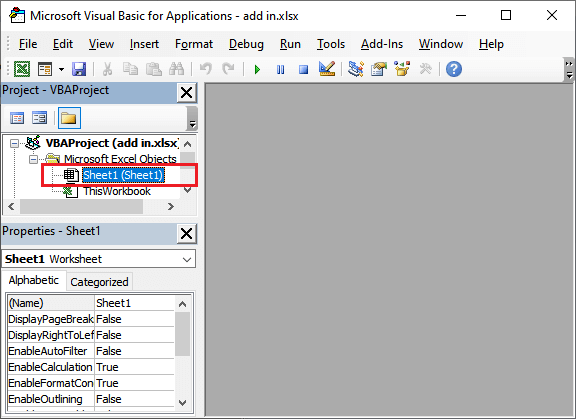
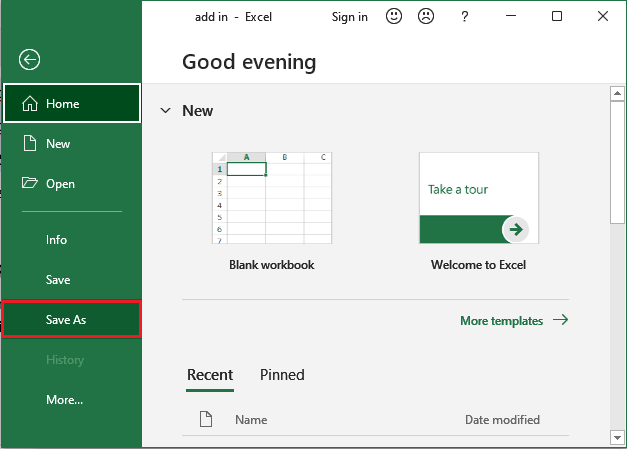
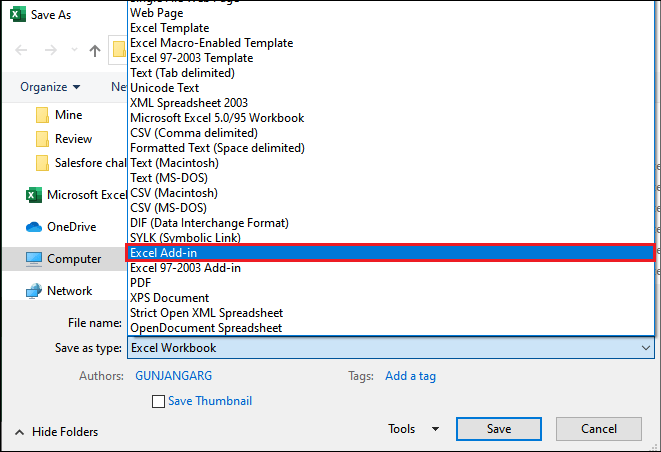
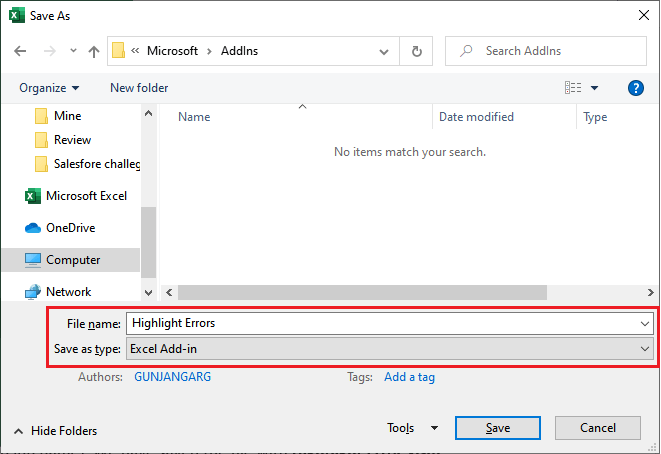
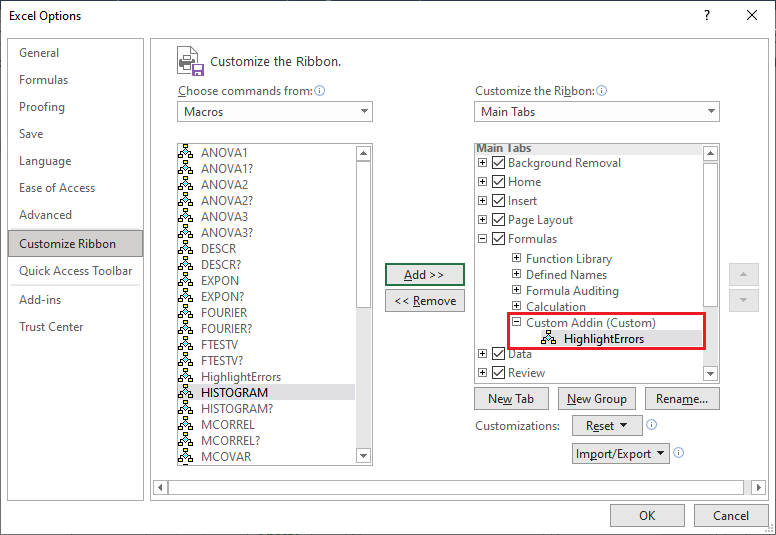
Step 2: Save and install add-inAfter successfully inserting the code, you have to save this code and then install the add-in.
This add-in is now available for your all Excel workbooks. Use this custom add-inn "HightlightErrors" to check and highlight errors with green color in the Excel worksheet.
Next TopicIF() in excel
|


 For Videos Join Our Youtube Channel: Join Now
Feedback
- Send your Feedback to [email protected]
Help Others, Please Share


