| |

Excel Wrap Text ShortcutMS Excel is currently the most powerful spreadsheet software with numerous functions and features. It allows users to enter vast amounts of data within the sheets and adjust the formatting using various built-in tools. It is essential to properly format the data in Excel sheets because it gives a neat and professional view of our excel data and makes it easier for others to read and understand. The Wrap Text feature in Excel is a specific formatting feature that helps arrange cells data. 
In this article, we discuss the various Excel Wrap Text shortcuts and step-by-step tutorials on using them. Before discussing the shortcuts, let us first introduce the wrap text feature in Excel. What is the Wrap Text feature in Excel?The Wrap Text feature in Excel is a part of formatting. It does not make changes in the value of any cell; however, it changes the way the value or texts are displayed in cells within the Excels sheet. It means the text formatted as a wrap text is still the same as when it wasn't formatted as a wrapped text. In simple words, when we enter texts or sentences in an Excel cell that exceeds the cell width, the text overflows to other adjacent cells. If the adjacent cell(s) has also text in it, the overflowing text will disappear, and the text that fits the cell width remains visible. Therefore, we use the Wrap Text feature, making the text visible within the cell width without overflowing on others. 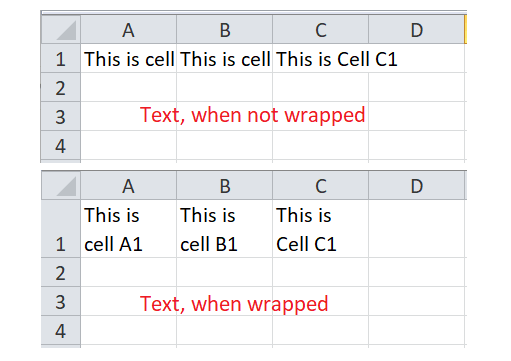
Wrap Text Shortcut in ExcelIn Excel, there are multiple ways to perform any specific tasks. Likewise, it also supports multiple shortcuts for an individual task. When it comes to using the wrap text shortcut in Excel, there are four significant ways, i.e.:
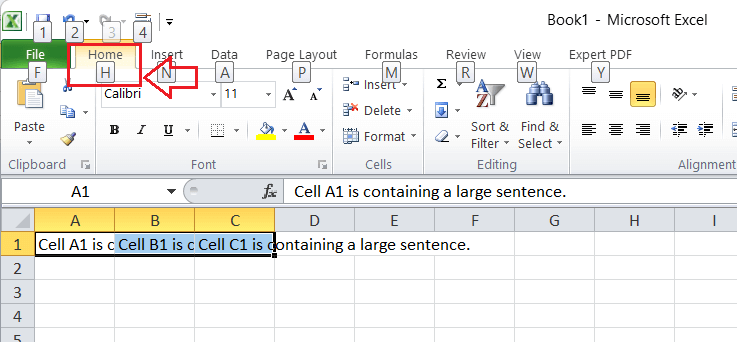
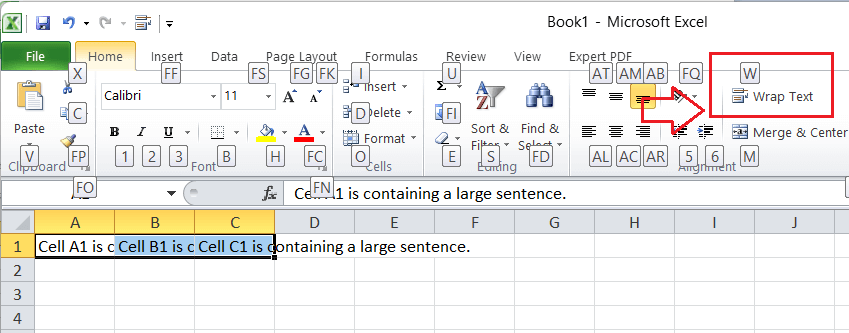
Let us discuss each method in detail; Wrap Text using the Keyboard ShortcutThe fastest way to perform any specific task in Excel is to use the keyboard shortcut. Excel has specific shortcut keys for almost every task. If there is no particular shortcut key for a specific task in Excel, the Alt shortcut method works most of the time. When using the wrap text feature, we don't have any definite shortcut keys in Excel. Thus, we need to use the Alt key method. According to this method, we first need to press and release the Alt key and then press the series of specific keys displayed or associated with the desired options on the screen. For using the Wrap Text feature using the keyboard shortcut, we need to press and release the Alt key and then press the key H and key W one by one. 
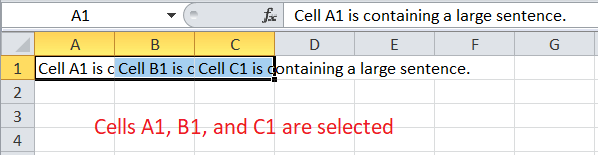
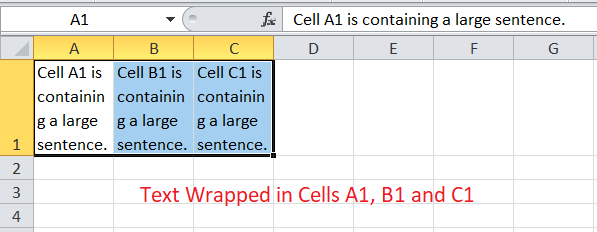
Let us try this shortcut key with example data: Steps to use Wrap Text Keyboard Shortcut Suppose we have the following Excel sheet where the A1, B1, and C1 cells contain comparatively lengthy sentences. It means the size of the sentence is relatively lengthier than the default width of the corresponding cells, as shown below: 
In the above image, the sentence in cells is not completely visible in all cells and looking inappropriate as overlapping on further cells. However, we can change the cells' formatting and make the text visible on the screen using the wrap text feature. To use the wrap text feature, we must perform the following steps:
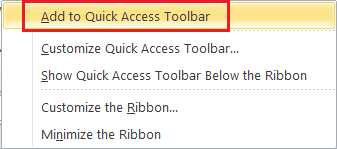
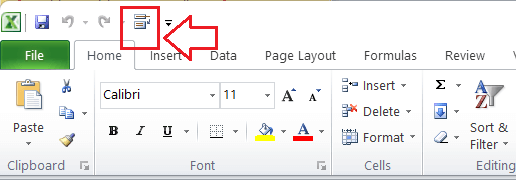
This way, we can wrap text in Excel using the keyboard shortcut Alt + H + W. Wrap Text using the Quick Access Toolbar ShortcutAnother method to quickly use the wrap text feature includes the shortcut of the 'Wrap Text' command directly from the Quick Access Toolbar (QAT). However, we need first to add this shortcut in QAT before we can start using it. Once added, we can use the 'Wrap Text' shortcut as many times as we want in any Excel window from the quick access toolbar. Adding a Wrap Text Shortcut in a Quick Access Toolbar
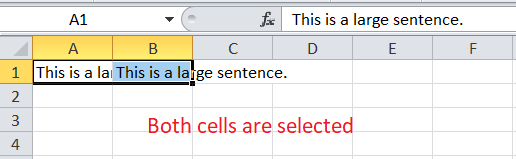
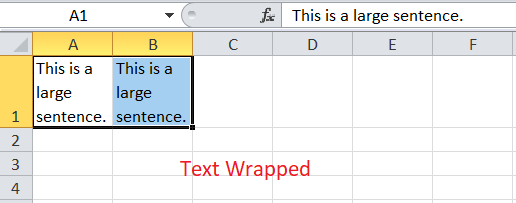
Steps to use Wrap Text Shortcut from QAT Once the wrap text shortcut has been added to the quick access toolbar, we need to click the shortcut to wrap text. However, we must select the desired cells in which we wish to wrap text, then only we need to click the corresponding shortcut from the QAT. Let us try this shortcut practically: Consider we have the following Excel sheet where the cells A1 and B1 have large sentences: 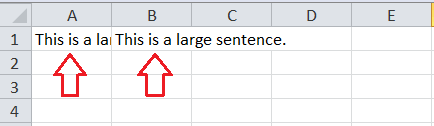
We need to perform the following steps to wrap text in our example Excel sheet:
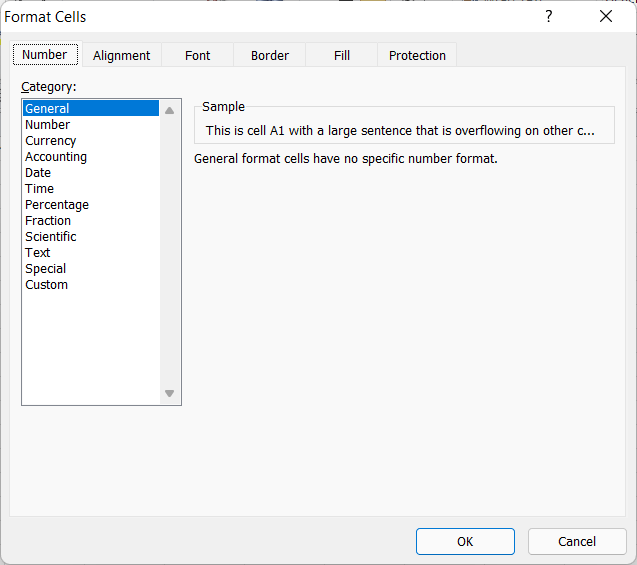
After using the steps, our example sheet looks like this: In the above image, we can see that the text is now wrapped so that it only remains within the cell width. However, the height of the cells is arranged. Wrap Text using the Format Cell ShortcutAnother quick shortcut to wrap text in Excel includes the use of the Format cell window. We can quickly launch the Format Cell window by using the shortcut Ctrl + 1. Then we can select the Wrap Text option from the window, and our selected data will be wrapped instantly. Consider the following Excel sheet where cell A1 has a long sentence, overflowing on further cells B1, C1, and so on. 
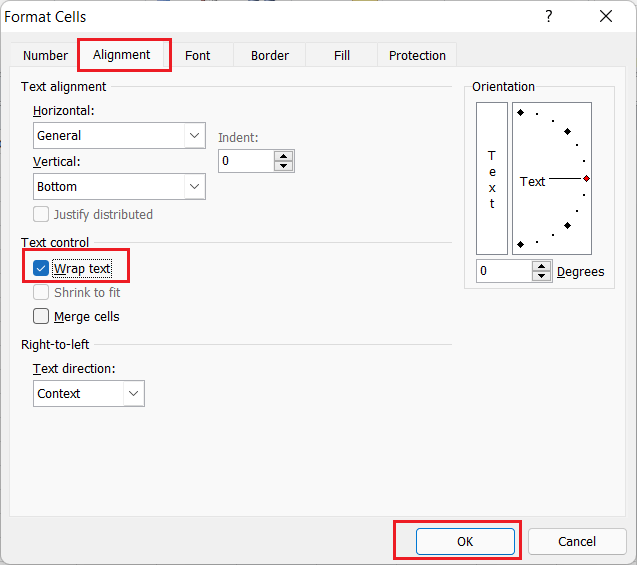
We need to perform the following steps to wrap text using the formatting cell shortcut:
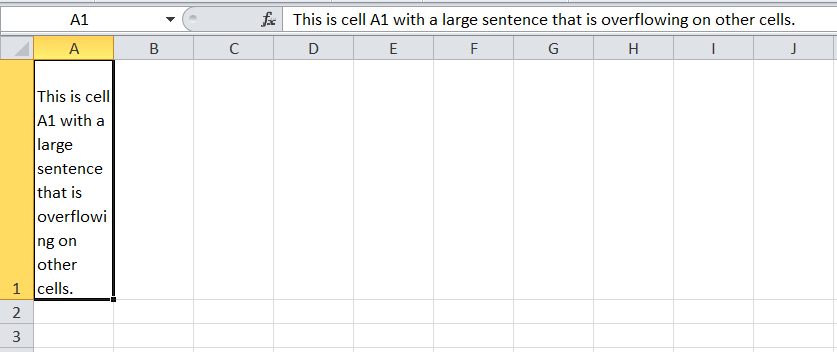
In the above example, we can see that the text has been wrapped. However, it is still not looking appropriate as some of the spelling (i.e., overflowing) are breaking or expanding in two lines. Thus, we must adjust the cell width by dragging the corresponding cell header and adjust the text accordingly. After we adjust a cell width in our example, it looks better: 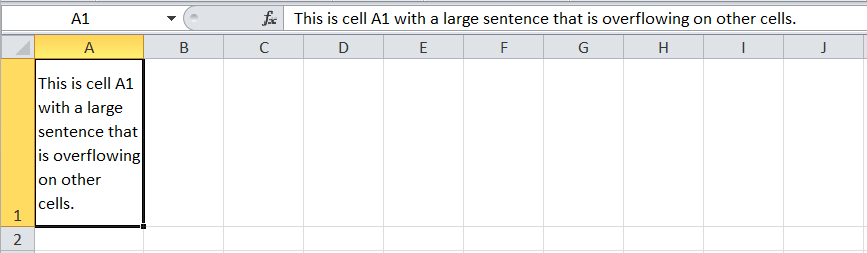
Wrap Text using the Shortcut from the RibbonUsing the shortcuts from the ribbon is a typical way of accessing the desired feature in Excel. To wrap text, we must first click the Home tab and then from there, select the option Wrap Text. Like the above methods, we need to select the desired cells in an Excel sheet before using the Wrap Text shortcut from the ribbon. 
Once all desired cells are selected, we can directly click the corresponding shortcut, and we will get the text wrapped up in no time. That is how we can wrap text in Excel sheets using the Excel Wrap Text Shortcuts. Adjusting the Row Height to adjust all wrapped textWhenever we wrap the text in Excel, the extra line is placed at the bottom of the first line in the cell. Because of this, we may not see the wrapped text completely, especially when the row height is less. In such cases, adjusting the height is the best solution. Although we can always adjust the row height manually by using the drag feature through the bottom edge of the desired row, the best solution is to use AutoFit Row Height. We can access this option by navigating the Home tab and then clicking the Format drop-down list, as shown in the following image: 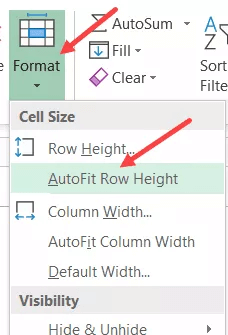
Before using the AutoFit Row Height, we must select all the cells in a cell that require height adjustments. Inserting a Line BreakExcel allows users to adjust the text breakpoint for each line within the wrapped data. Specifically, it helps start a new line of text at any desired point within the active cell. We can insert a line break in the desired cells and adjust the cells' text as per our needs. 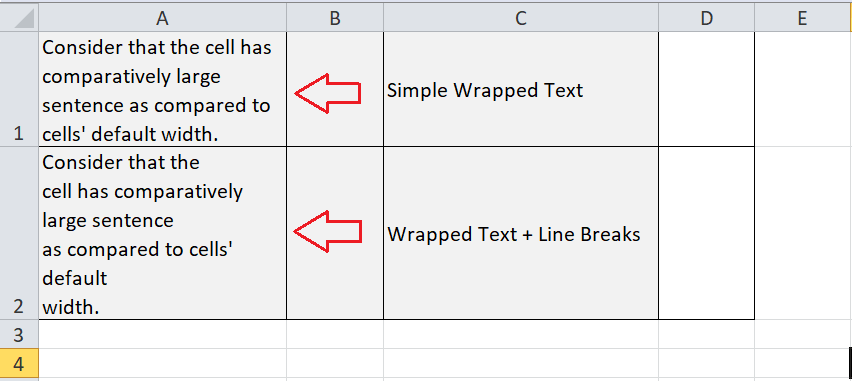
To insert a line break in a cell, we must perform the following two steps:
Next TopicUppercase Shortcut in Excel
|


 For Videos Join Our Youtube Channel: Join Now
Feedback
- Send your Feedback to [email protected]
Help Others, Please Share


