| |

How to Convert Columns to Rows in Excel?You store your information or data in various rows and columns. It can be a lot to keep track of. After incorrectly entering data, one of the most common mistakes is transposing columns and rows. Some people create Excel spreadsheets with the main fields horizontal. Others prefer the data vertically in columns. Sometimes these preferences lead to a scenario where you want to transpose Excel data. With Excel, the option of copy/paste the entries into the other place or start over would be wrong because it can paste all entries into the same row or same column. There's a really easy fix in the Paste Special menu that allows you to reverse your mistakes and columns to rows without starting over. If you have a worksheet with data in columns that you need to rotate to rearrange it in rows, use the Transpose feature. With it, you can quickly switch data from columns to rows, or vice versa. Transposing data in Excel is a task familiar to many users. You often build a complex table to realize that it makes perfect sense to rotate it for better analysis or presentation of data in graphs. Microsoft must have anticipated this issue because they offer several methods to switch your columns and rows around. These solutions work in all versions of Excel 2016, 2013, 2010, 2007, and lower. Convert Rows to Columns in Excel using PasteSuppose you have a dataset similar to shown below. The country names are organized in columns, but the list of countries is too long, so we did better change columns to rows for the table to fit within the screen: 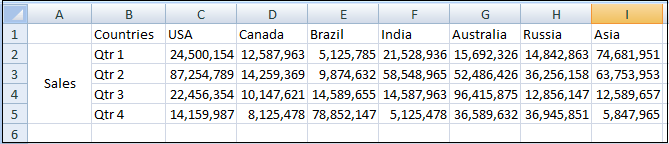
To switch rows to columns, you need to follow the following steps, such as: Step 1: Select the original data of your table. To quickly select the whole table, i.e., all the cells with data in a spreadsheet, press Ctrl + Home and then Ctrl + Shift + End. Step 2: Copy the selected cells either by right-clicking the selection or choosing Copy from the context menu or by pressing Ctrl + C. 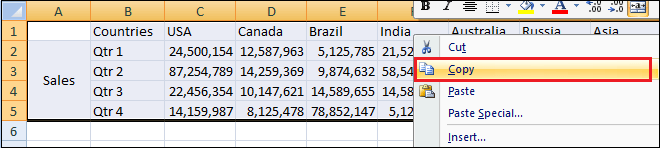
Step 3: Select the first cell of the destination range. Be sure to select a cell that falls outside of the range containing your original data so that the copy areas and paste areas do not overlap. 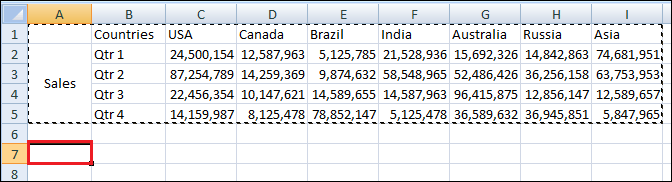
For example, if you currently have 9 columns and 5 rows, the converted table will have 5 columns and 9 rows. Step 4: Right-click the destination cell and choose Paste Special from the context menu. 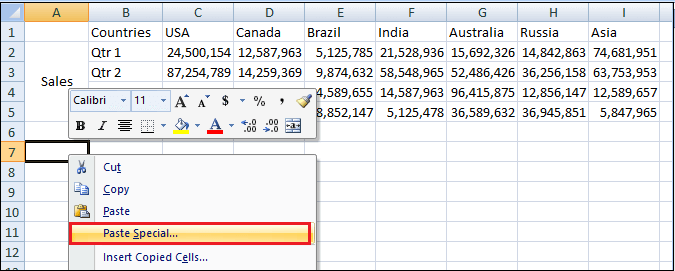
Step 5: And then tick mark on the Transpose checkbox. 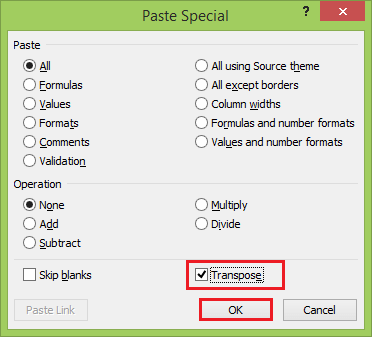
Step 6: Click on the OK button. You will get the transposed result of the table. 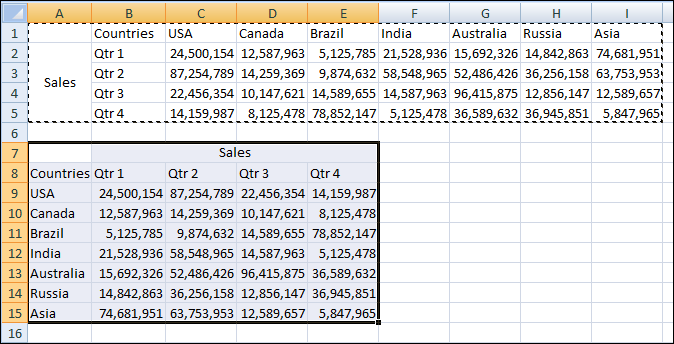
Note. If your source data contain formulas, properly use relative and absolute references depending on whether they should be adjusted or remained locked to certain cells.As you have seen, the Paste Special feature lets you perform row to column or column to row transformations. This method also copies your original data format, which adds one more argument in its favor. However, this approach has two drawbacks that prevent it from being called a perfect solution for transposing data in Excel:
How to Transpose a Table and Link with Original DataLet's see how you can switch rows to columns using the familiar Paste Special technique but connect the resulting table to the original dataset. The best thing about this approach is that whenever you change the source table's data, the flipped table will reflect the changes and update accordingly. Follow these steps to transpose the table and link it with the original data. Step 1: Copy the rows you want to convert to columns or columns to be changed to rows. Step 2: Select an empty cell in the same or another sheet. Step 3: Open the Paste Special dialog, as explained above, and click Paste Link in the lower left-hand corner. 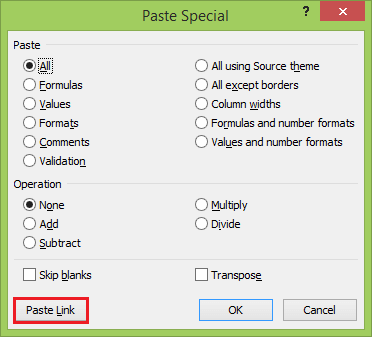
You will get a result something like that: 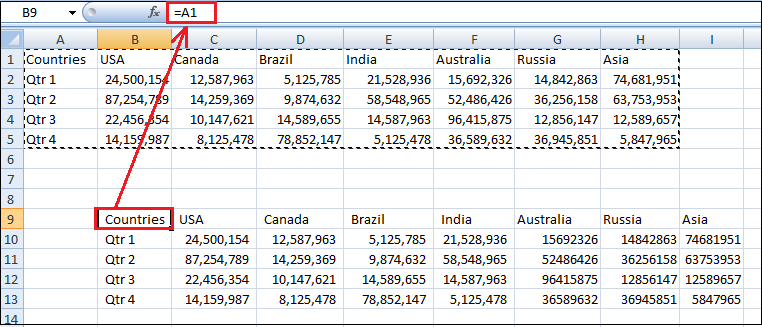
Step 4: Select the new table and open Excel's Find and Replace dialog or press Ctrl + H to get to the Replace tab straight away. Step 5: Replace all "=" characters with "xxx" or any other characters that do not exist anywhere in your real data. 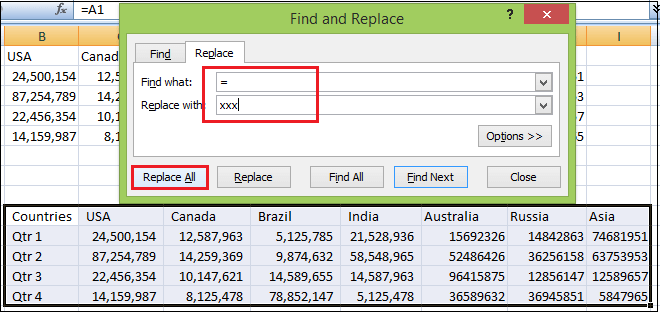
This will turn your table into something, as you see in the below screenshot. Now you need to follow these two more steps. 
Step 6: Copy the table with "xxx" values, and then use Paste Special button and Transpose to flip columns to rows. 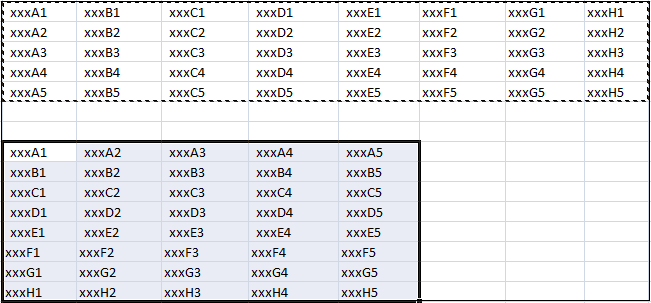
Step 7: Finally, open the Find and Replace dialog one more time to reverse the change, i.e., replace all "xxx" with "=" to restore the links to the original cells. 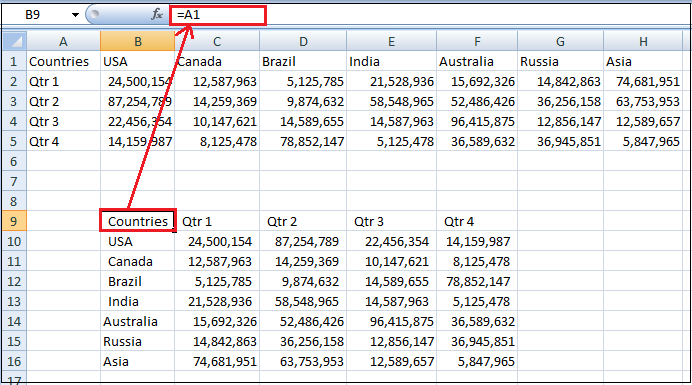
This way is a bit long but elegant solution. The only drawback of this approach is that the original formatting gets lost in the process, and you will need to restore it manually. How to Convert Columns to Rows using FormulasA simple way to dynamically convert columns to rows in Excel is by using the TRANSPOSE or INDEX/ADDRESS formula. These formulas also keep the connections to the original data but work differently. 1. Convert rows to columns using TRANSPOSE function The TRANSPOSE function is specially designed for transposing data in Excel. This function has the following syntax. In this example, we are going to convert the same table that lists countries by sales. 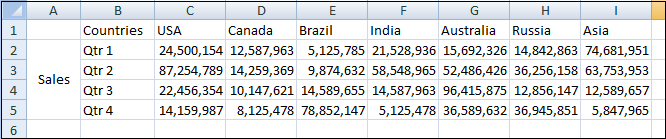
You need to follow the following steps to convert the table scenario by using the TRANSPOSE function. Step 1: Count the number of rows and columns in your original table and select the same number of blank cells, but in the other direction or sheet. Our sample table has 8 columns and 5 rows, including headings. Since the TRANSPOSE function will change columns to rows, we select a range of 5 columns and 8 rows. Step 2: In the selected empty cells, write the below formula 
Step 3: Since our formula needs to be applied to multiple cells, press Ctrl + Shift + Enter to make it an array formula. You will get the table in which columns are converted to rows and rows into columns, as shown below. 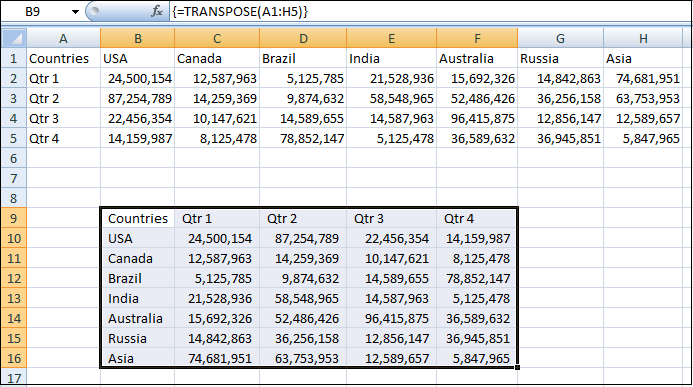
Advantages of TRANSPOSE Function The main benefit of using the TRANSPOSE function is that the rotated table retains the source table's connection. Whenever you change the source data, the transposed table will change accordingly. Disadvantages of TRANSPOSE Function
2. Convert column to row using INDIRECT and ADDRESS functions The below example will be using a combination of two functions. This is a little bit tricky. Suppose you have data in 5 columns and 5 rows, follow these steps to convert the table using the INDIRECT/ADDRESS function. Step 1: Enter the below formula in the leftmost cell of the destination range and press the Enter key. 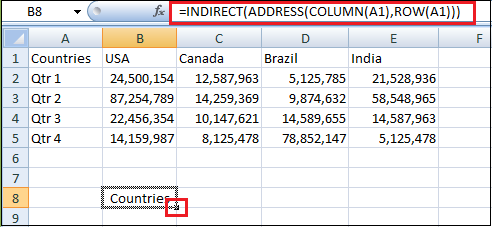
Step 2: Copy the formula rightward and downwards to as many rows and columns as needed by dragging the small black cross in the lower right-hand corner of the selected cells. 
All of the columns are switched to rows in your newly created table, and rows are switched to columns. 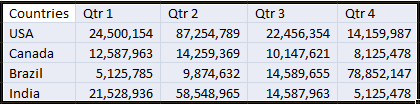
If your data starts in some row other than 1 and column other than A, you will have to use a bit more complex formula: A1 is the top-left-most cell of your source table. Also, remember the use of absolute and relative cell references. However, the transposed cells look very plain and dull in color compared to the original data. To restore the original formatting, just follow these three simple steps: Step 1: Copy the original table. Step 2: Select the resulting table. Step 3: Right-click the resulting table, choose the Paste Options and then click on the Formatting button. How this formula works Now you know how to use the combination of the INDIRECT/ADDRESS function, you may want to understand what the formula is actually doing.
Advantages of INDIRECT/ADDRESS Function
Disadvantages of INDIRECT/ADDRESS Function The formatting of the ordinal data is lost. At the same time, you can quickly restore it. Transpose Data VBA Macro in ExcelTo automate the conversion of columns to rows in Excel, you can use the following macro: NOTE: Transposing with VBA has a limitation of 65536 elements. In case your array exceeds this limit, the extra data will be silently discarded.How to Convert Columns to row Using macroWith the macro inserted in your workbook, follow the below steps to rotate your table scenario. Step 1: Open the target worksheet and press Alt + F8 key. Step 2: Select the TransposeColumnsRows macro and click on the Run button. Step 3: Select the range that you want to transpose and click on the OK button. Step 4: Select the upper-left cell of the destination range. Step 5: And click on the OK button.
Next TopicHow to Convert Number to Words in Excel
|
 For Videos Join Our Youtube Channel: Join Now
Feedback
- Send your Feedback to [email protected]
Help Others, Please Share


