| |

How to insert multiple rows in Excel?Inserting rows in an Excel sheet is a very common but a useful operation to do that an Excel user may require. The Excel user may need to insert one or more rows between the rows having data in an Excel sheet. The users can think that they can copy the rows data and paste them in the below rows to make the rows free to store the new data. But it is a bad idea because if any data manipulation operation is performed on that data, everything will be messed up. So, Excel enables another way, i.e., to insert the row in the Excel sheet 
This chapter will make it easy for the users to insert more than one row in Excel. Insert a row in an Excel sheetExcel users can easily insert a single row anywhere in the Excel sheet. It is not a big deal to insert a single row. One can easily do it as it is a very basic and common task of Excel. But the ways are different. Excel enables various ways to insert a row in an Excel sheet. You can follow which you most efficient and fast. Follow these three simple steps to insert a row in the Excel sheet: Step 1: We initially have the following data for different branch records of 5 years. Here, we want to insert a row between the BTech (CS) and BTech (EC) branches. 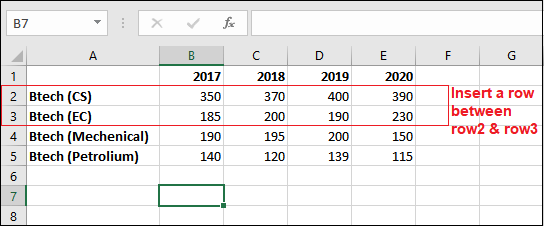
Note: A new row always inserts above the row you select to insert.Step 2: Just go to row3 (BTech (EC) branch) and right-click on the row header and select Insert from the list. 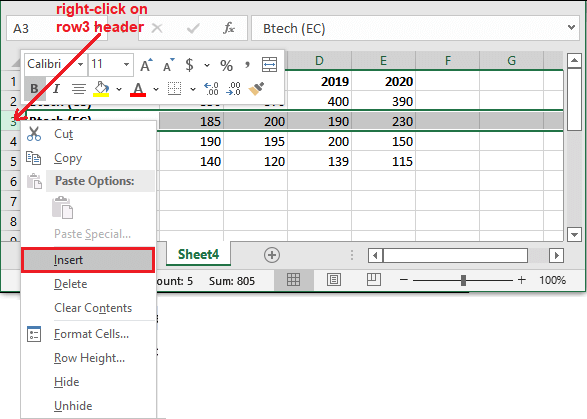
Step 3: A row will be inserted successfully above the row you select. 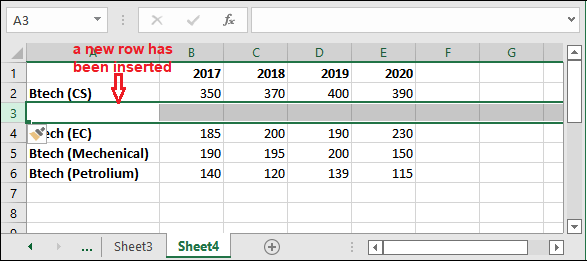
Step 4: Press the F4 key to keep inserting the rows continuously after a row insert. In this way, you can insert one or more rows in the Excel sheet by performing the same steps number of times how many rows you want to insert. But when you need to insert too many rows, this method is a time taking. So, we have another time-saving method too. Insert multiple rows in an Excel sheetExcel users can easily insert a single row anywhere in the Excel sheet, as seen in the above method. When it comes to insert multiple rows, the above method is time-consuming. It is a tricky operation than inserting a single row in an Excel sheet. So, by following this method, one can insert multiple rows at once. To insert the multiple rows, we have another method that will save your time. It will be a bit tougher than inserting a single row in an Excel sheet. Follow the steps to insert more than one row in the Excel sheet: Step 1: We have the following data of different branches of BTech, where we will insert four new rows after row3. 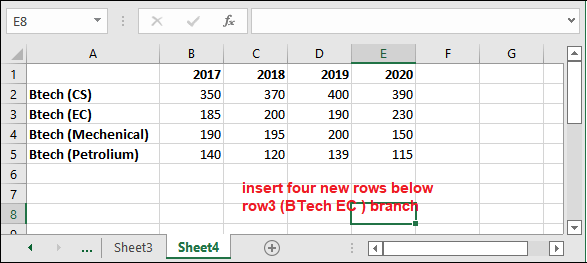
Step 2: Select any four cells from row 4 to row 8 and right-click on the selected cells. 
"Select the number of cells equal to the number of new rows you want to insert." Step 3: Select the Insert option from here. 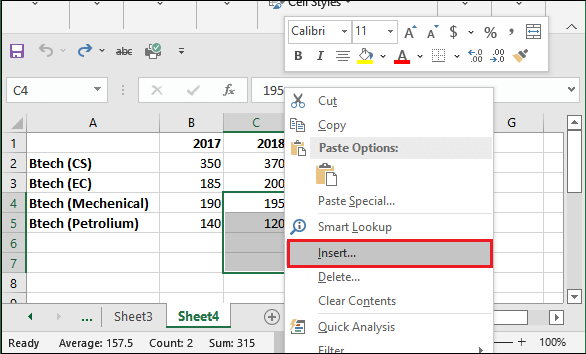
Step 4: Select the Entire row radio button and click OK. 
Step 5: Four new rows have been inserted successfully above the row you selected. 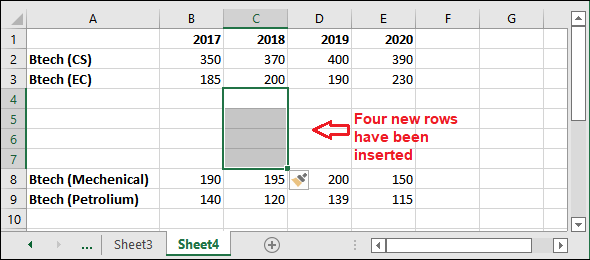
In this way, multiple rows can be easily inserted into the Excel sheet in a single go. You just need to perform a few extra steps and the problem will get solved. Insert multiple rows using shortcut keyIn the above method, we have described the steps to insert multiple rows into an Excel sheet in detail. You can prefer this method anytime. Besides this, we have a shortcut key to insert the multiple rows in an Excel sheet. This shortcut key will help you to avoid some steps and make it easier to insert rows. Although the method we have described is not too long, but you should also know the shortcut key to insert multiple rows. You can choose any method. If you are preferable to use the keyboard, you can use the shortcut key. The shortcut key to insert row is Ctrl+Shift+Plus (+ Sign). It is a quick and fast method. Steps to insert multiple rows using shortcut key Let's learn how this key helps to insert rows. Follow the given steps for it: Step 1: Select the number of rows how many you want to insert and just press the Ctrl+Shift+Plus (+ Sign) key. 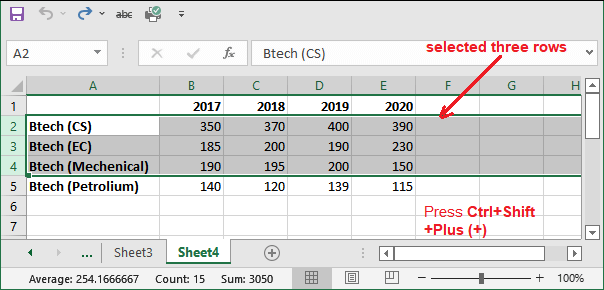
"Use Ctrl+Plus (+) if you are using number key board. Otherwise, use Ctrl+Shift+Plus(+) to insert the new rows." Step 2: if you have selected the cell instead of entire row in the above step, you will get a small Insert dialogue box where you select the Entire row option and click OK. 
Step 3: You see that the number of rows you selected has been inserted into the Excel sheet. Three new rows have been inserted successfully. 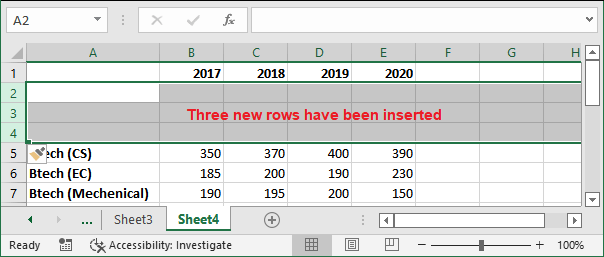
Insert multiple rows in non-contiguous mannerTill now, you have seen that we have inserted one or more rows in a contiguous manner. Suppose user has a bit different need. The user wants to insert multiple rows but not continuously. In this case, we have to either insert each row one by one or we can follow another method offered by MS Excel. This will make it easy and fast for the users to insert multiple rows in a non-contiguous manner in a single go. Let us learn how we could achieve that. Follow the few simple steps to insert multiple rows in a non-contiguous manner in the Excel sheet: Step 1: We have the previous dataset on which we will show you a demo for inserting the new rows in selected adjacent rows. 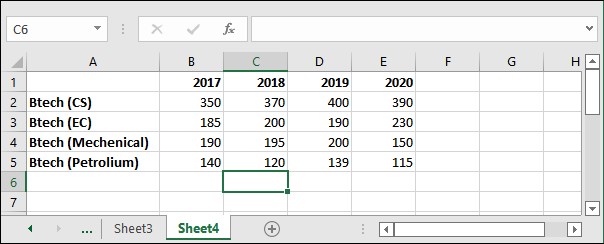
Step 2: Select the rows whichever you want in a non-contiguous manner and press the Ctrl+Shift+Plus (+) shortcut key to insert the new rows irrespective to selected rows. 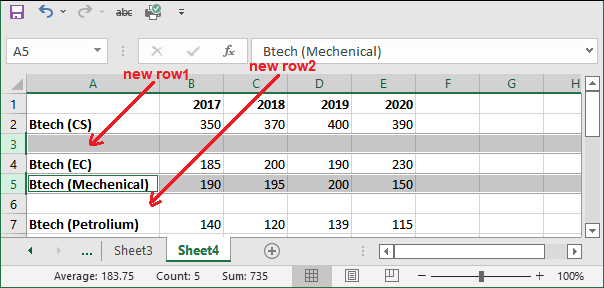
Step 3: You will see that multiple new rows have been just above each selected row. These rows are not continuously inserted. 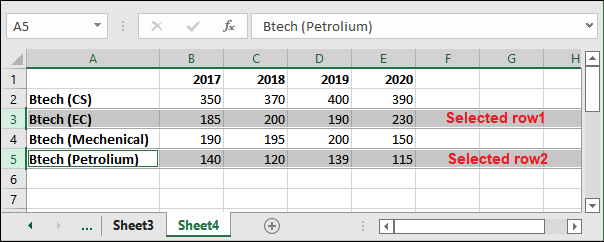
Hence, there are various easy ways enabled by MS Excel to its users that make working with Excel sheets easy.
Next TopicMIS report in Excel
|
 For Videos Join Our Youtube Channel: Join Now
Feedback
- Send your Feedback to [email protected]
Help Others, Please Share


