| |

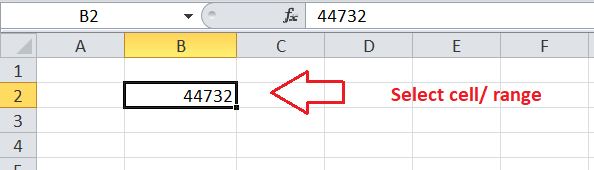
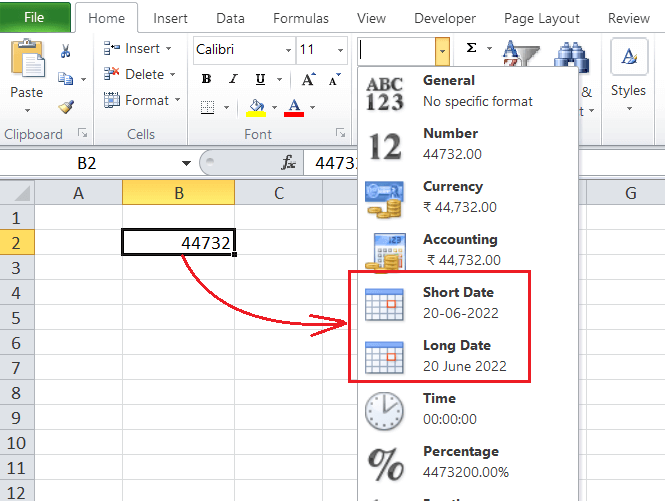
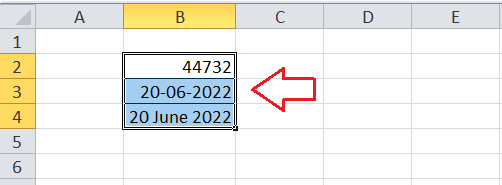
How to change the Date Format in Excel?Excel, a powerful spreadsheet software, allows users to record various data types in one or more desired cells across several worksheets. In addition to numbers, and text, we often require entering dates and times in an Excel sheet. No matter how we type the dates in Excel, it automatically picks up the default format as it is set in Excel's settings (or Control Panel). For example, if the configured date format in the settings is "M/d/yyyy", Excel will format the given or entered date "1st Jan 2021" as "1/1/2021". Excel will keep formatting dates as "M/d/yyyy" until we change the settings in Excel or the date format recorded in an Excel cell. If we change the date format from the settings, the newly given format will be the default format and be followed in the future. Thus, it is better to learn how to change the date format in Excel sheet to change how the dates appear in Excel cells differently. Note: The date system in Excel for Windows starts from January 1, 1900. However, for Mac, it starts from January 1, 1904. That means we cannot type or enter the dates before the specified starting dates in the respective platforms.Dates in ExcelBefore discussing the methods to change date formats within our Excel sheet, we must know how dates are treated and stored in Excel. Generally, it seems like Excel remembers the given date based on its day, month and year. However, this is not the case in how dates work in Excel. It is quite unbelievable, but the fact is that a date is nothing but the numbers in Excel. Excel stores and remembers the given date in the form of sequential numbers. However, it enables users to choose between various cell formatting to display the respective number as a valid date, including the date, month and year accordingly. Numeric Date FormatIf there is no specific date format is applied in Excel (or changed from Date to General/Standard), we usually see numbers or integers within the cell with dates recorded. The dates stored as integers typically represent or display the number of days since 01/01/1900 (on Windows) or 01/01/1904 (on Mac). For example, if we enter any positive number (i.e., 1) in an Excel cell with 'General' formatting and change it to 'Date', it becomes January 1, 1900. It occurs because the integer '1' represents the starting date, i.e., January 1, 1900. Likewise, the number '0' is formatted as January 0, 1900, and calculated as of December 31, 1899. The last date supported in Excel for calculation is December 31, 9999, representing the integer 2958465. Therefore, if we record June 20, 2022, in General format, it will become 44732 because 44732 days passed from January 1, 1900, to June 20, 2022. 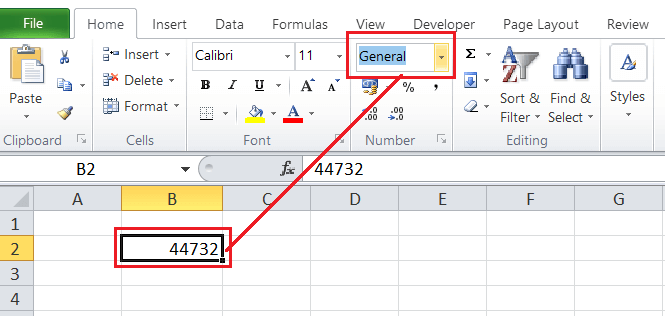
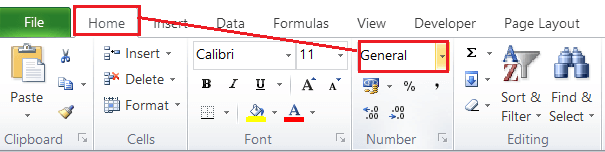
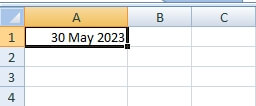
Quick Date FormatsAlthough we can choose a wide range of date formats in Excel, the most common formats are the 'Short Date' and 'Long Date'.
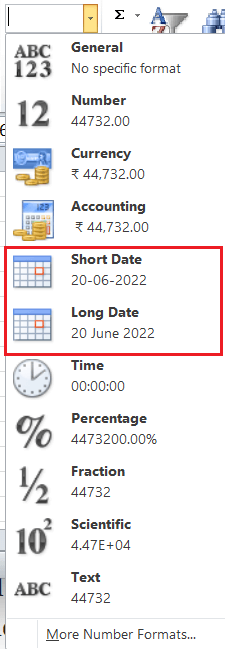
The short date and long date formats may vary from version to version in Excel, depending on the default settings. We can quickly choose between these two formats and apply them to the desired cells with dates. For that, we have to execute the below steps:
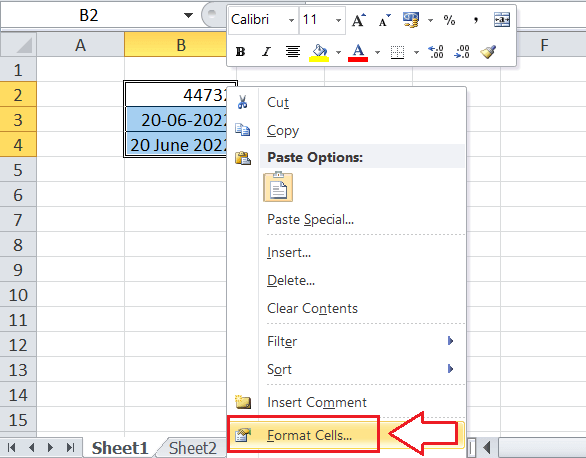
Date to Number format in ExcelThe various methods are explained here to find which serial Number displays the particular Date. 1. Format Cell dialogThe Format Cell dialog is used to find the Date of the respective serial Number. The steps to be followed are:
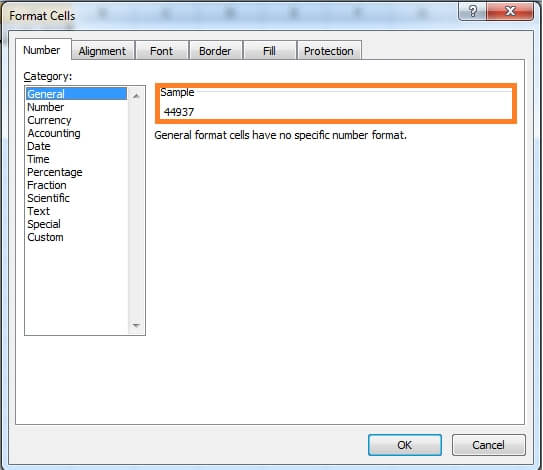
If the user wants to know the serial Number of the particular Date, note the serial Number of the Date and close the window, or if the user needs to display the serial Number of the particular Date, Click OK. 2. Excel DateValue FunctionThe DATEVALUE () function is used to convert the given Date to its respective serial Number. The steps to be followed are: Select a new cell, namely A1, and enter the formula as =DATEVALUE("1/1/2023"). Press Enter. 
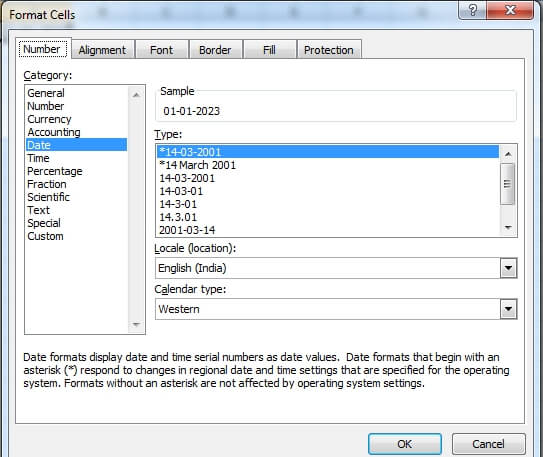
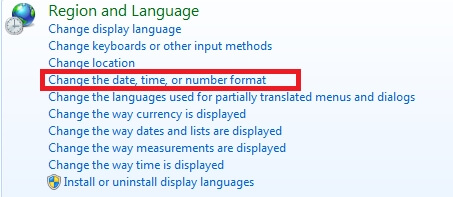
Default date Format in ExcelWhile working in Excel, the short and long date format are retrieved from Windows Regional Settings. The asterisk(*) symbol is placed in front of the default date format, which is present in the Format Cell Dialog box. To check the default date format in Excel, the steps to be followed are:
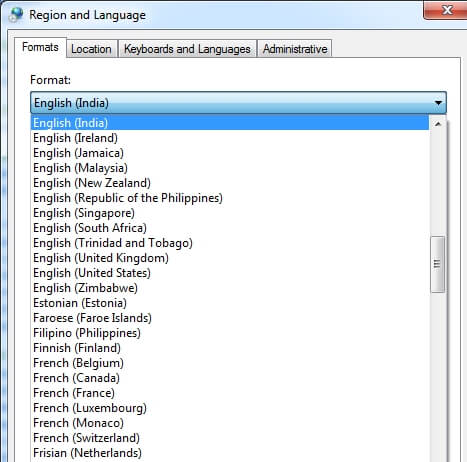
The default date setting will change in Format Cells if the settings in Control Panel will change. Changing the default date in ExcelBased on the requirement and data, the default date settings in Excel must be changed. For example, to change the time settings from USA style of Date to UK style to Date, the steps to be followed are:
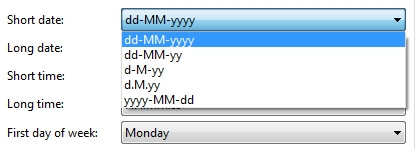
Note: To know the complete description of the dd/mm/yy pattern, click the link "What does the notation mean" under the Date and Time format Section.If the user wants to know more settings in the date pattern, click the "Additional Settings" button in the lower right corner of the Regional and Language dialog box. 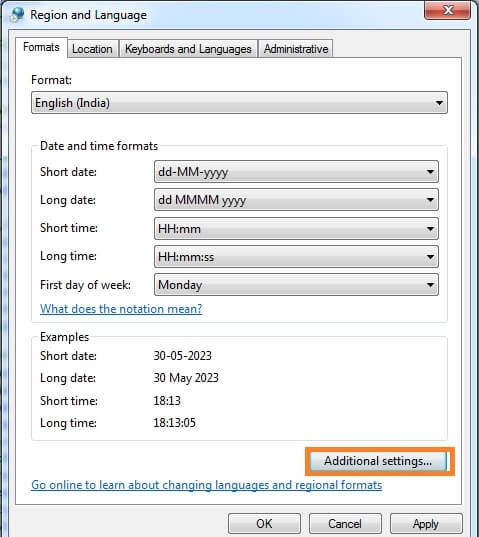
The Customize Format dialog box will display upon clicking the Additional Settings dialog box. In that, choose the Date tab, where the user can enter the Custom short or long Date in the respective box. 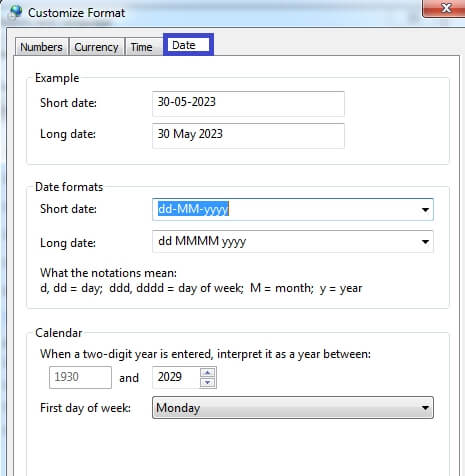
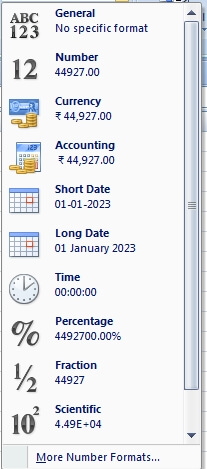
A quick way to change the Default DateAs previously explained, Excel has two default formats to change the Date. The two types are short and long. The quick method to change the default date is as follows:
If the user wants many date format options, click the More Number Format in the drop-down list or click the dialog box launcher, which is present near the Number. 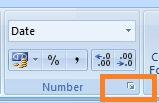
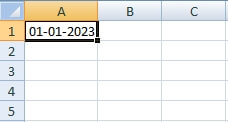
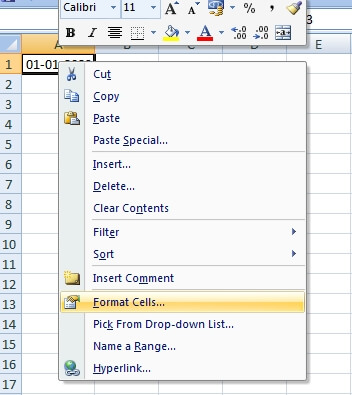
Changing the date format in ExcelThe different data format needs to be changed for different types of data. To change the date format in one cell or range of cells, the steps to be followed are:
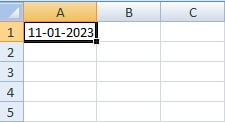
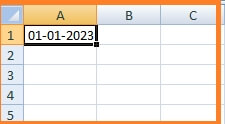
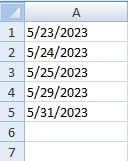
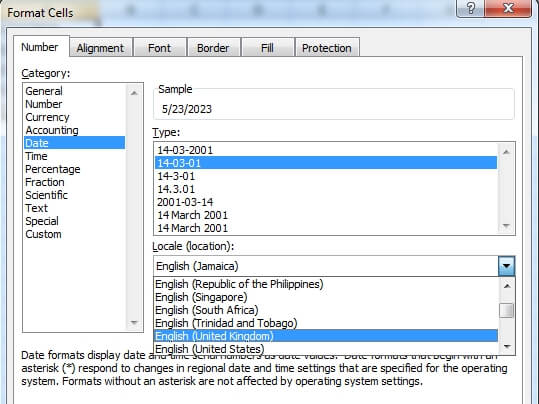
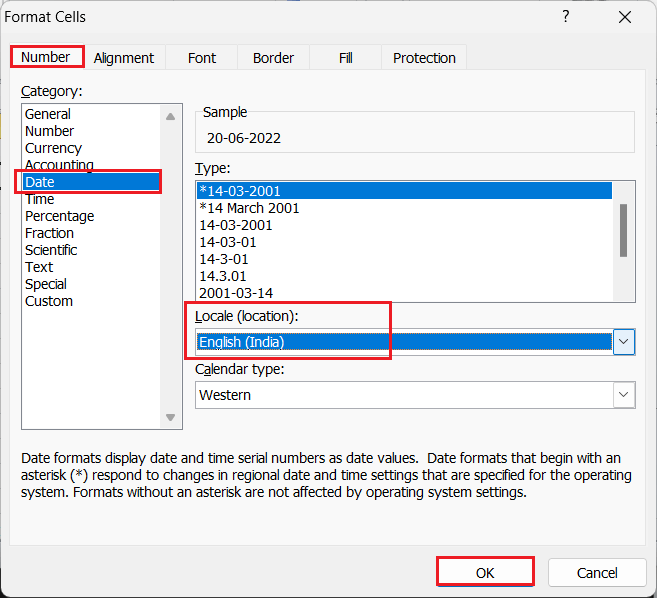
Note: If the dates are not formatted to desired date format, the Date is in text format. To convert the Date to the desired format, it is first converted to the date format.Converting the date format to another localeIf the given data set consists of dates that are in American Style(Month/Day/Year) and needs to be converted to European Style(Day/Month/Year), the steps to be followed are:
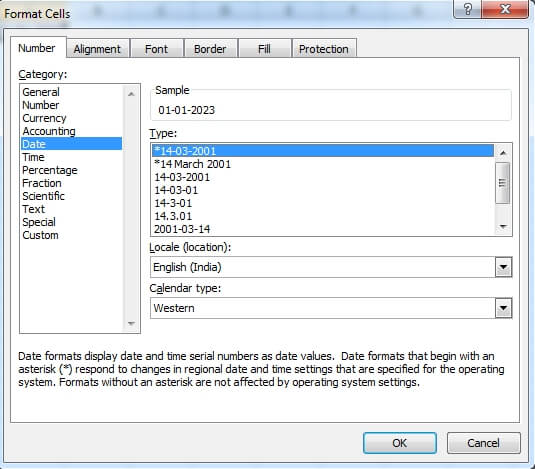
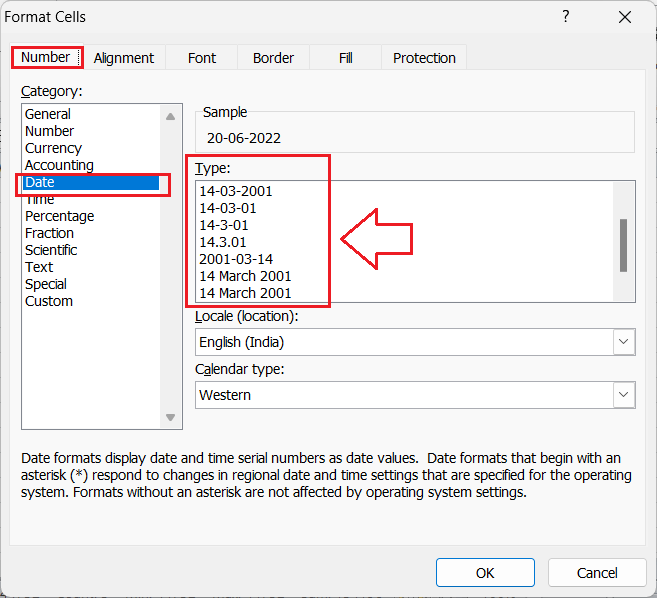
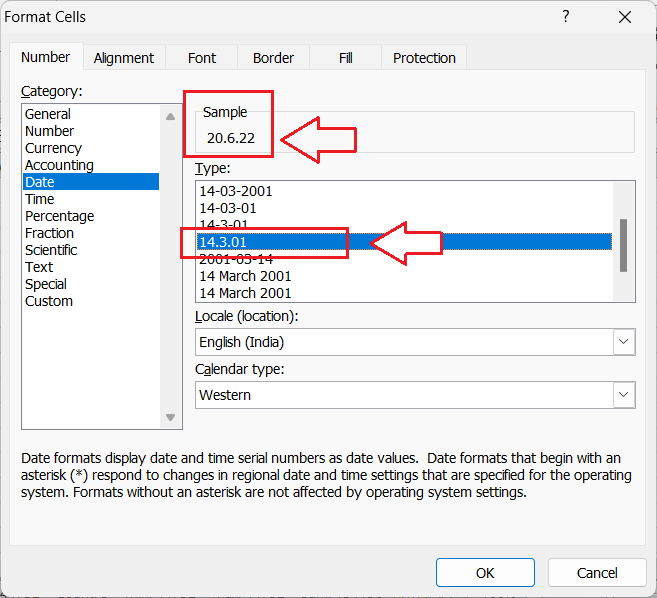
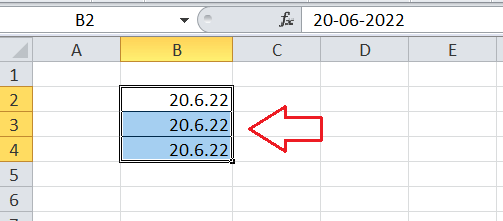
The desired location's date format will be applied to the data. It is one of the quickest methods to change the location of the data. Changing Date Formats in ExcelNo matter if we have the date in numeric form, short or long format, we can always change its format to other desired formats. The following are two commonly used ways to change date formats in an Excel sheet: Choosing from Advanced Date Formats ListExcel offers a wide range of predefined date formats that can be used on the desired cells immediately. We need to use the 'Format Cells' dialogue box to access the list of advanced date formats. We must execute the below steps to change the date format using the 'Format Cells' option:
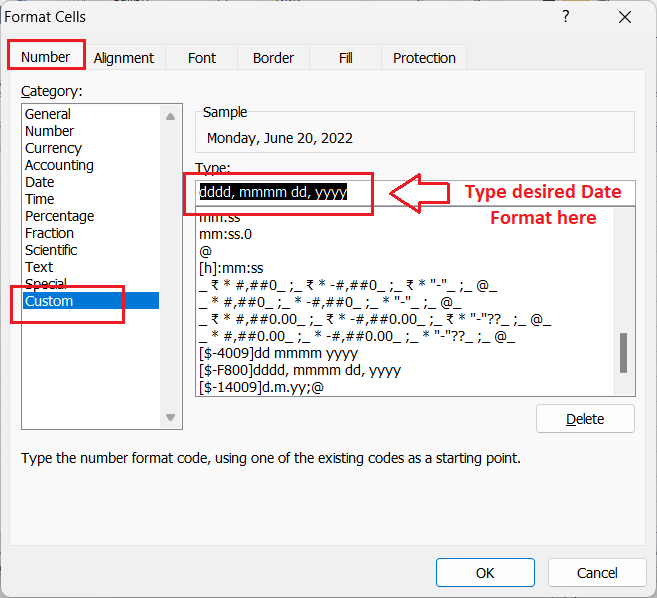
Creating Customized Date FormatsIf we don't like predefined or standard date formats, we can always create our customized format and use them in the desired cells within the sheet. We must execute the below steps to create our custom date format in Excel:
Before following the above steps and creating a custom date format, we must know the formatting codes required to create the date's structure. List of Formatting Codes in Excel The following table has various codes with their description and examples, which we can use to create a custom date format in Excel:
The easiest method to create a desired custom format for the dates is to start with any existing date format in the list. That means we can choose any specific date under the 'Type' box from the 'Date' category, then move to the 'Custom' and change the selected format accordingly. Let us now implement the above formatting codes and learn to create our customized date format using the sample dataset in an Excel sheet. Example: Suppose we have the dates in different formats in cells B2, B3, and B4. We want to change the format to a custom format (dddd, mmmm dd, yyyy) for all these cells. To use our custom date format, we first select all the corresponding cells containing dates in our sheet. Afterwards, we go to the Format Cells window, choose the Custom category and enter our custom format in the Type box. It looks like this: 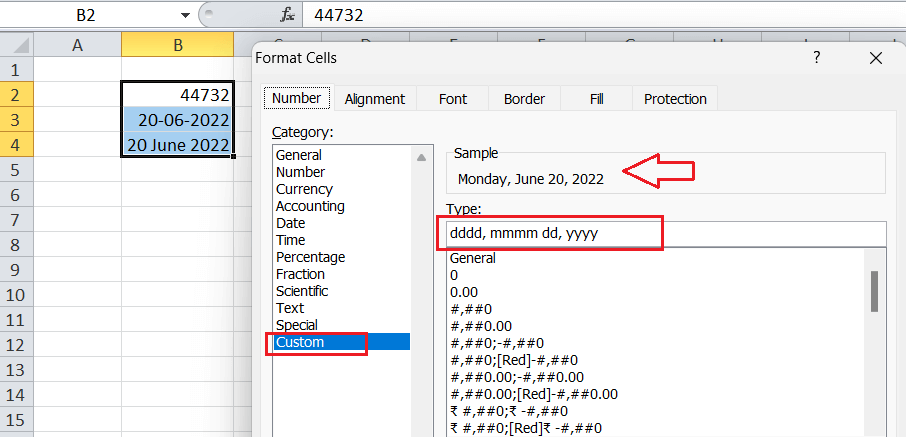
Since the date preview is right, we click the OK button to apply the same format to all selected cells. The dates appear based on the given format, such as: dddd, mmmm dd, yyyy. 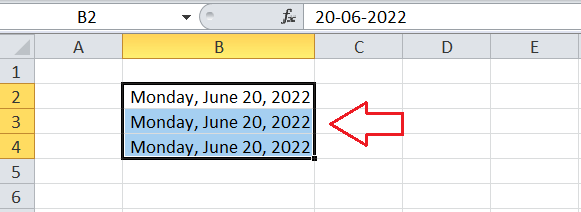
Converting Date Formats to Other Locales/LocationsIf we need to display dates for different locations, we must convert the date formats to a different locale. For that, we can execute the below steps:
Apart from this, we can also customize the locale settings for the dates in an Excel cell using the Custom format. We only need to create or select the desired format and prefix a date with the desired locale, meaning that we can add a locale before the custom date format accordingly. However, we must only use the specific locale codes formatted as [$-###]. Some essential codes and their locale are as follows:
There are many more locale codes for various locations on the globe. Suppose we want to change the date format containing a year-month-day (day of the week) for the location in Germany. So, we must apply the custom format in the following way: [$-407]dddd, dd. Mmmm yyyy 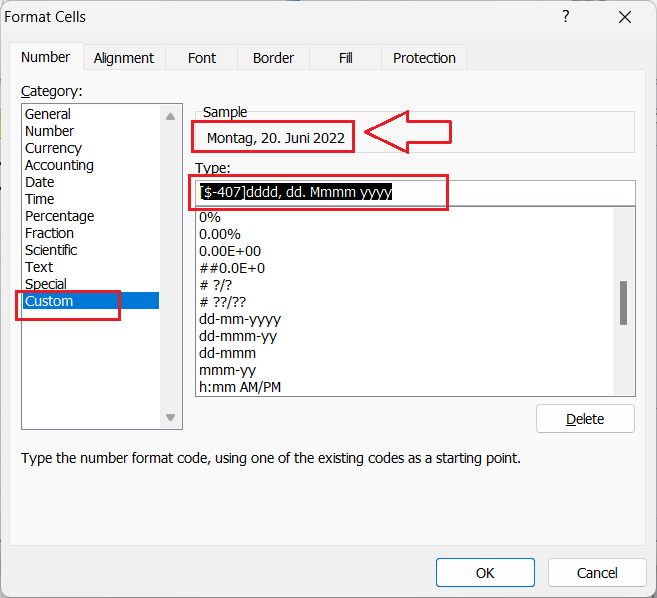
The above image shows the date in German as we used the locale code of Germany, i.e., [$-407]. Changing the Date Format using the TEXT functionExcel's TEXT function also helps us change or apply the desired Date Format in Excel. The function only requires two arguments and follows the below structure (or syntax): =TEXT(Value to convert into text, "Formatting code") The first argument can be represented as a cell containing a date, a numeric form of date, etc. The second argument is the Formatting code that we have already discussed above. For example, suppose our date (numeric form) is in cell B2, and we need to change its format to: dddd, mmmm dd, yyyy. So, we can use the TEXT function in another cell using the below formula: =TEXT(B2,"dddd, mmmm dd, yyyy") 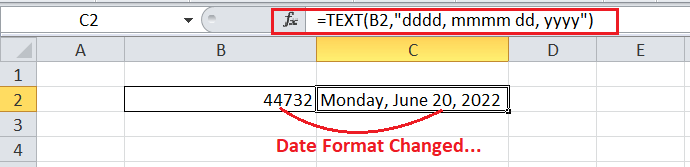
Instead of the date cell, we can also insert the numeric date in the formula directly, i.e.: =TEXT(44732,"dddd, mmmm dd, yyyy") 
Solutions to the Excel date ProblemsMicrosoft Excel understands the various date format entered by the user. What happens if the problem related to date format arises? To rectify this problem, the various causes and solutions are explained as follows: Size of the CellSometimes the date format returns the result as pound signs(#####) in a worksheet which means the size of the cell is not enough to fit the selected date format. To rectify this error, set the column width according to the column width or double-click the right border of the column, where the cell auto fits the Date, or it can be resized. Fixing the Negative Date ErrorAnother cause for the Hash Error(#####) is due to the negative numbers present in the Date. Sometimes formula returns this Type of hashtag error and also occurs if a negative number is present in the date format input. To display the negative numbers in date format, the steps to be followed are: Open the worksheet, click File>Options>Advanced. Scroll down to the bottom, and tick the checkbox containing "Use 1904 date system" in "While calculating this workbook." 
Here 0 is 1-Jan-1904;1 is 2-Jan-1904; -1is represented as -2-Jan-1904. To represent the negative dates, this method is used to calculate the data. Another method used to display negative numbers is using the TEXT function. The representation is as follows: 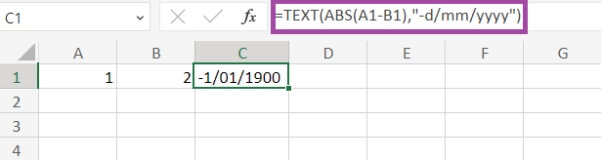
Here the value 1 is entered in cell, and value 2 is entered in cell B1. The value A1 is subtracted from cell B1 using the TEXT and ABS functions and followed by desired date format. The solution to Date imported as text Values in Excel WorksheetWhile importing the data from other files or databases to Excel, sometimes it is imported as text values. Even though it looks like Normal dates, excel considers it a text value and displays the error message. To rectify this problem, Excel converts the "text dates" to the date format using the DATEVALUE function and the Text to Column feature. Important Points to Remember
Next TopicHow to compare two Excel sheet
|
 For Videos Join Our Youtube Channel: Join Now
Feedback
- Send your Feedback to [email protected]
Help Others, Please Share


