How to Install Dropbox on Kali LinuxWhat is Dropbox?Dropbox is a cloud storage service that allows us to save and sync files across several devices. Dropbox offers a free plan with 2 GB of storage. We can extend this to as much as 3 TB with a subscription. With the help of the Dropbox, we can share files and folders with others without having to send large attachments. Dropbox is a file hosting service sometimes known as "cloud storage." Dropbox is one of the most well-known and widely used cloud storage services, while there are numerous others such as Google Drive, Microsoft OneDrive, Sync, Box. Dropbox is very helpful for Linux systems, and it has had native Linux applications since its inception. In this tutorial, we will learn how to install Dropbox on the Kali Linux system. Features of DropboxThe following are the features of Dropbox:
1. Free Storage When we sign up for a Dropbox account, we get 2 gigabytes (GB) of storage space for free. There is no set-up fees or additional charges after we begin using the service. We can expand our storage space by sending Dropbox fan mail, connecting our Dropbox to social media, or inviting others to join Dropbox. There is also a premium option that gives us 2 TB of storage space, which we may use to keep numerous hard drive backups. 2. Encryption Security The most crucial aspect of Dropbox is security; while exchanging the most sensitive files, it is critical to do so securely hence it uses 256-bit AES encryption security to share files. 3. Sharing Another great feature is the ability to share the files with others. To share the files with others, we must place them in a Dropbox folder that is set up to share with specific users or the general public. 4. Mobility With the help of Dropbox, we can access our files from anywhere. We can access and work on files from our phone or tablet if we install the Dropbox app on our iOS or Android device. If we don't have our device, we can still access Dropbox from any device with an Internet connection. 5. Edit Microsoft Office Files Online for Free Dropbox's feature integration with Office Online is a free basic version of Microsoft office that runs on our browser, allowing us to open and edit office files from Dropbox without installing the software. 6. Easy to Use Dropbox is simple to use, and anybody can access this tool by connecting to the internet. We can easily download the app on our mobile devices and computers. We need to open the application and upload or download files to get started. We will always have access to the most recent version of each file. To share files with approved Dropbox users, simply place them in a folder designed to share with authorized users. 7. Add Comments to Files As we all know, sharing a folder is as simple as right-clicking on the folder or file that we want to share and inviting individuals to join our folders. Another option is to share a link to the file with others. Now using the commenting feature, we can add comments to the shared files like using email or chat to discuss our changes to the file. And we can easily keep the discussion regarding our files in the same area this way. 8. Back up All Our Pictures to Dropbox In Dropbox, there is a feature called Carousel. Using this feature, we can see all the photos which we have uploaded, according to the date and location that is arranged into sharable albums. 9. Use Selective Sync to Save Space Dropbox contains the Selective Sync feature. Using this feature, we can select the most important file to save or sync. 10. Customize Dropbox Notifications Dropbox's email and push notifications might become overwhelming as we share and comment on a larger number of files. However, Dropbox notifications can be customized, and we are able to turn off or on email and push notifications. How Dropbox WorksWhen we sign up for Dropbox, we are given a set amount of storage space in an online server known as "the cloud." After installing the Dropbox app on our PC, mobile device, or both, any files which we store in our Dropbox locally will be copied to the Dropbox server as well. If we make modifications to these files in one location, the changes are automatically reflected everywhere. We can view and share our Dropbox files with others by synchronizing them locally and online. How to Install Dropbox on Kali LinuxStep 1: In order to install Dropbox on Kali Linux, we have to go to the official download page for Linux via our web browser. We can see the page, as shown in the following screenshot. Here we must select the Ubuntu.deb installer file. Because our system is 64-bit, we will use it (modern days systems usually use 64-bit). After clicking on the .deb 64-bit file, it begins to download and finishes quickly (under 70 KB). 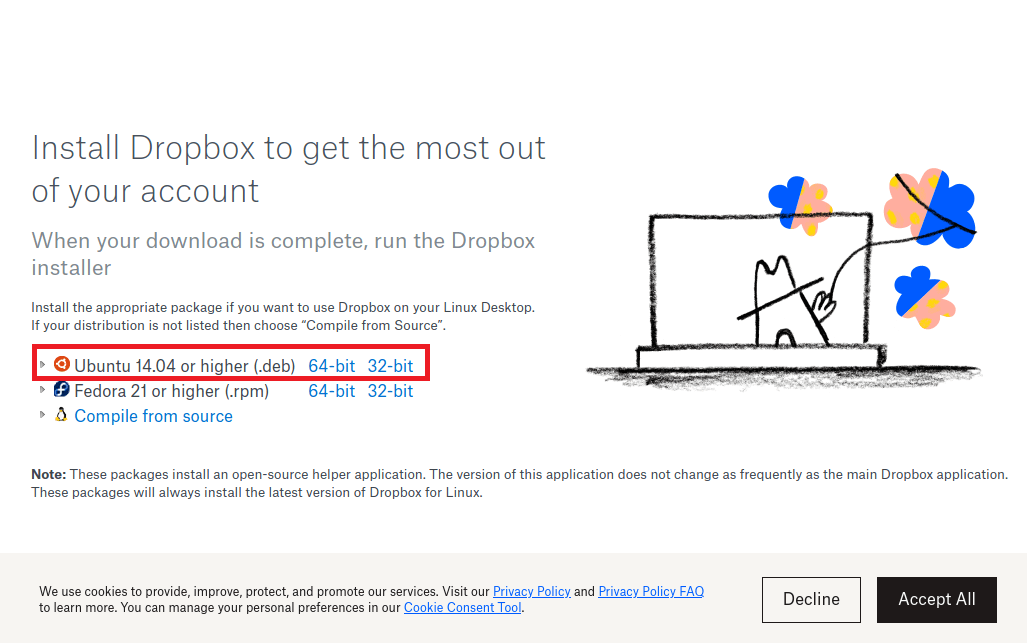
Step 2: By default, the downloaded files are saved in the Downloads directory. So, using the following command, start a terminal window and navigate to the Downloads directory. 
Step 3: Now, we have to run the installer file with the help of the command below: The following screenshot shows the results of the above commands: 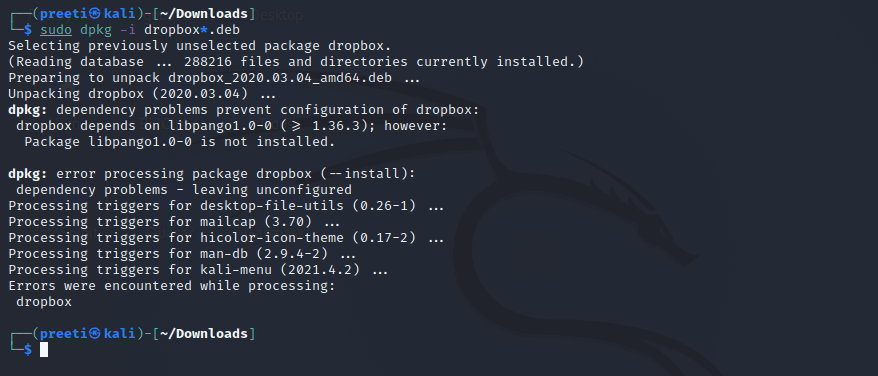
Step 4: Now we can find Dropbox on our application menu, as we can see in the screenshot below: 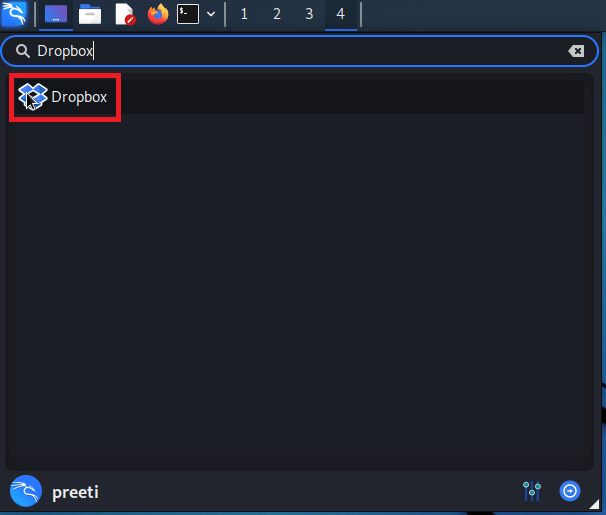
Step 5: We can access Dropbox from here, and the first time we did so, we were greeted with a popup window similar to the screenshot below: 
Step 6: Here we have to click on "OK" in order to start the download process of Dropbox. The installation of Dropbox may now be seen in the following screenshot. 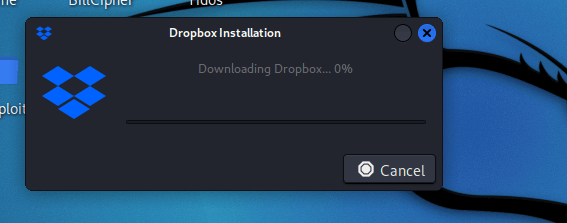
After installing Dropbox, it should either send us the Dropbox login page automatically or allow us to select "Sign in "from the Dropbox icon in the top panel. Step 7: After that, click "Sign in." Our default browser will open and prompts for sign- in. 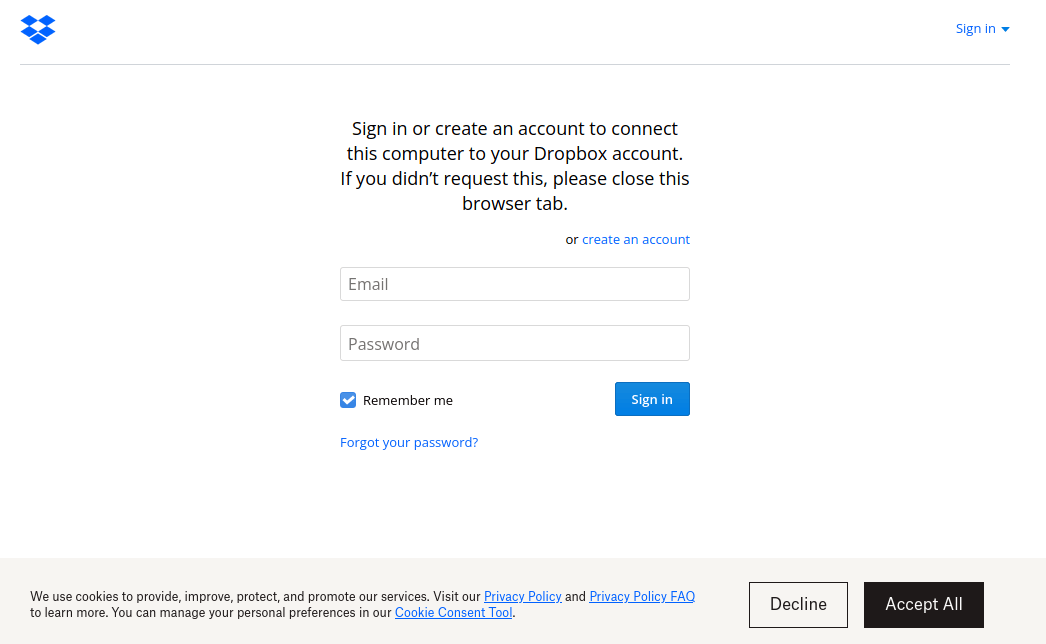
Step 8: After logging in, we can access our files through Kali Linux's native Dropbox application. One thing to keep in mind here is that Dropbox will not work until we sign in. The free Dropbox version can only be linked to a restricted number of devices, which is a concern. If we have 3 devices linked to our Dropbox account, we should remove at least one of them. Dropbox will prompt us to connect to our computer application once we have successfully signed in, as shown in the following screenshot: 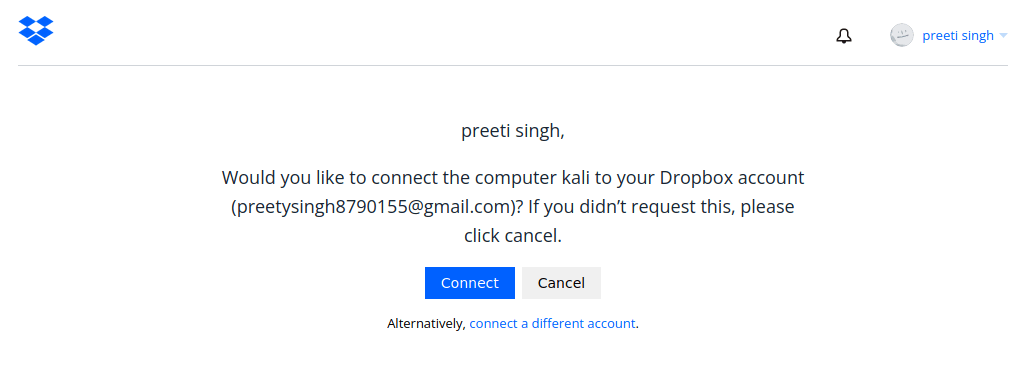
Step 9: After clicking on "Connect", our system will be connected with our account. 
Step 10: On our Home, we can now see the Dropbox folder. 
This is how we can get Dropbox installed on our Kali Linux system. These days, cloud services are required. Dropbox has excellent Linux support. |
 For Videos Join Our Youtube Channel: Join Now
Feedback
- Send your Feedback to [email protected]
Help Others, Please Share


