AutoCAD Offset Command
The offset command in AutoCAD is used to create parallel lines, concentric circles, and parallel curves.
We can offset any object through a point or at a specified distance. We can create as many parallel lines and curves with the help of the offset command.
The offset objects can also be modified further according to the requirements. Here, modification of offset object means that we can apply trim, extend, and other methods on it.
Let's understand it with some examples.
Example 1: Offset of a circle.
The steps are listed below:
- Create a circle with any specified radius. For example, 3.
- Select the Offset icon on the ribbon panel.
Or
Type O or offset on the command line or command prompt and press Enter.
- Specify the value of offset distance. It is the distance value to create a concentric circle from the original circle. For example, 1.
- Press Enter.
- Select the object to offset. We need to select the object with a small square cursor.
- Move the cursor inside or outside to place the offset object, as shown in the below image:
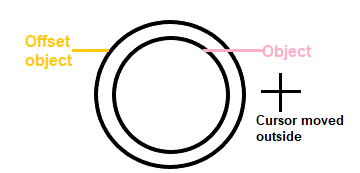
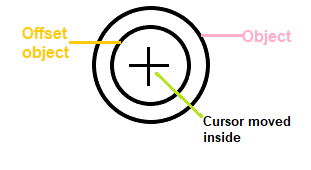
- Press Esc or Enter to exit from the offset command.
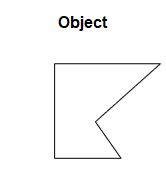
Example 2:
The object to offset is shown in the below image:
The steps are listed below:
- Create an object with two lines and an arc, as shown above.
- Join the object. To offset the whole figure, we need to join the segments of that figure. It will be joined as a polyline.
The steps to join the object are listed below:
- Type J or join on the command line.
- Select objects or multiple objects to join. Here, we will select the two lines and an arc.
- Press Enter.
- Select the Offset icon from the ribbon panel.
Or
Type O or offset on the command line or command prompt and press Enter.
- Specify the value of offset distance. For example, 1.
- Press Enter.
- Select the object to offset. We need to select the object with a small square cursor.
- Move the cursor inside or outside to place the offset object, as shown in the below image:
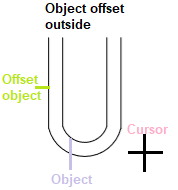
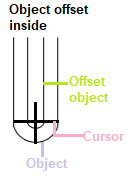
- Press Esc or Enter to exit from the offset command.
The distance between the object and the offset object is 1, as mentioned in step 4.
Example 2: To remove the object after the offset.
We can also remove the object after the offset. The object is shown in the below image:
The steps for such an example are listed below:
- Create an object using the polyline command, as shown in above image. We can also create it using line command and can join them using Join
- Select the Offset icon from the ribbon panel.
Or
Type O or offset on the command line or command prompt and press Enter.
- Type E or erase on the command line and press Enter.
- Type yes to erase the source object after offsetting.
Or
Click on the yes button on the command line, as shown in the below image:

- Specify the value of offset distance. For example, 1.
- Press Enter.
- Select the object to offset with a small square cursor.
- Move the cursor in the particular direction and click on that point.
- Press Enter.
It is shown in the below image:

- Press Esc or Enter to exit from the offset command.
We can notice that the source object is erased after offsetting.
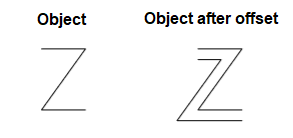
Below are the figures with their offset.
Figure 1:
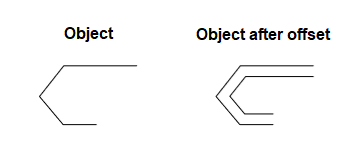
Figure 2:
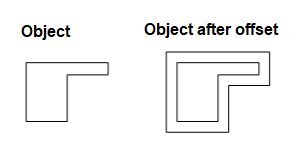
Figure 3:
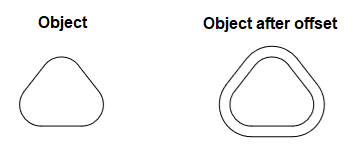
Figure 4:
Multiple Offset
The multiple offset command in AutoCAD is used to apply the offset multiple number of times.
Let's understand it with an example.
The steps are listed below:
- Select the line command from the ribbon panel and create a line of dimension 4. We can draw any object according to the requirements.
- Type O or offset on the command line and press Enter.
- Specify the offset distance. For example, 1.
- Select the object to offset.
- Type M or multiple on the command line and press Enter.
- Continue clicking in the corresponding direction to place the offset objects.
With the help of the above steps, we are not required to use the offset command again and again.
| 
 For Videos Join Our Youtube Channel: Join Now


