Trim and Extend in AutoCADTrim command
Consider the below figure: 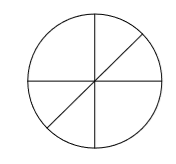
The steps to trim the portion of the above object are: 1. Select the Trim icon from the ribbon panel, as shown below: 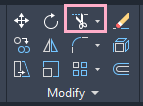
Or Type Tr or trim on the command line or command prompt and press Enter. 2. Press Enter 3. Select the line or curve, as shown below: 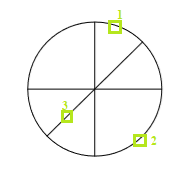
Here, we have selected three parts at once. We can choose objects according to our requirements. 4. Press Enter. The selected portion will be removed. The object will now look like the below image: 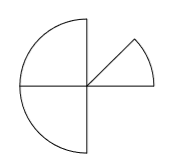
Extend CommandThe extend command is used to extend the selected boundaries or edges. The objects are extended so that the edges of other objects can be converged. Consider the below image: 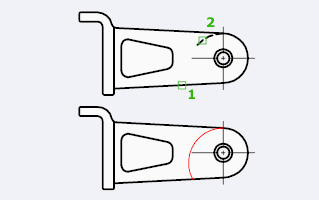
It displays the effect of the Extend command on the figure. Let's understand with an example. Consider the below figure: 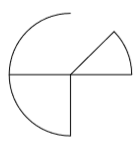
The steps to extend the boundaries or edges of the selected parts in the above figure are: 1. Select the Extend icon from the drop-down list of the Trim, as shown below: 
Or Type EX or Extend on the command line or command prompt and press Enter. 5. Press Enter 6. Select the part to extend, as shown below: 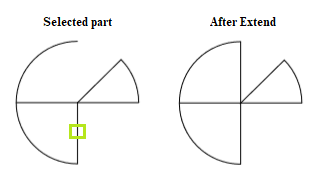
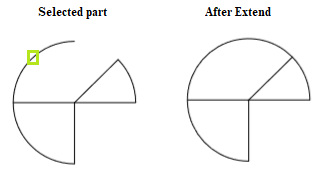
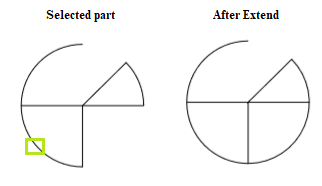
Here, we have selected different parts for better understanding. We can select the objects according to our requirements. 7. Press Enter.
Next TopicAutoCAD Spline
|
 For Videos Join Our Youtube Channel: Join Now
Feedback
- Send your Feedback to [email protected]
Help Others, Please Share


