Move an image on button clicks in HTML using CSS and JavaScript
HTML, CSS and JavaScript come in a bundle. Each of the three languages has different options and properties especially CSS and JavaScript. There is no better way than exploring the properties ourselves continuously to root them into our brains. Once we know enough options, it'll not be a very big task to make professional websites with different looks.
Here is a simple task to discover some basic properties:
Task: Move an image 10px in different directions on button clicks. Example: When clicked on right button, the image has to be moved to the right by 10px.
Directions:
- Up
- Down
- Right
- Left
- Top right diagonal
- Top left diagonal
- Bottom up diagonal
- Bottom right diagonal
Steps:
- Insert an image into the webpage
- Create buttons for all the 8 directions
- Write JavaScript functions to each button
- Style the buttons using CSS
- Test the working
So, let us follow the steps and start coding:
- Create a new file and save it with .html extension.
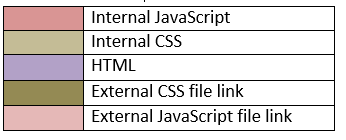
- We can either embed the CSS and JavaScript codes internally or you can create external files and link them to the html file.
- We'll embed them using <style></style> and <script></script>
The basic skeleton:
Observe the colors:
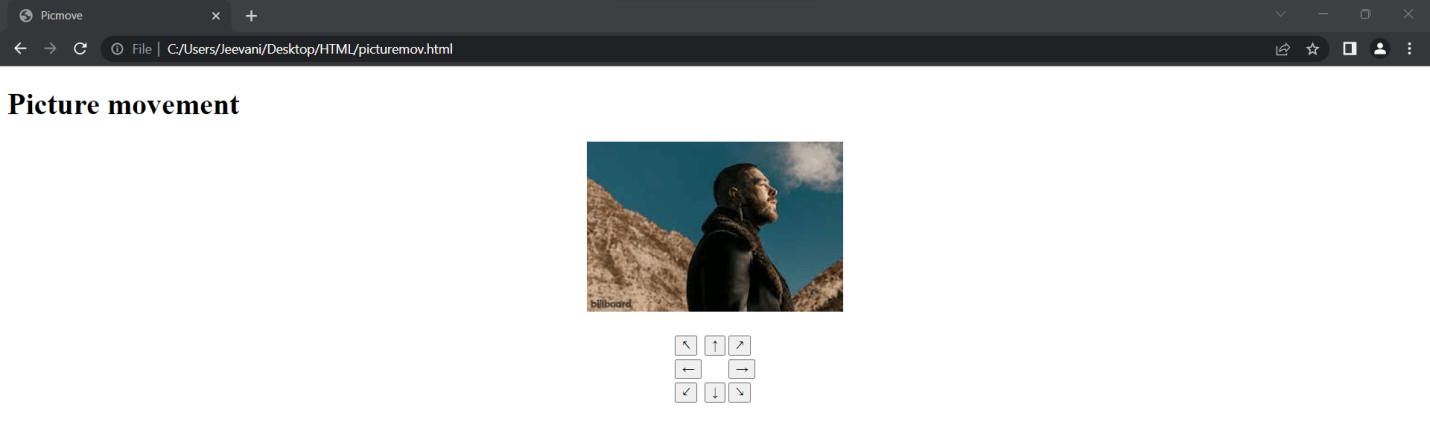
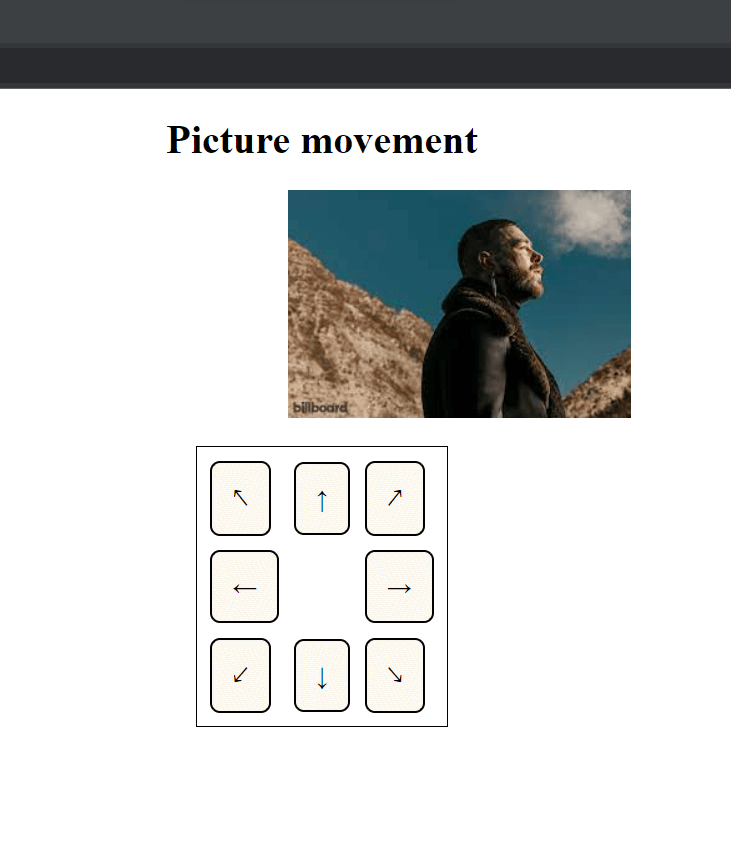
4. Now, we need to insert an image into the webpage using <img> tag:
- See that the image is saved in the same location as the html file.
- If not, assign the total path of the location to src.
- You can also assign an online image link but evey time you run the file; you need to have active internal connection to access the image.
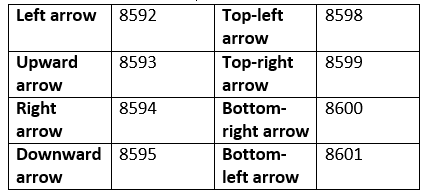
5. Now, we need to build 8 buttons for the 8 directions:
- On the buttons, we can write the name of the direction or we can simply display arrows.
- We can use the decimal or hexadecimal codes to access the codes.
- Here are the codes:
Use &#code Eg: ←
- We'll use a table to arrange the buttons to make it easy and equi-distance.
- On clicking these buttons, we call a JavaScript function with argument as the direction of the button.
- Using <center></center> we'll arrange the image as well as the button table in the center.
HTML Code:
On running:
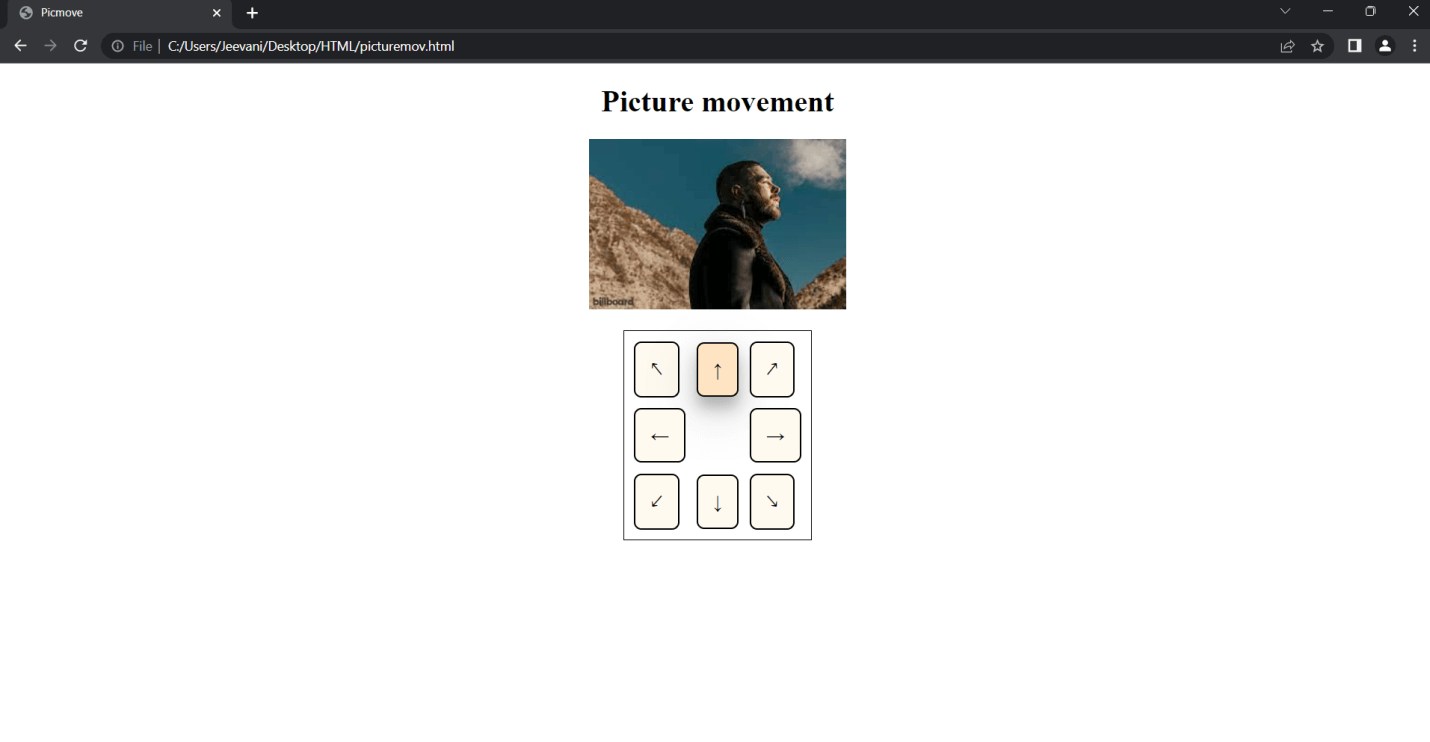
6. It is time to provide the actual functionalities to the buttons or we can add styling to the elements and then add the functionalities.
CSS:
Now, let us give some style to the buttons using some simple properties:
Output:
Properties used:
| Property |
Explanation |
| table_layout: fixed |
The layout of all the cells in the table remains fixed (Width of the columns) irrespective of the length of content inside. |
| border-spacing: 10px |
Distance or space between the borders of cells. It applies only when border-collapse is set to separate. We can set both vertical and horizontal distances. |
| border |
One property for adding the width, style and color to the borders of an element. |
| border-radius |
To curve the edge of the element's corners. (To add rounded corners to an element). The greater the value, rounder the corner will be. We can give four values to four corners. |
| background-color |
The color to the background of an element. We can give the name of the color or use hexadecimal codes. |
| box-shadow |
To attach a shadow to an element. We can add multiple shadows to a single element by separating them by a comma. |
| padding |
To create space between the element and the border around it. Using padding-top, padding-right, padding-bottom and padding-left, we can give spaces on each side of the element. |
| .b:hover |
When the user hovers the curser on the button, we can alter the properties of the button like box shadow and background color to give a feeling of click. |
JavaScript:
The functionality we use here is a CSS property: position. We can give five different values to the property:
- static -> default
- relative
- fixed
- absolute
- sticky
| Value |
Mechanism |
| static |
It is the default value when we insert an image into the document. It doesn't get affected by .left and .top modifications later in the code. |
| relative |
The position of the image is set relative to its normal position and we can alter the position using .left and .top properties later in the code. When moved, other elements won't take up the space cleared by the elements. The space stays emty until manual arrangements. |
| absolute |
The element is positioned relative to its nearest ancestor. If there are no ancestors nearby, the position will be set relative to the position of the body of the document. When moved, other elements occupy its space. |
| fixed |
The position is set relative to the position of viewport (visible part of the document). When moved, other elements take up the space cleared out by the element. Mostly used for navigation menus that stay in the same place even though user scrolls. |
| sticky |
Similar to relative. The difference is that the element remains fixed in its position until a certain point and then they become relative. This is used for navigation menus that need to be fixed until user scrolls up to a certain point only. |
Code:
Explanation:
By using .style, we are accessing the CSS of the element. First, we stored the image in a variable 'a' and then set its position to relative. So, when we try to position the picture, we'll be able to use .left and .top properties and the position is assigned with respective to its current position. To use the position property, we have to first assign it to some value and then use the dot properties to alter the position of elements.
There are only left and top properties available, we'll have to use the two to position the element in all the directions:
- left(-) for left
- lefft(+) for right
- top(-) for top
- top(+) for bottom
- Top-left: top(-) + left(-)
- Top-right: top(-) + left(+)
- Bottom-left: top(+) + left(-)
- Bottom-right: top(+) + left(+)
Specifically:
- If b is equal to "left", the left property is decremented by 10 pixels.
- If b is equal to "right", the left property is incremented by 10 pixels.
- If b is equal to "up", the top property is decremented by 10 pixels.
- If b is equal to "down", the top property is incremented by 10 pixels.
- If b is equal to "top-right", the left property is incremented by 10 pixels and the top property is decremented by 10 pixels.
- If b is equal to "top-left", the left property is decremented by 10 pixels and the top property is decremented by 10 pixels.
- If b is equal to "bottom-right", the left property is incremented by 10 pixels and the top property is incremented by 10 pixels.
- If b is equal to "bottom-left", the left property is decremented by 10 pixels and the top property is incremented by 10 pixels.
Output:
|

 For Videos Join Our Youtube Channel: Join Now


