Publishing your Calculator website using Github pages (Beginner level)
Github Pages is a web hosting service provided by Github that allows developers to easily host/ publish their websites live from Github repositories. It is a free service and it also supports custom domain names, SSL encryption and a lot of other advanced features. For developers who want to create a website fast without having to purchase for web hosting services, it is one of the best options to just go for it.
It is also very useful to students developing different websites using HTML, CSS and JavaScript. Once we host a website, other developers or users can access the website using the link and we can use the link as a reference to the project done. This tutorial explains how simple it is to publish your own website on Github with an example webpage of a calculator on which there is a tutorial already on JavaTpoint.
Here is a code for a simple calculator using HTML, JS and CSS utilizing the eval() function:
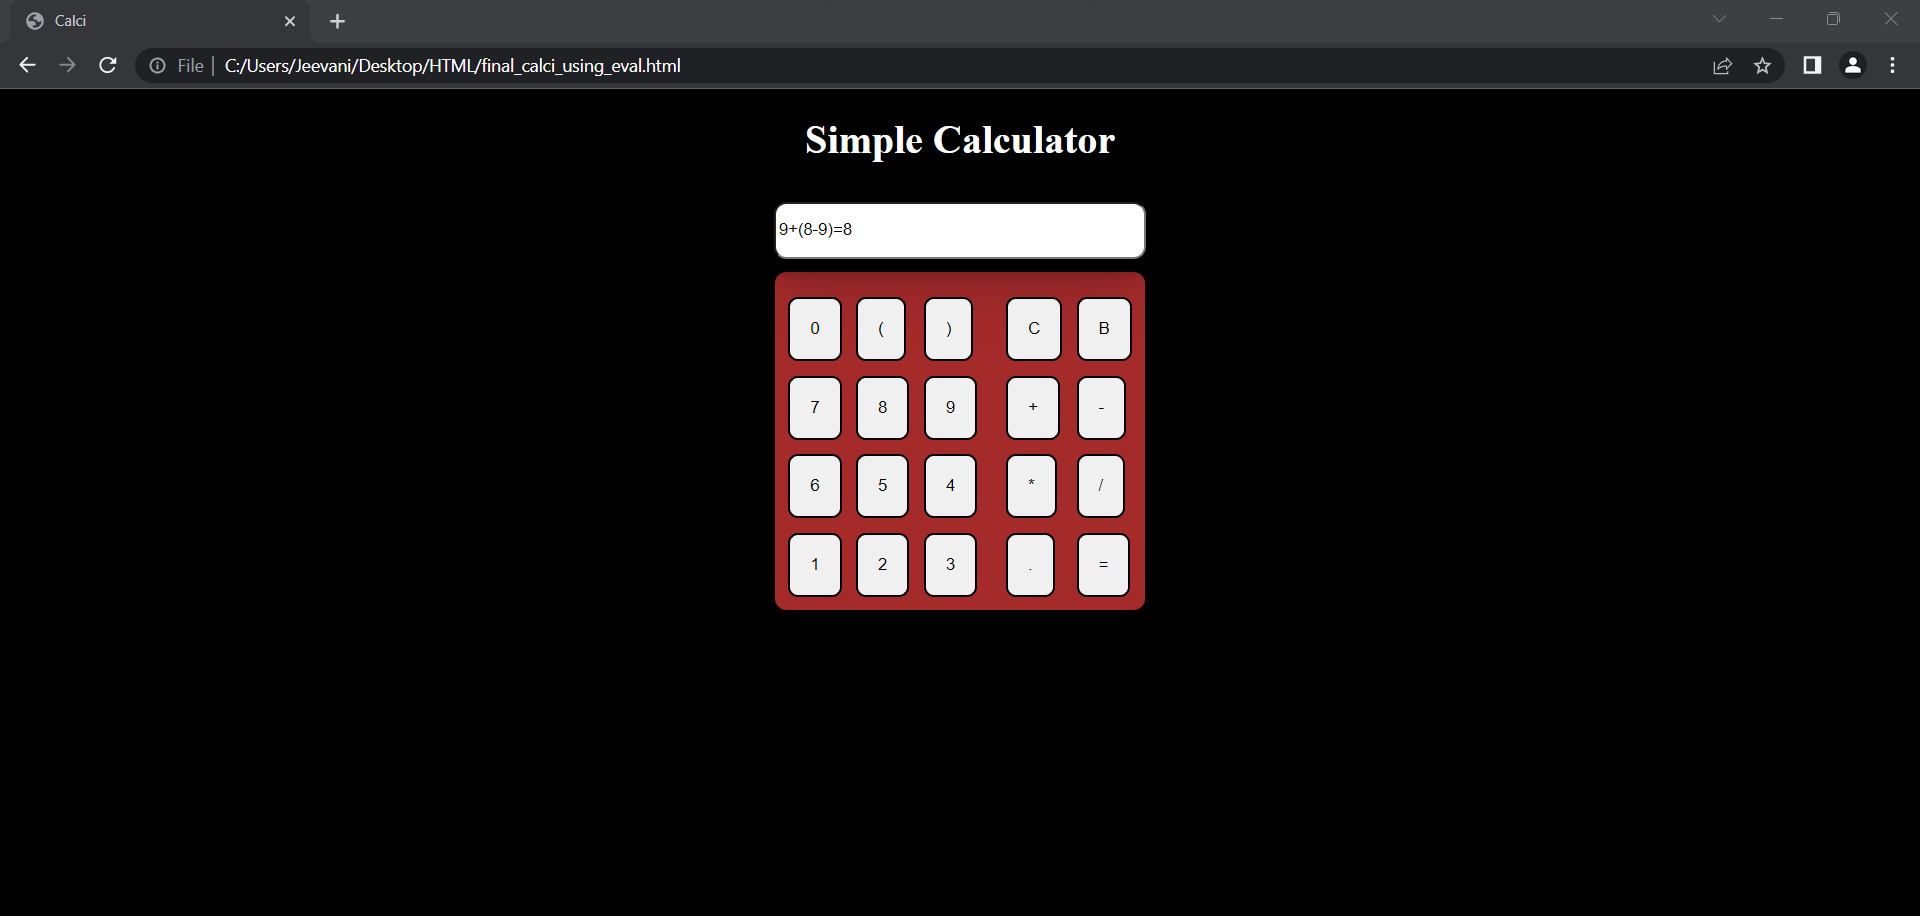
This is a simple HTML file with a calculator that has basic arithmetic operations like addition, subtraction, multiplication, and division. The calculator also has buttons for parentheses, decimal point, clear (C), and backspace (B).
This is how the calculator looks like when executed:
About the code:
HTML:
- The head section includes the title of the page, the character set, and the viewport. The body section contains a centered h1 heading that says "Simple Calculator" and a table that contains the buttons for the calculator. The first row of the table contains a text input field with an id of "display" that shows the user the calculations that they have inputted.
- There are four rows in the table, each containing six buttons. The first row has three buttons for 0, open parenthesis, and close parenthesis, followed by a blank cell, and two buttons for clear and backspace. The second row has three buttons for numbers 7, 8, and 9, followed by a blank cell, and two buttons for addition and subtraction. The third row has three buttons for numbers 4, 5, and 6, followed by a blank cell, and two buttons for multiplication and division. The last row has three buttons for numbers 1, 2, and 3, followed by a blank cell, and two buttons for decimal point and equal sign.
CSS:
- The style section of the HTML file contains CSS rules that define the appearance of the calculator. The table has a brown background color, black border, and a box-shadow effect. The buttons have a padding of 16 pixels and a border radius of 8 pixels.
- When the user hovers over a button, it changes the background color to black and the text color to white. When the user clicks on a button, it reduces in size by 2% and shows a box-shadow effect.
- The input field has a width of 290 pixels, a height of 40 pixels, a box-shadow effect, and a border radius of 10 pixels. When the user hovers over the input field, it changes the background color to black and the text color to white.
- The body of the HTML file has a black background color, while the heading has a white color. When the user hovers over the body, it changes the background color to floral white, while the heading changes to black.
JavaScript:
- The JavaScript code in this calculator contains four functions: fun(), C(), B(), and res().
- The fun() function is called whenever a button is clicked, passing the button value as the parameter a. This function appends the button value to the value currently displayed in the calculator's display area.
- The C() function is called when the "C" button is clicked, which clears the display area by setting its value to an empty string.
- The B() function is called when the "B" button is clicked, which deletes the last character from the display area. This function gets the current value of the display area, removes the last character using the slice() method, and sets the new value back to the display area.
- The res() function is called when the "=" button is clicked, which evaluates the expression entered in the display area and displays the result. This function gets the current value of the display area, appends the result of evaluating the expression using the eval() function, and sets the new value back to the display area.
About the website we're going to publish:
- Observe that JS and CSS aren't written in external files. We have only one file with HTML, CSS and JS.
- If you have external files, make sure the code is working and all the links are given to the HTML file, confirm the execution and ensure that the code is working properly.
- Even if you are facing some problem with the code, you can take the help of developers on Github.
Now, we've completed the coding part of the calculator. Note that using eval() is not the best practice due to its security problems. There are other methods/ algorithms we can use to build a calculator. This is just a simple one intended to make you understand the publishing part in the Github pages.
Github pages:
It is the web hosting service provided by Github. We can host static websites, blogs including documentation directly using Github repositories without having to go for different paid options. It offers different features like static site generators such as Jekyll, Hugo and Gatsby.
We can make a custom domain name, layout, color, theme and content in our website using the editor built in the website.
- The first step is to create a Github profile
- Open github.com and create an account for yourself.
- If you are a student, there are many opportunities like free subscriptions github provides you need to check out.
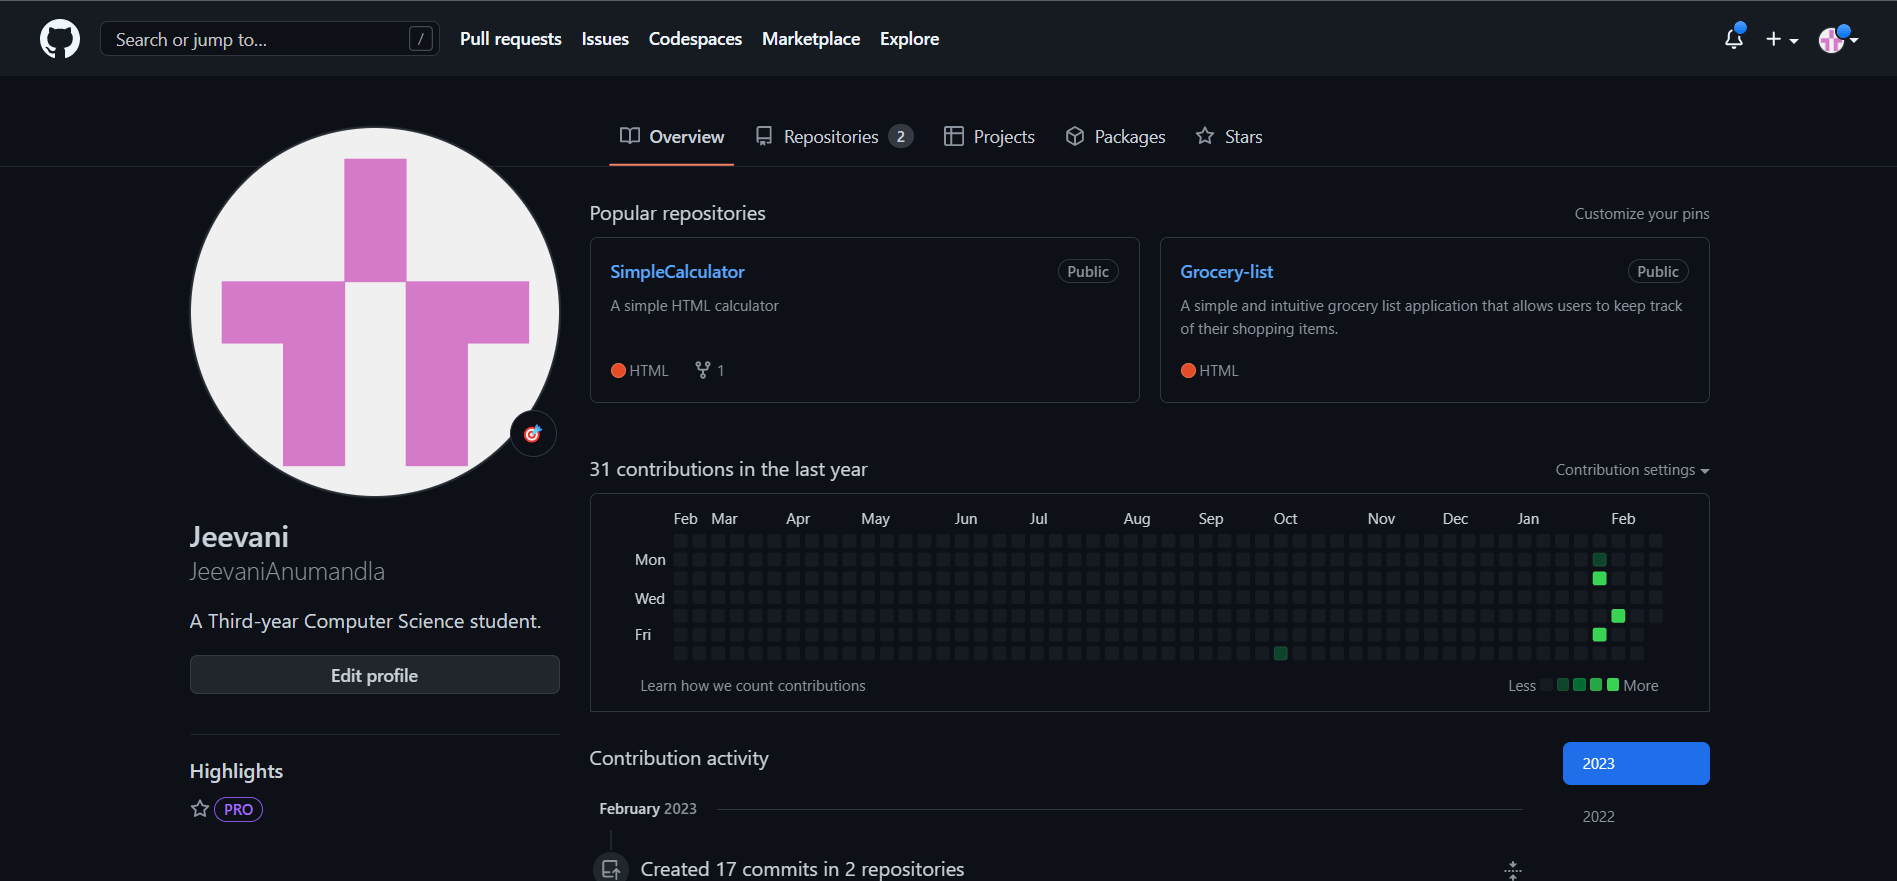
Avoid the repository history. When you create an account, the repositories will be empty. Now, let us start with the publishing:
- Rename your file with the code as index.html
- If you have multiple files, rename the html file as index.html
- Make sure that all the external files are linked right.
- Go into the Repositories section and click on New:

- Enter the details like name for the repository, keep it as public if you want to share it to people and let everyone access the website with the link
- Adding a README file is always a best practice, Check the checkbox for Add a README file
- A README file is just a big summarization about what the website is for and what can it do.
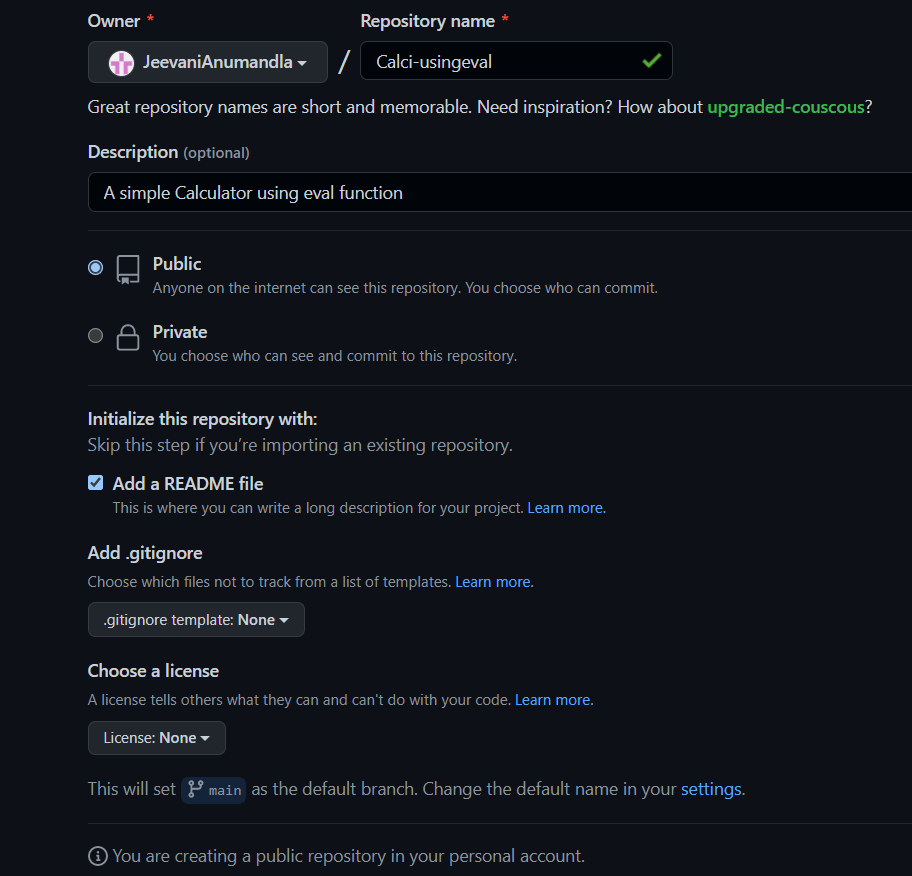
- The repository is now being created, click on the edit option and edit the README file to add description about the website.
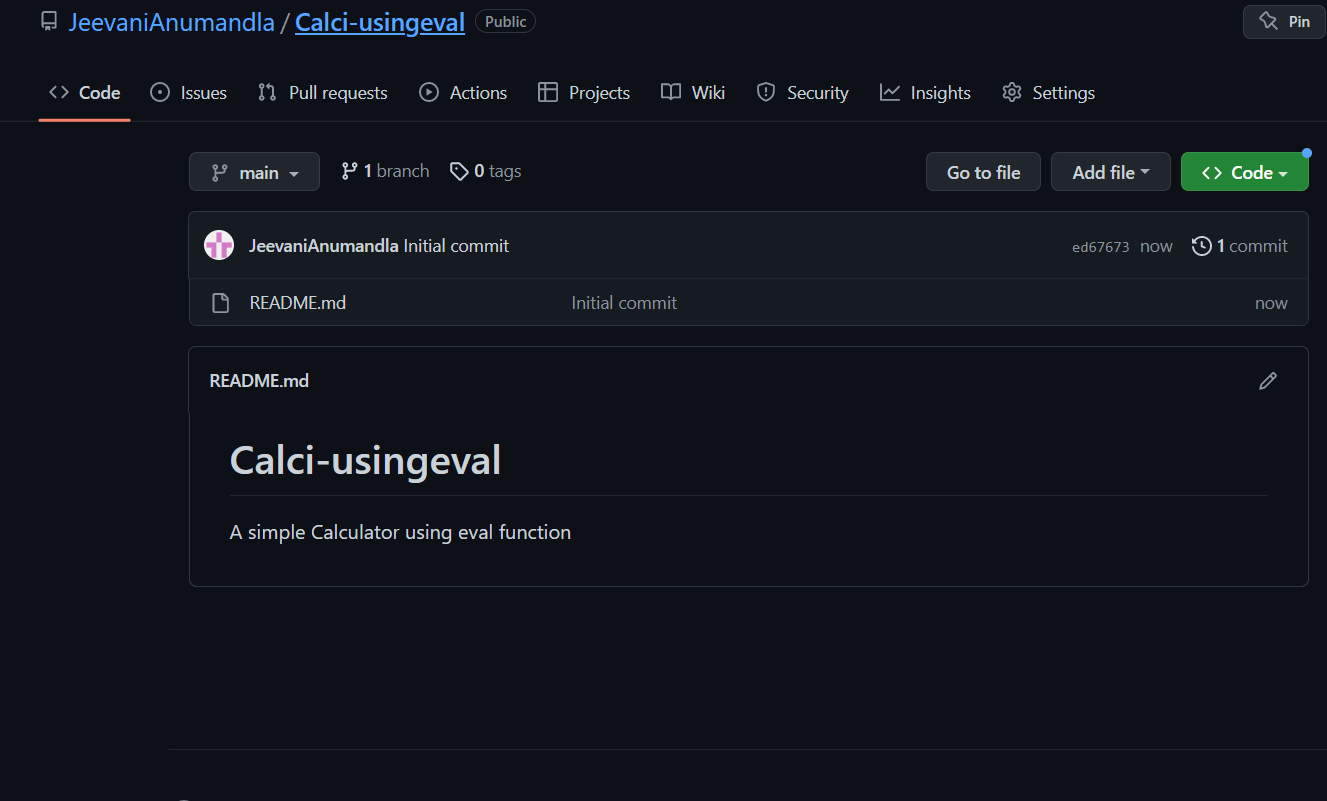
Our README file:

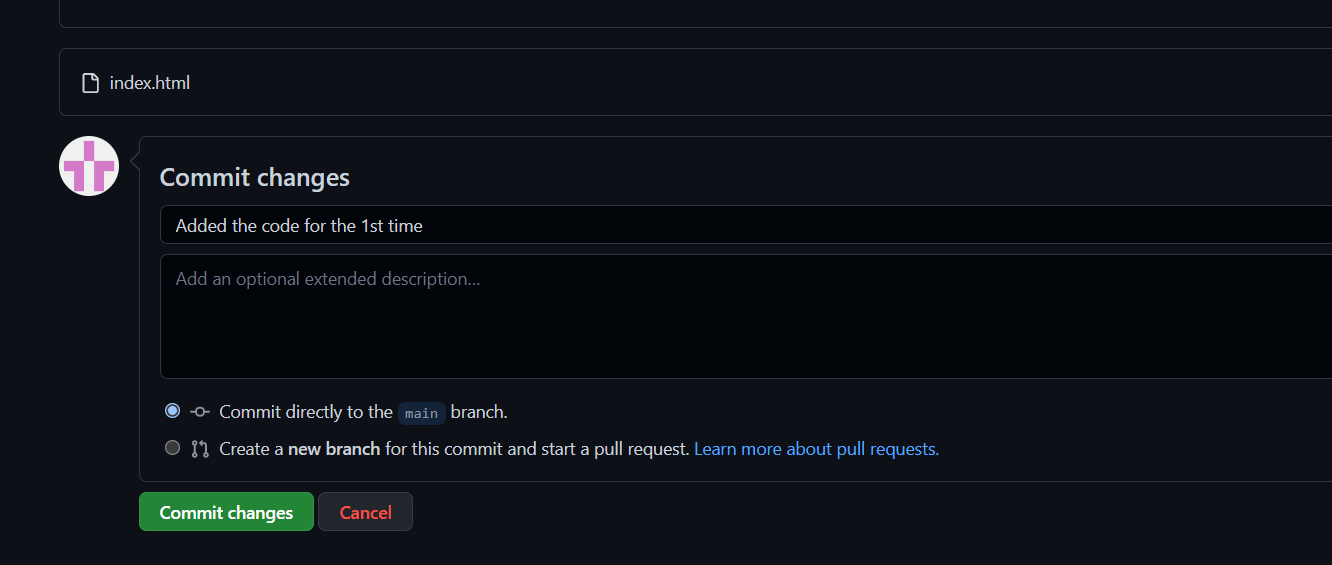
- Whatever change you have done, you need to click on commit changes for it to be saved. Otherwise, the change won't be made. In the future, we might find some more updating and we might change the code and the documentation a lot of times, hence, we need to give a small caption describing what change have you made.

- Now, it is time to upload the actual code. Click on add file and upload the index.html file we've created and do not forget to commit the change
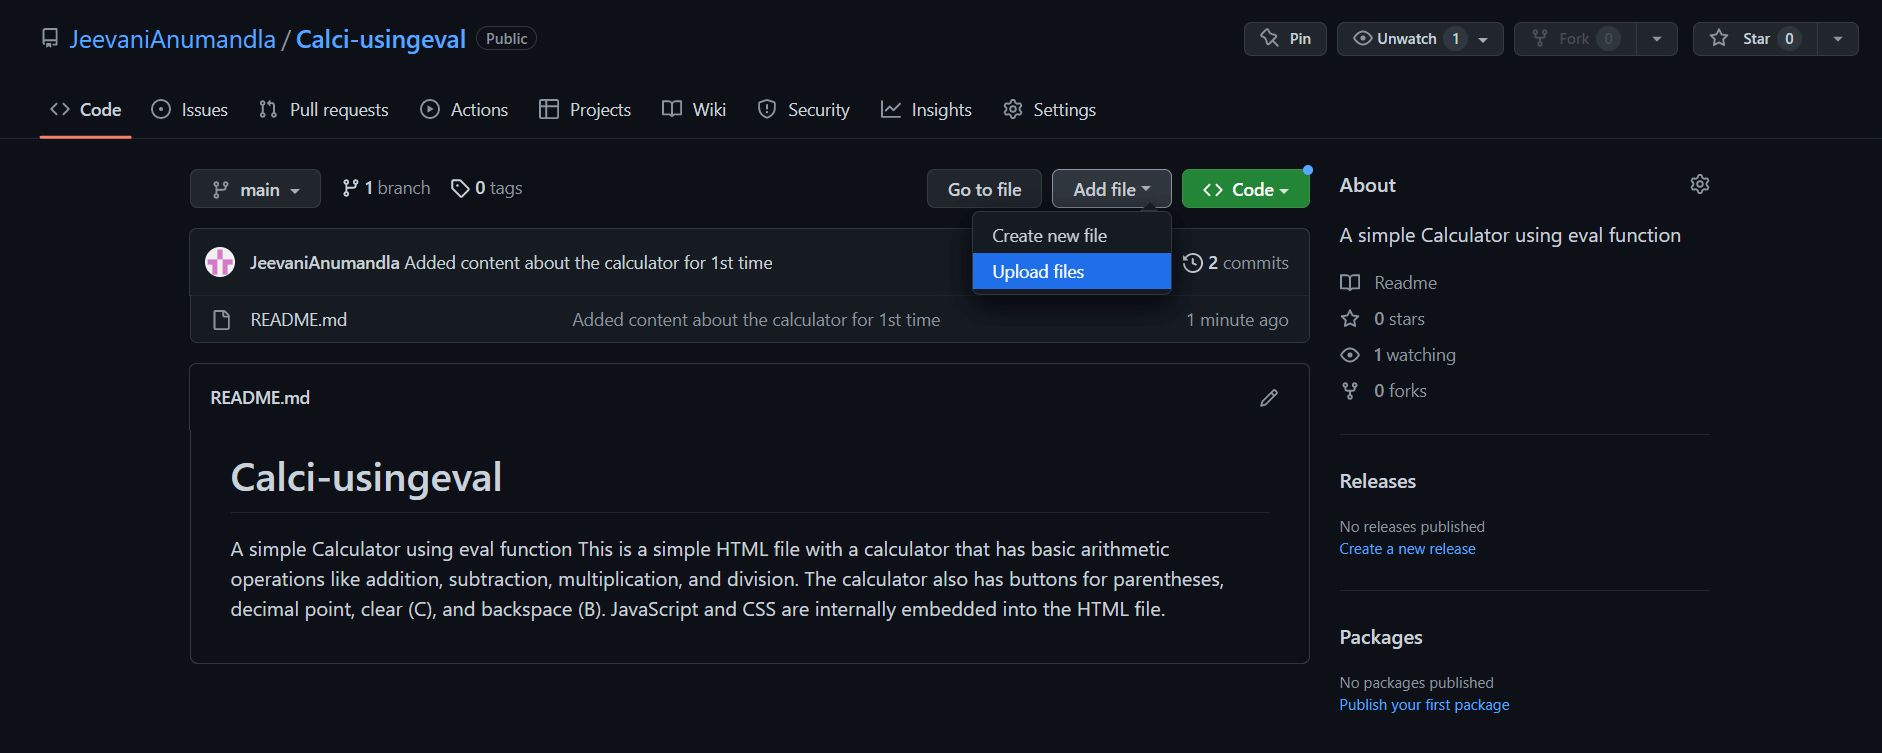
Commit:
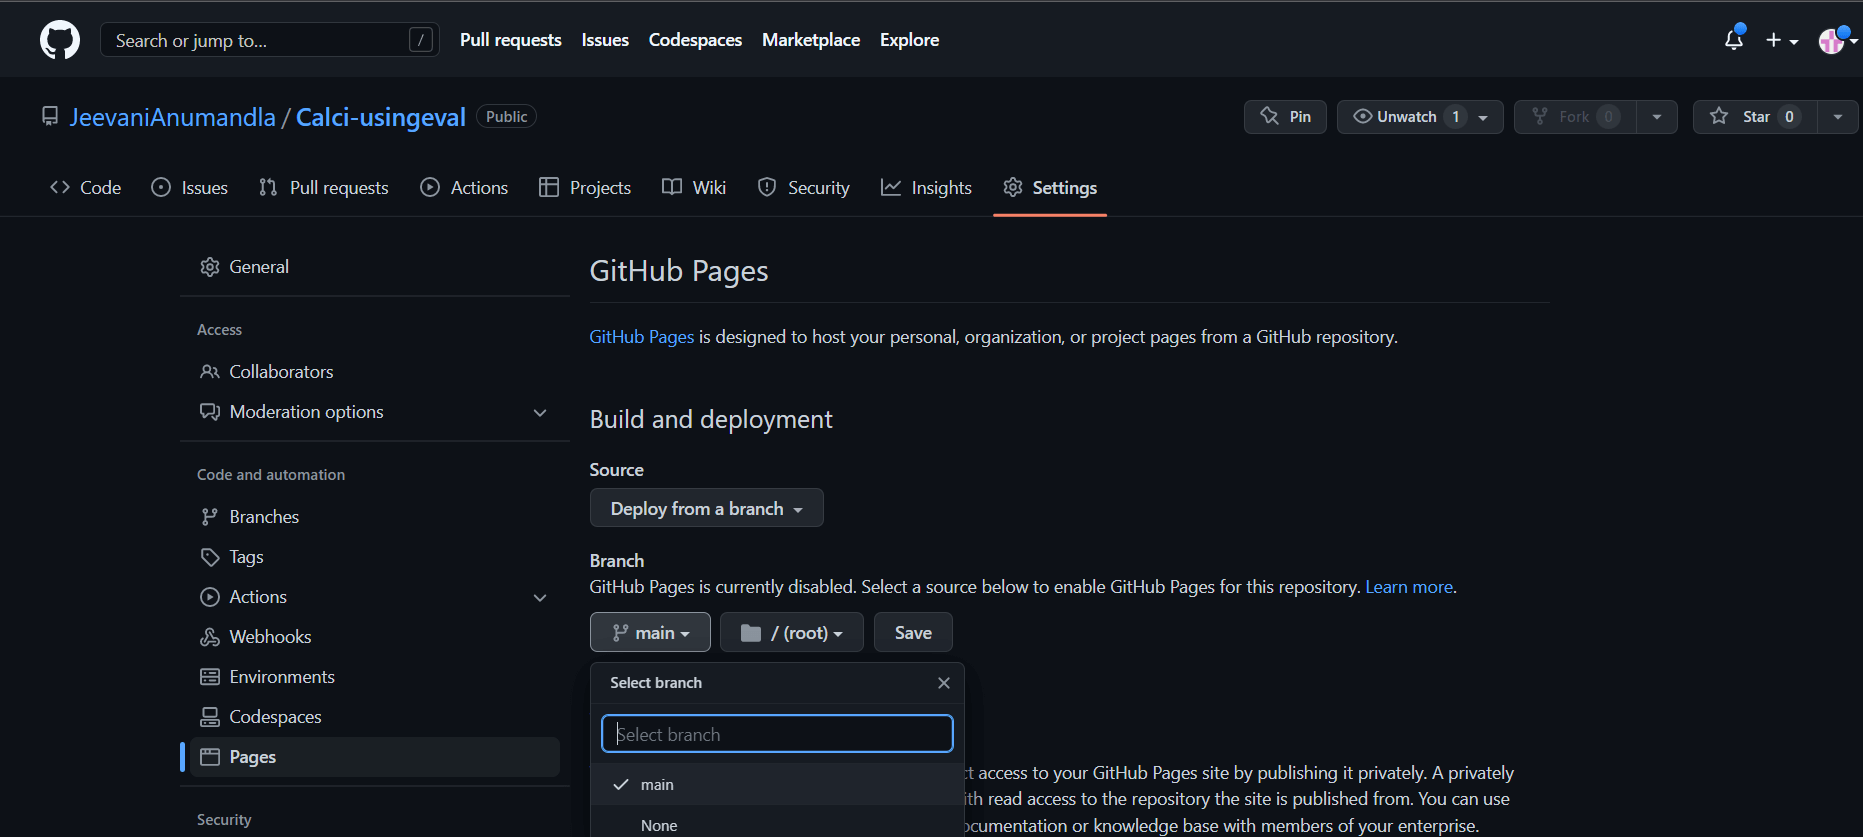
- Go to settings and click on Pages in the left navigation menu. Select main from Branch dropdown menu. Using the branch feature, we can make changes to a website without disturbing the original code by making different branches. This feature will be useful to divide works in between a team for a project and then we can merge the branches into the root directory.
- Click on save
- In no more than 5 minutes, you will get a link showing that the website is now live.
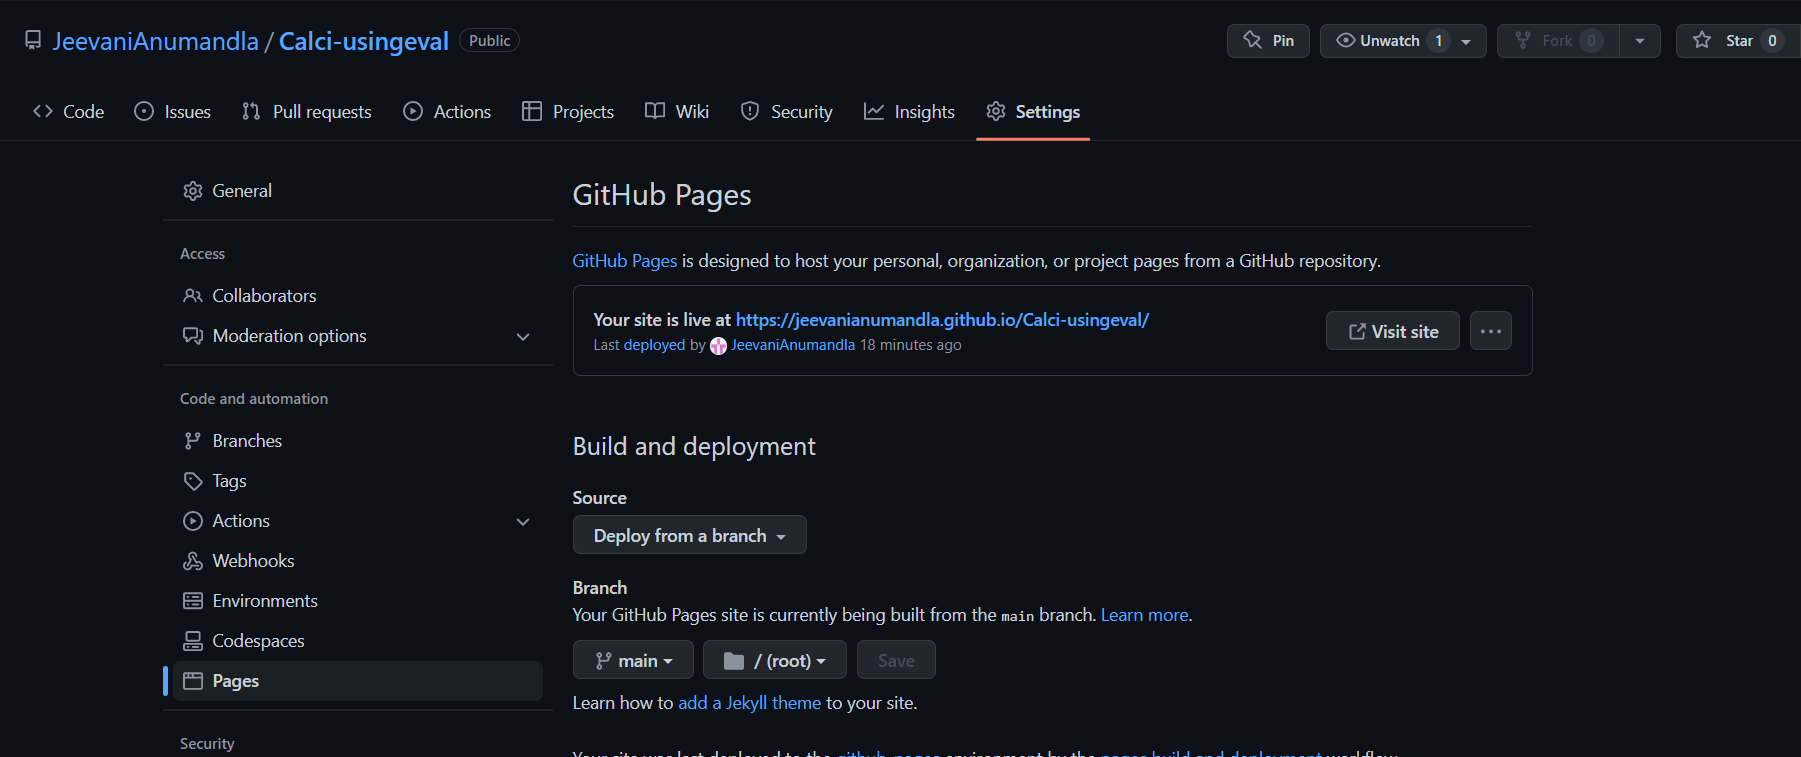
Here is the link of the calculator we've made:
https://jeevanianumandla.github.io/Calci-usingeval/
|


 For Videos Join Our Youtube Channel: Join Now


