OpenVPN UbuntuWhat is OpenVPN?OpenVPN is a VPN virtual private network system that implements several techniques for creating secure site-to-site or point-to-point connections in bridged or routed remote access facilities and configurations. It implements both server and client applications. OpenVPN permits peers for authenticating each other with pre-shared username/password, certificates, or secret keys. It permits the server for releasing an authentication certificate for all clients using certificate and signatures authority when used in the multi client-server configuration. It extensively uses the encryption library of OpenSSL, TLS protocol, and includes various control and security features. Also, it uses a protocol for custom security that uses TLS/SSL for key exchange. It can traverse firewalls and network address translators. OpenVPN has been embedded and ported to many systems. For instance, DD-WRT contains a function of OpenVPN server, a multi-protocol VPN server, i.e., SoftEther VPN also includes an OpenVPN protocol implementation. It is free software and defined by James Yonan, published upon the terms of the GPLv2 (GNU General Public License Version 2). Commercial licenses are also available. Architecture of OpenVPN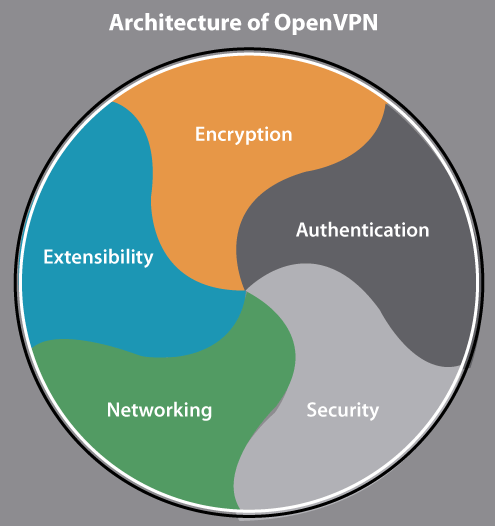
EncryptionOpenVPN uses the library of OpenSSL for providing encryption of both the control and data channels. It enables OpenSSL to implement every authentication and encryption work, permitting OpenVPN for using every cipher present inside the OpenSSL package. Also, it can use the authentication feature of the HMAC packet for adding an extra security layer to the connection. It can also apply hardware acceleration for getting the better performance of encryption. It supports mbed TLS that is available from the 2.3 version. AuthenticationOpenVPN contains many ways for authenticating pairs with each other. OpenVPN provides pre-shared keys, username/password-based, and certificate-based authentication. Pre-shared secret keys are the simplest and certificate-based are the most feature-rich and robust. In the 2.0 version, password/username authentications could be enabled both without or with certificates. However, OpenVPN relies on third-party modules to make use of password/username authentications. ExtensibilityOpenVPN can be developed with third-party scripts and plug-ins which can be known at specified entry points. The aim of it is often for extending OpenVPN with more leading logging, increased authentication with RADIUS integration, dynamic firewall updates, passwords/username, and so on. Dynamically, the plugins are loadable modules, written in C and the scripts interface can run any binaries and scripts present to OpenVPN. There are a few examples of these plug-ins in the source code of OpenVPN including a PAM authentication plug-in. Also, many third-party plugins exist for authenticating against SQL or LDAP databases like MySQL and SQLite. NetworkingOpenVPN can execute over Transmission Control Protocol or User Datagram Protocol transports, multiplexing established SSL tunnels on an individual UDP/TCP port. OpenVPN completely supports IPv6 as a protocol of the virtual network in a tunnel and the applications of OpenVPN can also create connections by IPv6 from the 2.3.x series on. It has the capability for working from almost all proxy servers and is good at implementing network address translation and getting out from firewalls. The server configuration contains the capability to "push" various options of network configuration to the clients. These contain routing commands, IP addresses, and some connection options. OpenVPN facilitates two interface types for networking by the Universal TAP/TUN driver. OpenVPN can use the LZO compression library for compressing the data stream. For OpenVPN, the official assigned port number of IANA is the 1194 port. When OpenVPN uses TCP transports for establishing a tunnel, the performance would be acceptable only as far as there is enough excess bandwidth over the un-tunneled network link to ensure that the tunneled TCP timers don't expire. The performance dramatically falls off if it becomes untrue. It is called the "TCP meltdown problem". SecurityOpenVPN provides several features of internal security. It includes up to 256-bit encryption from the library of OpenSSL, although a few service providers might provide lower rates, offering a few of the fastest VPNs available for customers. It executes in userspace rather than needing an IP stack operation. OpenVPN includes the ability for dropping root privileges, apply mlockall for preventing swapping conscious data to disk. OpenVPN executes a protocol for custom security based on TLS and SSL, instead of supporting PPTP, L2TP, IPSec, or IKE. OpenVPN provides support for smart cards by PKCS#11-based cryptographic tokens. Platforms of OpenVPNOpenVPN is available on macOS, QNX, NetBSD, FreeBSD, OpenBSD, Linux, Solaris, and Windows XP, and later versions. It is available for several mobile phone operating systems including Windows Mobile 6.5, Maemo, and below, Android devices, Android 4.0+ devices, jailbroken iOS 3.1.2+ devices, and iOS 3GS+ devices that have the accurately installed kernel module. It's not compatible with a few mobile phone operating systems including Palm operating system. It's not a VPN that is web-based displayed as a webpage like Terminal Services Web access or Citrix: the program is independently installed and configured by manually editing text files instead of using a GUI-based wizard. OpenVPN isn't suitable for VPN clients that apply the IPSec over PPTP or L2TP protocols. The whole package is composed of a binary for both server and client connections, a configuration file (optional), and multiple key files relying on the method of authentication used. Firmware implementationsOpenVPN is developed to various firmware packages of the router, permitting users for running OpenVPN in server or client mode using their network routers. The routers executing OpenVPN in client mode, for instance, permit a device on the network for accessing a VPN without requiring the capability for installing OpenVPN. Also, OpenVPN has been implemented in a few firmware of the manufacturer router. Software implementationsOpenVPN is developed to SoftEther VPN. It is a multi-protocol and open-source VPN server that permits users for connecting to the VPN server through OpenVPN clients. Also, OpenVPN is developed for Vyos. It is an open-source routing operating system forked through the Vyatta software router. Licensing of OpenVPNOpenVPN is present in two different editions:
This addition heavily depends on iptables for load balancing and never has been present on Windows for this specific reason. Also, this version can create client installers dynamically, which add a client profile to connect to a specific Access Server instance. The user however doesn't require to have an Access Server client for connecting to the Access Server instance; a client can be used from the OpenVPN Community Edition. Installing OpenVPN on UbuntuOpenVPN is a popular, fast, and, open-source program to create a virtual private network. It applies both the UDP and TCP transmission protocols. VPN tunnels are captured with the protocol of OpenVPN with TLS/SSL authentication, credentials, certificates, MAC address book, and multi-factor authentication. OpenVPN can be used on a huge range of systems and devices. It contains a client-server architecture like almost all VPN protocols in the market. The access server of OpenVPN executes on a Linux System, the clients could be installed on many Linux systems, macOS, Windows, and mobile operating systems like iOS, Android, and Windows mobile. The access server of OpenVPN accepts several connections of incoming VPN and the Connect clients of OpenVPN or the open-source clients suitable with OpenVPN can start a connection to a server. We will learn how we can set up an access server of OpenVPN on Ubuntu and connect the clients of VPN from many Linux systems in this article. Set up OpenVPN server in Ubuntu
Before downloading and executing the script, remember that the script would auto-detect the private IP address of our server. But we need to take note of the public IP address of our server when especially if it is executing behind NAT. To check the public IP address of our server, we need to execute the following wget command in the terminal window:
When run for the very first time, this script will prompt us a few questions, we need to carefully read them, and give answers according to our preferences for setting up our OpenVPN server.
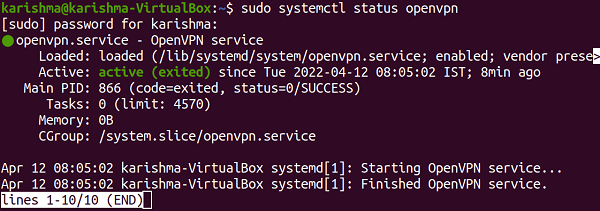

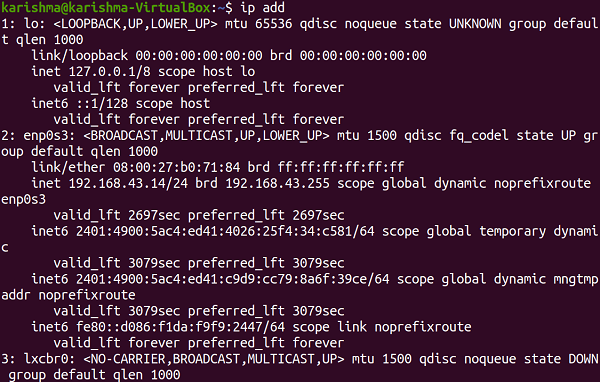
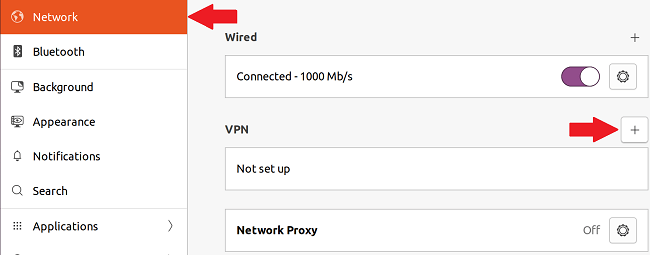
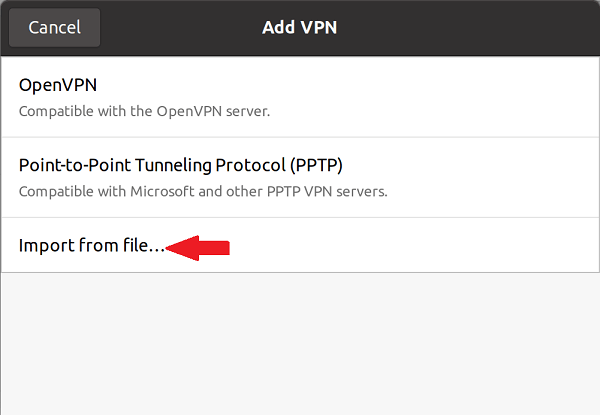
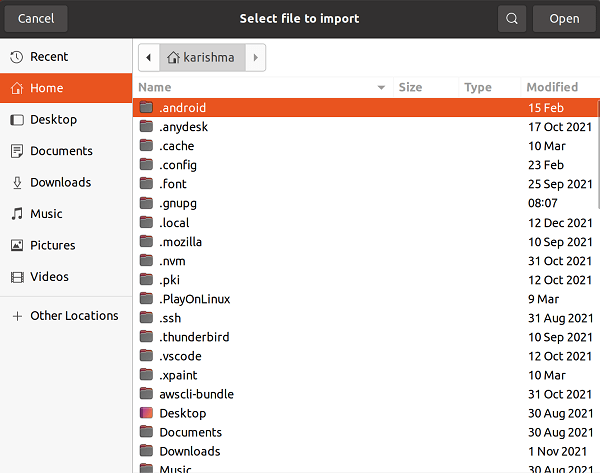
Setting up OpenVPN clients


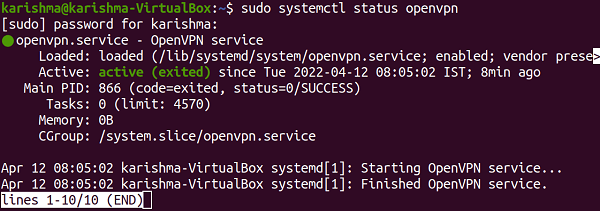
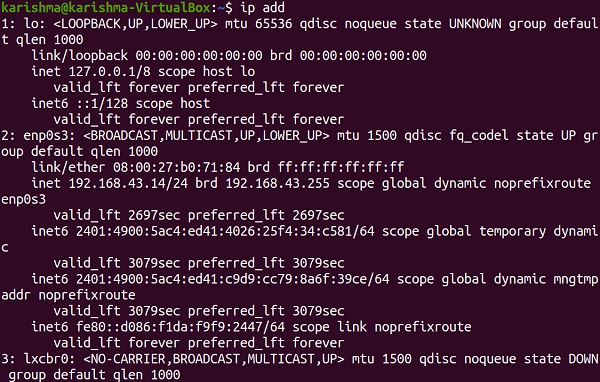
Next TopicSegmentation Fault Core Dumped Ubuntu
|
 For Videos Join Our Youtube Channel: Join Now
Feedback
- Send your Feedback to [email protected]
Help Others, Please Share


