| |

pgAdmin 4 UbuntuIntroduction to pgAdmin 4pgAdmin 4 is the dominant tool of open-source management for Postgres. pgAdmin is developed to manage and monitor multiple EDB Postgres Advanced Server and PostgreSQL database servers, both remote and local, using one graphical interface that permits the easy management and creation of database objects and several other tools to manage our database. pgAdmin can be downloaded in two modes: Server and Desktop mode. Desktop mode is downloaded as a standalone app being utilized by the same OS user, while server mode can be used on the network, permitting it to be used by more than one user. The implementations of both modes follow a 3-tier architecture method.
Functions in pgAdmin 4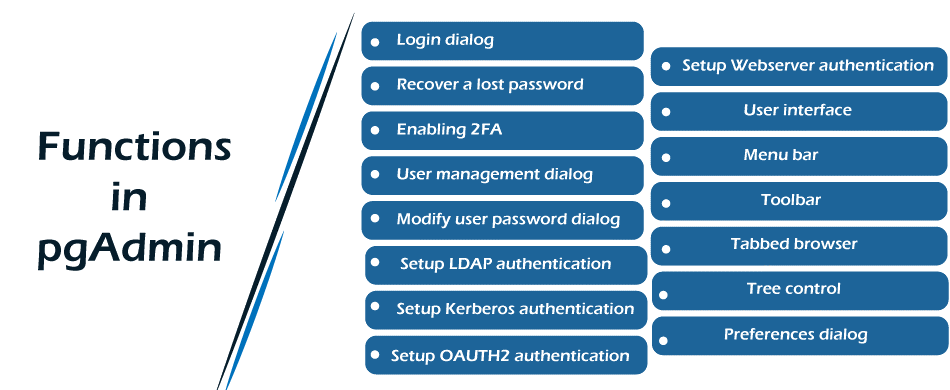
Login DialogWe can use the Login Dialog for logging in to pgAdmin. We can use many fields inside the Login Dialog to access our connections. There are two different ways to access our connection:
Note: We will be logged out if the pgAdmin server is rebooted. We need to login again to continue.Recover a lost passwordIf we can't supply our password, select the 'Forgotten your password' option to launch the password recovery utility.
Enabling 2FATwo-factor authentication is an additional security layer used when logging into applications of websites. We need to login with our password and username and give another authentication form that only we know or can authenticate with 2FA. User management dialogA password is generated randomly and then avoided when invoking pgAdmin in a desktop mode. We will be asked for an administrator password and email for the pgAdmin client if we install pgAdmin in a server mode. When we access pgAdmin, the server definitions related to that login role are present in the tree control. The administrative users can utilize the User Management dialog to:
Modify user password dialogIt's a good policy to modify our passwords routinely to protect our data, even in what we may consider a protected environment. Failure to use a proper password policy can leave us in breach of data protection laws in the workplace. We can consider the below guidelines when choosing our password:
Setup LDAP AuthenticationWe must construct the LDAP settings inside the config_system.py or config_local.py file on the system in which pgAdmin is already installed in server mode to set up LDAP authentication. We can also copy the settings through the config.py file and change the values for the below parameters. There are three ways to construct LDAP:
Note: The password of LDAP is not saved in the pgAdmin database.
Setup Kerberos AuthenticationWe must construct the Kerberos settings inside the config_system.py or config_local.py file on the system in which pgAdmin is already installed in server mode to set up Kerberos authentication. We can also copy the settings through the config.py file and change the values for the below parameters.
Note: The password is not saved in the pgAdmin database.
Note: It will grab the default_server parameter value if it's not set.Setup OAUTH2 AuthenticationWe must construct the OAUTH2 settings inside the config_system.py or config_local.py file on the system in which pgAdmin is already installed in server mode to set up LDAP authentication. We can also copy the settings through the config.py file and change the values for the below parameters.
Setup Webserver AuthenticationWe must setup our webserver using any authentication plug-in (like HTTP BASIC and Shibboleth auth) as long as it fixes the variable, i.e., REMOTE_USER environment. We must construct our Webserver settings inside the config_system.py or config_local.py file on the system in which pgAdmin is already installed in server mode to set up Webserver authentication. We can also copy the settings through the config.py file and change the values for the below parameters.
Note: The password is not saved in the pgAdmin database.
User InterfacepgAdmin 4 supports every feature of PostgreSQL, from writing basic SQL queries to integrating typical databases. It is developed to query a database, permitting us to stay current with implementations and modifications. Features
Menu BarThe menu bar of pgAdmin offers drop-down menus to access the utilities, commands, and options. The menu bar shows the below sections:
Selections might be greyed out, which means they're disabled for the recently chosen object in the pgAdmin tree control. ToolbarIt offers shortcut buttons for mostly used features such as Query Tool and View Data which are mostly used in pgAdmin. It is clear on the Browser panel, and buttons get disabled/enabled based on the chosen browser mode.
Tabbed BrowserThe pgAdmin window's right pane offers a group of tabs that show information about the currently selected object in the pgAdmin tree control inside the left window. We can choose a tab to use the information of the highlighted object inside the tree control. The Statistics tab shows the statistics gathered for all objects in the tree control; the below statistics vary by the selected object type. A few of the statistics available are as follows:
Tree ControlThe main Window's left pane shows a tree control that offers access to the objects that position on a server. We can expand nodes inside the tree control to see the database objects that position on a selected server. This tree control expands to show a hierarchical view:
Also, we can drag and drop many objects for the Query Tool, saving time in entering long names of the objects. Text having the object name will be completely qualified with schema. If required, double quotes will be included. For procedures and functions, the function name with parameter names will be fixed in the query tool. Preferences DialogOn the Preferences Dialog, we can use many options to customize the client's behavior. We need to select Preferences through the File menu to open it. The Preferences Dialog's left pane shows a tree control; all nodes of the tree control offer access to options that correspond to the node in which they are shown.
Keyboard ShortcutsKeyboard shortcuts are offered in pgAdmin to permit easy access to particular functions. Alternate shortcuts could be configured from File > Preferences if required.
Search ObjectsWe can find almost every kind of object inside a database using this dialog. We can use it by right-clicking on any database or any of its children nodes and choosing "Select objects". Also, we can use it by entering the shortcut (ALT+SHIFT+S). The output is shown in the grid with the object tree path, object type, and object name in the browser. We can double-click a result row to choose the object inside the browser. It means that we have not activated those object types if the object is greyed out in the preferences, so we cannot double-click it. We can choose the ellipses appended to the procedure and function names to check their arguments. We can filter based on a specific object type by choosing from the dropdown of the object type. When an object type is chosen, only those types will be obtained from the database if the search button is clicked. An object type will not be clear in the dropdown when the database server doesn't support it or if it's not activated from the preferences. Handling Cluster ObjectsA few object definitions remain on the cluster level; pgAdmin 4 offers dialogs that permit us to make the objects, handle them, and control their connections to each other. To use a dialog that permits us to make a database object, we need to right-click on the object type inside the pgAdmin tree control, and choose the option, i.e., Create for that object. Handling Database ObjectspgAdmin 4 offers simple but strong dialogs that we can use to create and design database objects. All dialogs contain a tab series that we use to define the object that will be made by the dialog; the SQL tab shows the SQL command that the server will run when making the object. To access any dialog that permits us to establish a database object, we need to right-click on the object type inside the pgAdmin tree control, and choose the option, i.e., Create for that object. Creating or Changing a TablepgAdmin 4 offers dialogs that permit us to change every table attribute and property. To access any dialog that permits us to establish a database object, we need to right-click on the object type inside the pgAdmin tree control, and choose the option, i.e., Create for that object. Management BasicspgAdmin offers the point & click dialogs that support us in performing many functions of server management. Dialogs simplify operations, such as granting user privileges, handling named restore points, and performing REINDEX, ANALYZE, and VACCUM functions. Backup and RestoreA strong but convenient Backup and Restore tool offers a simple way to use pg_restore, pg_dumpall, and pg_dump to take backups and make database objects or database copies for use in the development environments. Developer ToolsThe pgAdmin menu, i.e., Tools, shows a list of strong developer tools that we can use to run and analyze typical SQL commands, debug SQL/PL code, and manage data.
Installing pgAdmin 4 in UbuntupgAdmin is a famous open-source development and management tool which is published under the Artistic/PostgreSQL license. Different database type options can be easily done from the browser with this software. It can be used on almost every popular operating system. pgAdmin 4 is currently published, and it is developed using JQuery and Python. Several improvements are implemented in pgAdmin 4 than in pgAdmin 3. Anyone can download the binary or source file of this software based on a specific OS for installation. The user will be needed to have the technical knowledge to download pgAdmin by compiling the source file so that the installation processes are only for advanced users. From a binary file, installing pgAdmin is a great way for new users. In this article, we will explain how to download and use pgAdmin in Ubuntu. Steps for installing pgAdmin 4
We need to press 'y' to finish the installation process of the needed packages when the below prompt occurs: 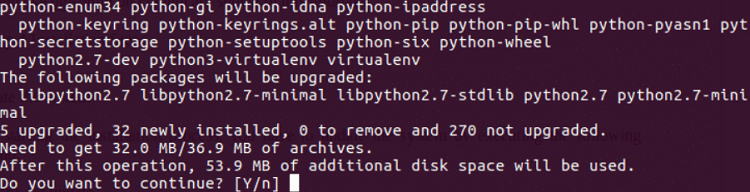
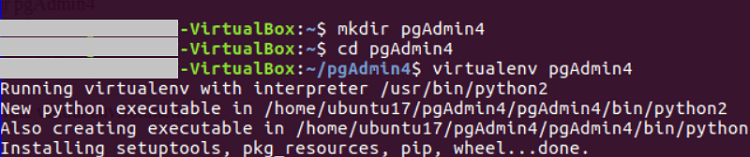

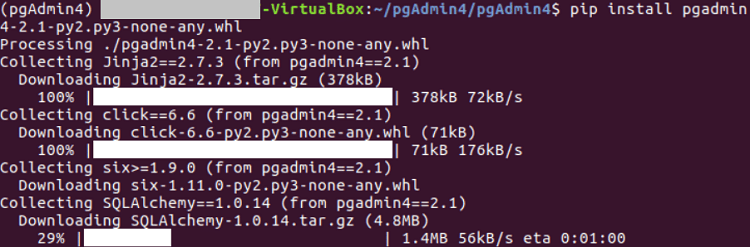
After finishing the download process of pgAdmin, the terminal will appear like the below image: 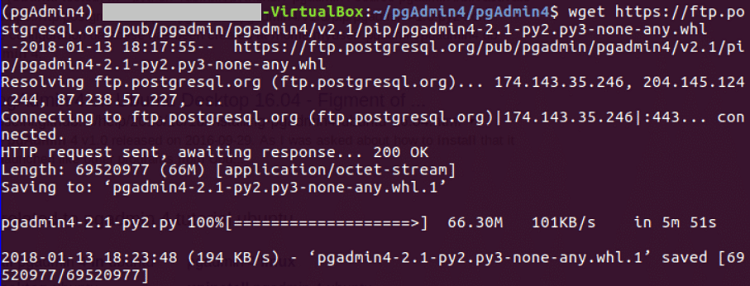
After the installation process, the below screen will occur: 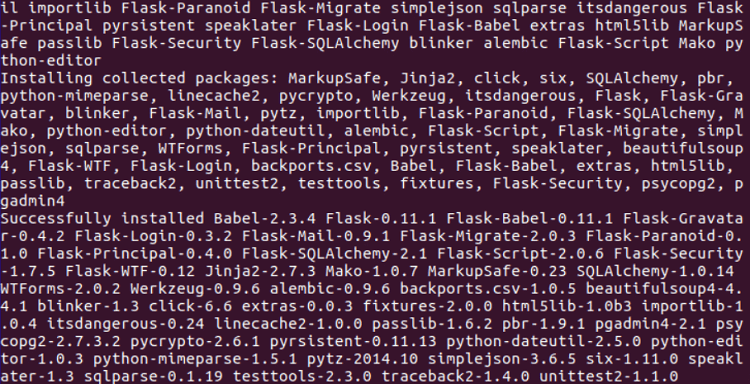
Next TopicRestart Network Manager Ubuntu
|
 For Videos Join Our Youtube Channel: Join Now
Feedback
- Send your Feedback to [email protected]
Help Others, Please Share


