| |

Putty Command in LinuxIntroduction to PuttyFor Windows, Putty is a famous terminal emulator. However, it is not just restricted to Windows OS. Being open-source and free, it is famous among many users of Linux as well. Putty provides its support for a huge protocol range such as SFTP, SCP, rlogin, Telnet, SSH, serial, etc. It is used via hobbyists/maker-crowd and seasoned sysadmins alike. Generally, sysadmins use Putty as a client of telnet and SSH whereas the community of makers uses Putty to interact with many serial ports over their hardware. This terminal emulator can ship with a terminal tool which is called "psftp" (an SFTP client of Putty). It is used for securely transferring files between systems on an SSH connection. The PuTTy commands or SSH commands model, i.e., client-server based permits two located systems (remotely) authentication during encryption of data that will pass from them.
Hence, some of the prerequisites for using PuTTy commands are mentioned below: Prerequisites
In Ubuntu Linux, the easiest way for installing Putty is by a terminal (command-line). We can install it by using the following steps on Ubuntu: Step 1 On Ubuntu Desktop, click Ctrl+Alt+T for opening the GNOME terminal. We can execute the terminal through the Ubuntu Dash if for any reason this shortcut did not work. Step 2 Execute the below command inside the terminal: 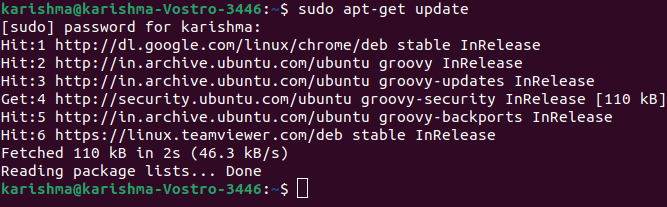
The above command will update the package list of Ubuntu with the current one. In case, the command is bounded, there is a better opportunity that Ubuntu may install the software's previous version rather than the current version because it just had the previous list along with the software's previous version. Hence, whenever upgrade the versions of the software or install new software, it is better to execute the command first. At the starting of the above command, the prefix sudo informs the terminal to execute the command as the root since upgrading and installing software is the privilege action and must not be implemented via users which don't have enough access. Give the password of the user when asked via sudo and press the Enter button. Step 3 We can install Putty by the following command: 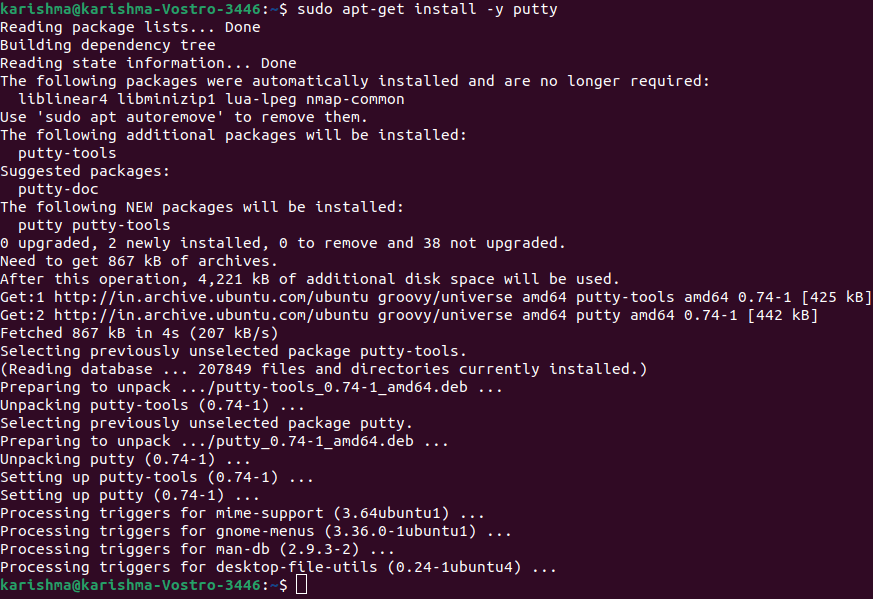
Step 4 After entering the above command Putty must be installed. Execute it through the terminal through the Dash or by entering "putty" as a command. 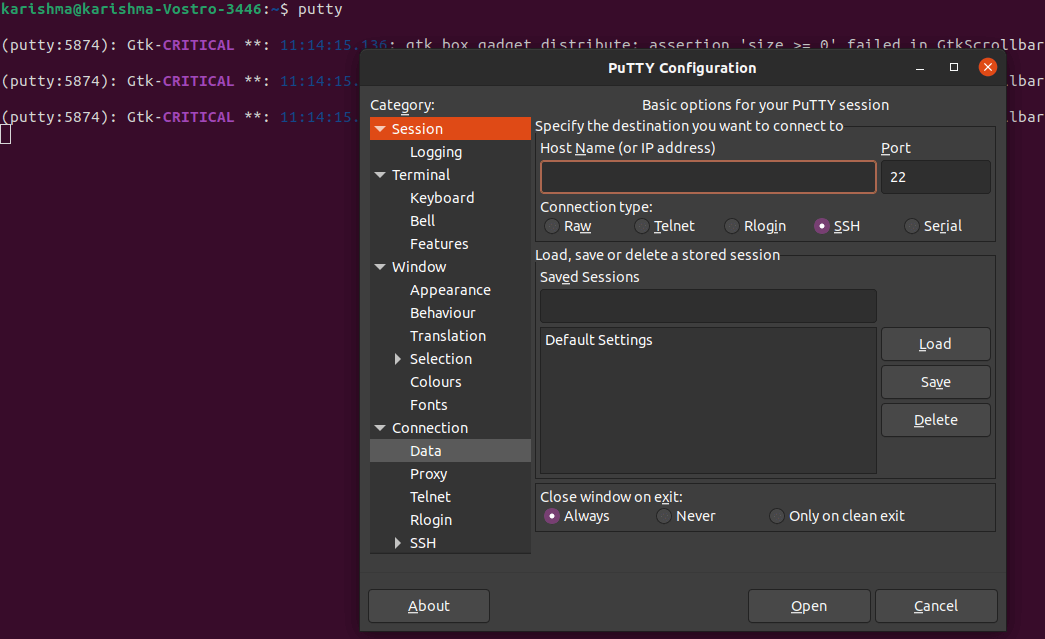
Putty facilitates a connection type range to select from Serial, SSH, Rlogin, Telnet, and Raw. Also, it ships along with various tools of the command-line for DSA and RSA key generator (also known as puttygen), SFTP (psftp), SCP (pscp), etc, which can be executed from the terminal. Connection using PuTTyType the server's IP address to the IP address bar or Host name for connecting to the server and keep the type of connection as SSH and the port as 22. Also, we may store the configuration for future use. Now, the terminal of PuTTy will open and asking for a password and username for connection. We will be logged on a server to which we were trying to establish a connection. If we are using a Mac or Linux-based OS, then we do not require any client such as PuTTy because Linux operating system contains its SSH terminal. We only require to apply the below command for connecting to the server: ssh user@serverip
Putty CommandsSome of the important commands of Putty are explained below: 1. vi: It enables us to input a text editor. Its syntax is below: 
This command will start the file over the screen of the system. In case, the file does not exist, then it will make a new file using a similar name.
2. grep: If we wish to find a specific string in a folder or file, it is the accurate command for us. This command will return the entire line including the phrase when it searches for the accurate match. The syntax is as follows: 
3. head: This command enables us to read the initial ten lines of the content in a file. Syntax of the head command is as follows: 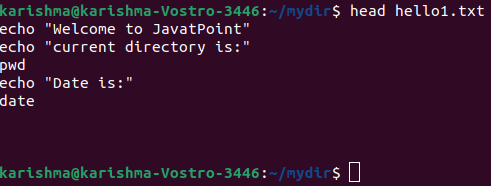
4. tail: This command is the same as a command, i.e., head which provides us the ten lines (first). The tail command provides us the ten lines (last) of content through the file. Syntax of this command is as follows: 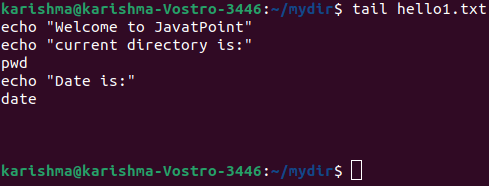
5. cat: The cat command is used for displaying the file's content on the screen. This command copies the standard input to the standard output. Also, it permits scrolling completely when the shown text does not fix the screen. The syntax is as follows: 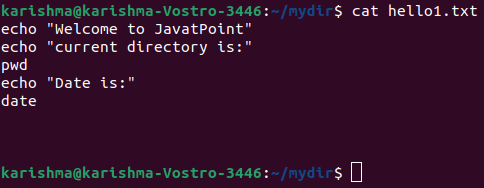
Also, this command is used for concatenating two files and display their content incorporated as one. Syntax: 
where, ">" is the result of redirection character This command can be used for creating a new file as well. Syntax: 
6. rm: It stands for remove. It enables us to remove a file through the server. The syntax for this command is mentioned below: 
Next TopicCheck OS Version in Linux
|
 For Videos Join Our Youtube Channel: Join Now
Feedback
- Send your Feedback to [email protected]
Help Others, Please Share


