Atom PythonAn Introduction to AtomTime waits for no one, and in order to stay up with this incredibly fast-paced world, we always need to update our tools. One of the main industries where programmers require the most creative surroundings to write code and create software quickly is software development. Consequently, the need for an efficient text editor and integrated development environment (IDE) arises. Regarding the Python programming language, Atom is the ideal IDE. Atom is an open-source integrated development environment that is free and intended specifically to help Python developers in their work. Let's take a glance at the subjects we will be covering in the lesson before delving more into the idea:
Let's start by recognizing the Python Atom IDE's true significance. Recognizing Atom Python's NeedPython programs may be created and run using the most basic technique, which is to create an empty file with the Python extension (.py). After that, we must use a terminal or command line shell to point to the file using the syntax shown below: Alternatively, we may use Python's built-in IDLE (Integrated Development and Learning Environment) program to run code written in Python. But these two main possibilities would not seem like a decent decision to get something done. Something more dependable and productive will be needed. That's why the Atom Python IDE is useful. Instead of having any unique features in the conventional sense, Atom creates packages that connect to its vulnerable core. Features like code lines, code highlights, and auto-complete are included in these packages. Let's go on to comprehend the amazing Atom Text Editor. Understanding Atom Text EditorAtom is a multi-platform, free, open-source text editor or IDE that supports integrated Git control and packages produced using NodeJS. Open-source groups create the majority of expanding packages and are available for free. The foundation of Atom IDE is Electron Framework, formerly known as Atom Shell. With the aid of NodeJS and Chromium, the electron framework enables developers to utilize the desktop application on several operating systems, including Windows, Linux, and MacOS. The Atom IDE is created and maintained by GitHub and is written in CoffeeScript and Less. Atom Text Editors is also known as Hackable Text Editor for the Twenty-First Century by its developers and is fully customizable in HTML, JavaScript, and CSS. Now, let us see how to download and install Atom Text Editor. Downloading and Installing Atom Python Text EditorAtom Python Text Editor is available for download from https://atom.io/, the official website. The setup file that corresponds to the current operating system settings will be automatically detected and shown for download. Downloading and Installing Atom Python Text Editor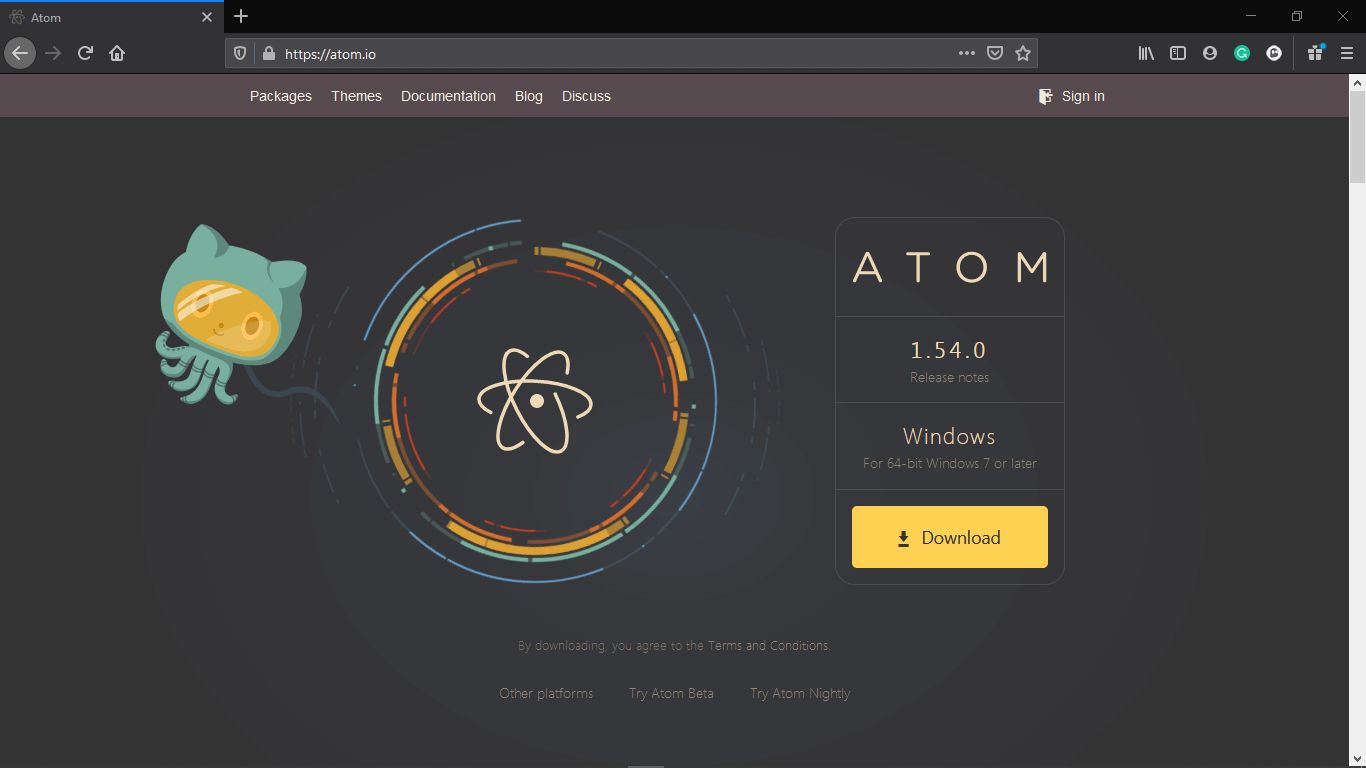
Click Download to start downloading the setup file. To install the application on the system, open the setup file when the download is finished. An instruction manual is not necessary because the installation process is automated. After a successful installation, Atom will launch immediately in the default location and create a shortcut in the start menu. To run Python code, we now need to install the necessary plugins and packages. Now, let's see how Atom Python is configured such that it may be accessed using a standard approach from the user's preferred directory. Additionally, Atom offers options like installing packages or themes with the aid of a welcome guide. 'Show Welcome Guide upon opening Atom' is being unchecked, and the welcome guide is being closed. Consequently, the welcome guide won't show up when we open the atom application the following time. 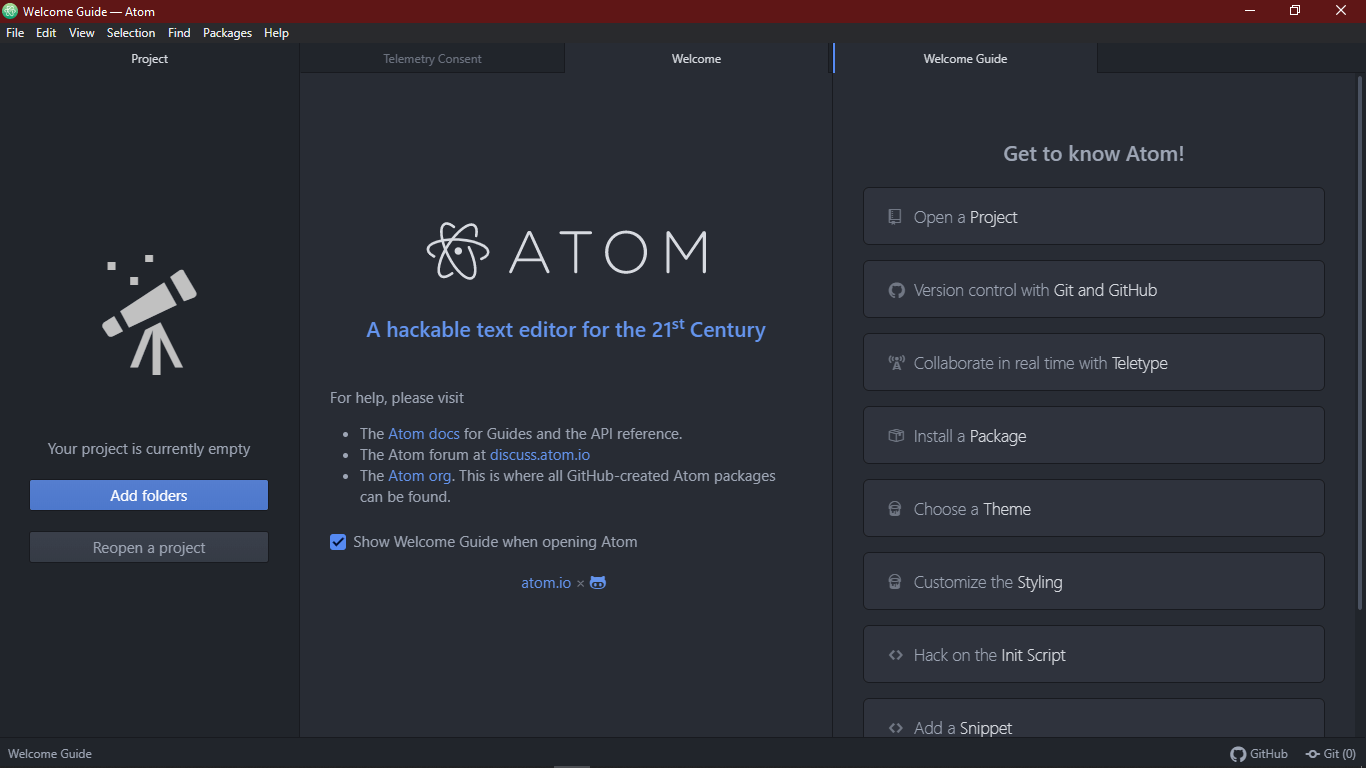
Now that we are in the directory, we can right-click on any file or folder and choose "Open with Atom" from the menu. We can open the option from the programs if it isn't there in the context menu. All we need to do with Atom is choose the File menu. Navigate to Settings. To open Atomic settings, we could use the shortcut key Ctrl + Comma (Ctrl+,). We must choose the System Tab under Settings and verify the following options:
Then, the 'Open with Atom' option will appear in the context menu. We may now access the chosen file or folder in Atom immediately. The tree view is displayed on the left when we launch the Atom program. Toggle Tree View may be selected from the menu bar by going to View if the tree view is not shown. The keyboard shortcut Ctrl + K Ctrl + B is another option. The files in the connected folder are displayed in this tree view, and we can double click any Python file to examine its contents. Code Execution in Atom PythonGenerally, we use the command prompt or terminal to execute Python programs. However, Atom provides a plugin known as platformio-ide-terminal in order to execute the python code. We can set up this plugin by navigating to the File in the Menu bar. Go to Settings. Click on Install Tab. Now, in the search bar, search and install the platformio-ide-terminal plugin. We can use the above method in order to install other packages, plugins as well as themes. 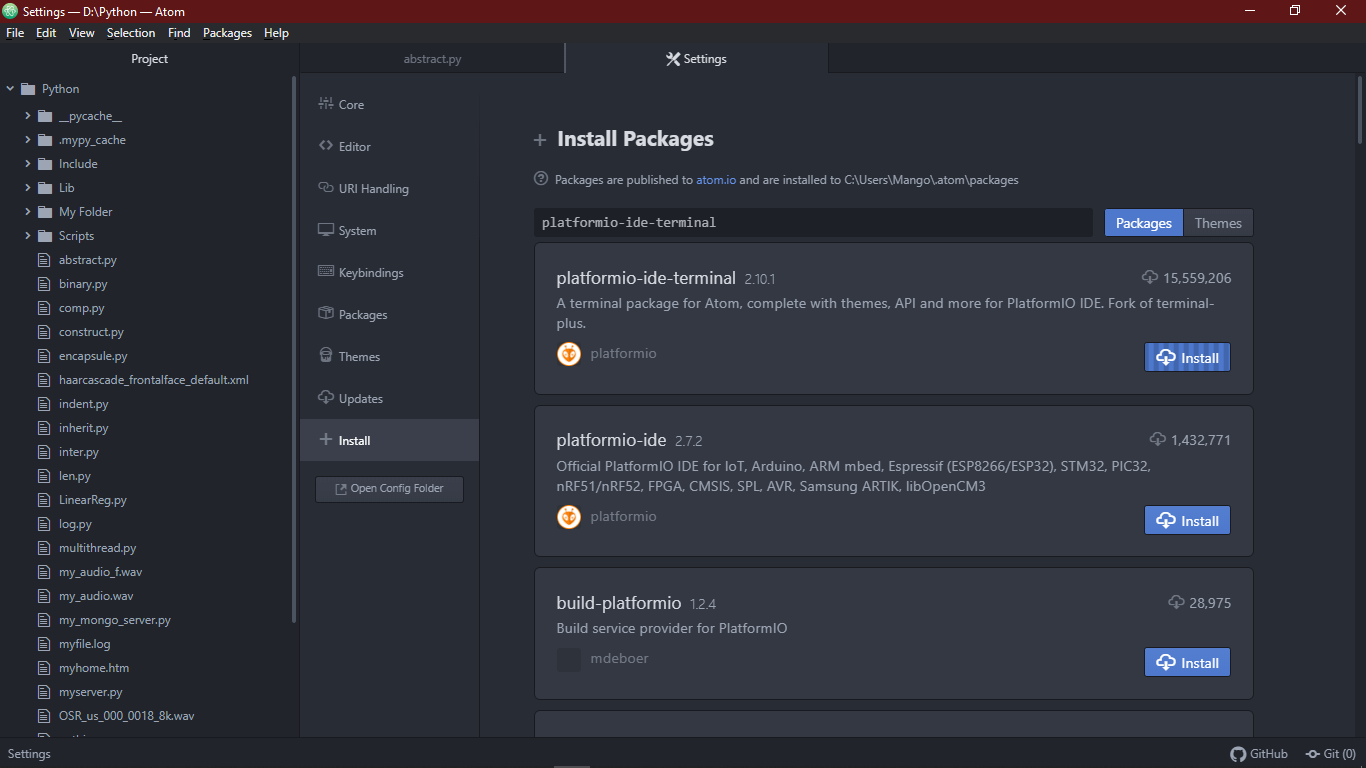
The Atom text editor will incorporate a terminal after the plugin has been installed properly. The + icon that may be seen in the editor's bottom-left corner allows us to switch between this terminal and others. Splitting the Editor We can open multiple files in Atom and split the window by navigating to View in the Menu bar. Go to Panes and select the Split Right option in order to send the present file to the right half of the window. This will help the users to enhance productivity while working with more than one file. Atom Python ThemingAtom offers two different kinds of themes: UI themes and syntax themes. The syntactic themes are used to specify the code color and draw attention to certain syntax features. UI themes, on the other hand, are used to alter the appearance of buttons, dropdown menus, and many other elements. By selecting the Themes tab from the Settings menu located in the File menu, we can view all of the installed themes. The appropriate output will be shown on the Theme tab. By selecting the + Install option in Settings and looking for the preferred theme, we can also download a number of new themes that are currently available on the market. Formatting If we go back to the parameters and choose the Editor tab, we can also modify the font's default parameters. Numerous settings pertaining to the Editor style, such as font size and style, are available under the following tab. To customize it the way we want, we may use Font Family to modify the font. Atom Python ExperimentingThere are various things that we can also experiment with using the options as follows: line-height: The distance between two lines is the standard definition of line-height. By going to the Editor tab and making the necessary changes, we can easily adjust the line-height. Scroll Past End: Usually, the last line of the code-also known as the bottom of the screen-is the furthest we may scroll over. Usually, we are unable to scroll past this point. On the other hand, the bottom line appears at the top of the screen if we activate the Scroll Past End package. For users' comfort, this package includes a blank space at the bottom where they may work with their codes. Show Indent Guide: The vertical lines, which indicate where the indentations should appear, are displayed using the Indent Guide. From the Editor tab in Settings, we can turn on the Show Indent Guide feature. We can try a number of other alternatives. For now, though, let's move on to comprehending a few settings that are exclusive to Python. Python particular ConfigurationsISome of the most helpful plugins for increasing Python productivity are listed below: Script: The purpose of the Script package is to show a document that contains all the information about other packages, including commands, shortcuts, and much more. If you find these default shortcuts unpleasant, you may always modify them by going to the view code tab, which is where the keymaps folder is kept. The script.cson file must then be opened and updated in accordance with preferences. 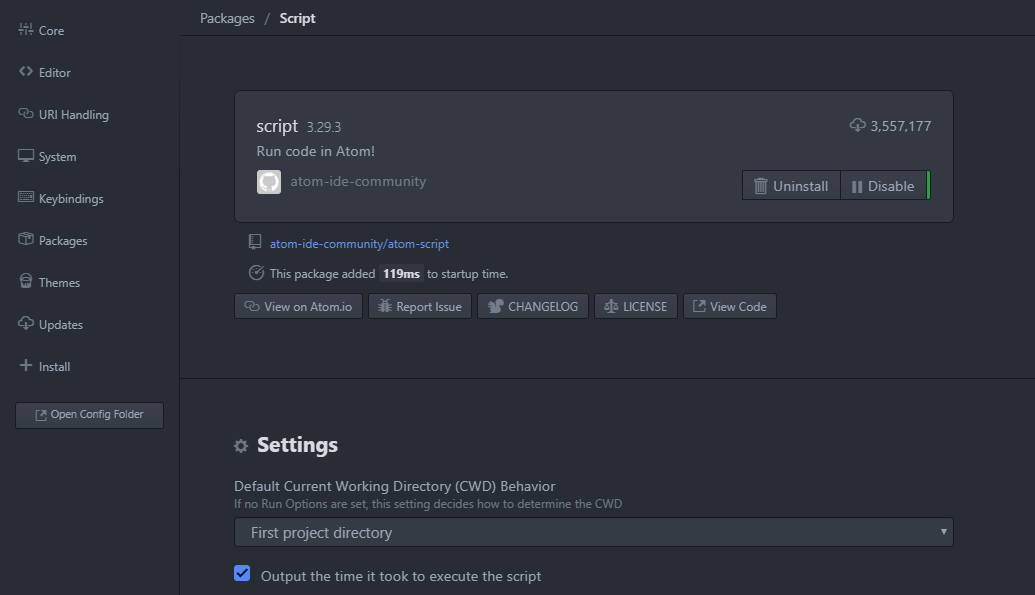
We have modified the shortcut to Ctrl + R, for example. After the update procedure is complete, shut down every window and launch Atom IDE again. Following the restart, an output box appears at the bottom, and we can use the customized shortcut to utilize the Python script. However, we may also alter this output box as seen below: Navigate to the Themes tab under the Settings section of the File menu. Toward the top is a link that allows you to modify the CSS. By clicking this link, we may get the stylesheet. To make the script console's font larger, copy and paste the following code snippet into the stylesheet once it has opened. atom-file-icons: The icons that lead the files in the tree view are inserted using the atom-file-icons package, as seen below: Before Installing the atom-file-icons package 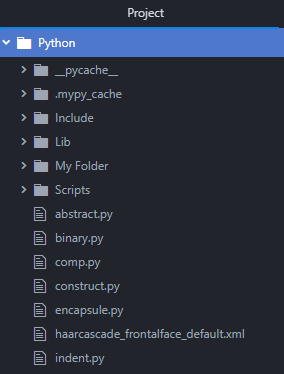
Following the atom-file-icons package installation 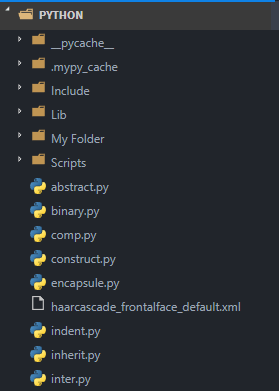
autocomplete-python: When we get to a certain place when writing code, the autocomplete-python module shows the recommendations box regarding what may appear. 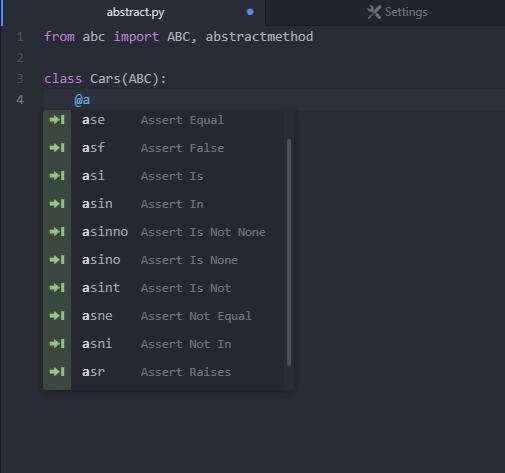
Flake: Flake serves as a Python linter, identifying and highlighting all of the script's problems. By installing flake8 using the following line in the command shell or terminal, we may enable the flake package: After the installation is finished, the Atom IDE will display a little symbol in the lower left corner. The error list that was discovered while writing will be shown by clicking on this symbol. python-autopep8: The package python-autopep8 is utilized for formatting code. By selecting the Format option under the Save menu, we may activate it from the autopep8 plugin settings. Let's now examine how Python code is executed within the Atom IDE. How can I run Python code in the Atom editor?Let's write a basic code for an abstract class to understand better how Python code is executed in the Atom IDE. Example: File: inter.py When the code is finished, it will resemble the following image: 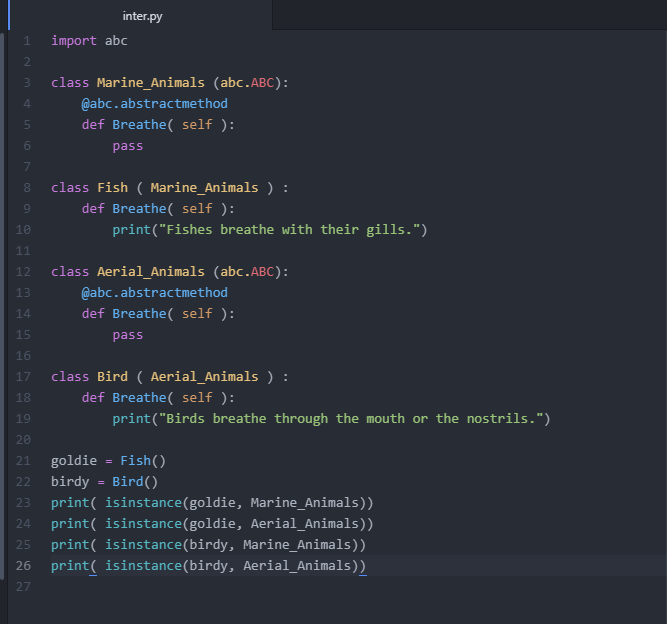
Now let us move onto the code execution using the terminal we have installed earlier. To use the terminal, click on the + icon located at the bottom left. Now, type the following command to run the program: Output: $ python inter.py True False False True The same can be viewed in the following image: 
Now, let us understand the code. Explanation: The two abstract base classes, Marine_Animals and Aerial_Animals, each have an abstract method called Breathe, and this Python program defines them. Two concrete classes, Fish and Bird, implement the Breathe method with different behaviors for each kind of animal. Fish and Bird inherit from Marine_Animals and Aerial_Animals, respectively. Next, instances of Fish and Bird with the names Goldie and Birdy, respectively, are created by the program. It determines if each instance belongs to the Marine Animals and Aerial Animals classes by using the isinstance() method, and depending on the outcome, it prints True or False. According to the output, birdy (a bird) is an instance of Aerial Animals but not Marine Animals, whereas Goldie (a fish) is an instance of Marine Animals but not Aerial Animals.
Next TopicContains in Python
|
 For Videos Join Our Youtube Channel: Join Now
Feedback
- Send your Feedback to [email protected]
Help Others, Please Share


