| |

Building a Notepad using PyQt5 and PythonNotepad does not require much introduction. It is a generic text editor that allows users to open, read, create, and edit plaintext files. It has been part of Microsoft Windows since the beginning, and similar applications exist in every GUI desktop ever developed. In the following tutorial, we will create a replica of Notepad in the Python programming language with the help of the PyQt5 library. But before we get started, let us have a brief introduction to the PyQt5 library. A brief overview of PyQt5PyQt5 is a Graphical User Interface (GUI) toolkit, a set of Python bindings for Qt v5 compatible with many operating systems like Windows, Unix, Linux, macOS, Android, and iOS. The PyQt5 library allows us to easily develop an interactive desktop application because of its tools and simplicity. A GUI application comprises Frontend and Backend. PyQt5 offers a tool known as 'QtDesigner' that uses the drag and drop method in order to design the Frontend so that development can become faster, and one can give more time on backend stuff. Installing PyQt5 using pipIn order to install the Python module, we need 'pip', a framework to manage packages required to install the modules from the trusted public repositories. Once we have 'pip', we can install the pyqt5 module using the command from a Windows command prompt (CMD) or terminal as shown below: Syntax: Verifying the InstallationOnce the module is installed, we can verify it by creating an empty Python program file and writing an import statement as follows: File: verify.py Now, save the above file and execute it using the following command in a terminal: Syntax: If the above Python program file does not return any error, the module is installed properly. However, in the case where an exception is raised, try reinstalling the module, and it is also recommended to refer to the official documentation of the module. Let us now start building the project. Prerequisites of the ProjectIn order to start building Notepad using PyQt5 in Python, a basic knowledge of the language's syntax and functions is required. Since Python is a High-level Interpreted Object-Oriented Programming language, we will also use the concept of Classes and Objects. Moreover, the following are the modules we will be using throughout the Project:
Building the Notepad application in PythonWe will start by creating a new folder as - 'My Notepad'. Inside this folder, we will create another folder as - 'icons' that will contain all the icons we require for the project and a Python program file as - 'main.py', where we will write the source code of the project. The icons are optional and can be used to make the application look attractive. One can either use the icons of their choice or download the ZIP file containing the icons which we have used in this project from the following link: Click here to download Now that we have set up the structure for the application, it is time for us to open the 'main.py' file and start the coding part. To keep the concept clear and understandable, we have divided the complete project code into different segments. The followings are the steps that we will opt to work on the project. Step 1: First of all, we will import the required modules for the project. Step 2: Secondly, we will create the main window of the application. Step 3: We will then add the text editor and container to the window. Step 4: After that, we will create the Menus and Toolbars. Step 5: At last, we will define the necessary functions and set the event triggers. Let us understand these functions in detail. Importing the required modules for the projectWe will start by importing all the necessary modules like sys and os. We will also import the various classes from different modules of the PyQt5 module. Let us consider the following snippet of code illustrating the same. File: main.py Explanation: In the above snippet of code, we have imported the sys and os modules. We have then imported all the necessary classes from the QtWidgets, QtGui, QtCore, and QtPrintSupport modules of the PyQt5 module. Creating the main window of the applicationNow that we have successfully imported all the required modules and classes for the project, it is time for us to create the main window of the application. We will create a QMainWindow subclass and define an initializing function to configure the window's title, geometry, and icon. File: main.py Explanation: In the above snippet of code, we have defined a subclass of the QMainWindow class. Within this class, we have defined an initializing function to initialize some variables with their default values. We have also inherited the methods from the parent class. Within this function, we have configured the application's title and defined the initial width and height of the application. We then set the window icon and used the resize() function to set the geometry of the application. We have then instantiated the class we created and used the show() method to display the resulting window. We have also used the exit() function of the sys module to operate the closing of the application. Adding the Text Edition and the Container to the ApplicationWe will now add some filter types, default destinations, and display font style and size. We will also create a main layout where we will add the Text Editor and other necessary widgets. We will also create a container to enclose the main layout of the application. Let us consider the following snippet of code illustrating the same. File: main.py Explanation: In the above code snippet, we have defined some filter types for the editor. We have also initialized a default path in the directory and font style. We then created an object of the QVBoxLayout class. We then created a text editor, set its font style to the initialized font, and added this editor object to the main layout of the window. We then created a status bar using the statusBar() method. We have also created an app container using the QWidget class and the setLayout() method to set the main layout of the container. Creating the menus and the toolbarsWe will now create the menus and the toolbars. These menus and toolbars will help us perform different operations on the text. To keep things simple, we will create a 'File' menu with the file handling operations and an 'Edit' menu with the editor handling operations and their respective toolbars. We will include the operations such as Open, Save, Save As, and Print in the 'File' menu, whereas the operations like Undo, Redo, Clear, Cut, Copy, Paste, Select All, and Wrap text in the 'Edit' menu. File Menu and its toolbar Let us start by creating the File menu and its toolbar consisting of the operations to perform file handling. File: main.py Explanation: In the above snippet of code, we have created the 'File' menu using the addMenu() function and a toolbar using the QToolBar() method. We have then used the setIconSize() function and set the primary size of the icons to be displayed in the toolbar and set this toolbar to the top. We have then created different actions like open, save, save as, and print using the user-defined make_action() function we will define later in this tutorial. We have also used the setShortcut() method to set a shortcut for the actions. At last, we have used the addAction() method to add all the created actions to the 'File' menu and toolbar. Edit Menu and its toolbar Let us start by creating the Edit menu and its toolbar consisting of the operations to edit the text. File: main.py Explanation: In the above snippet of code, we have created the 'Edit' menu using the addMenu() function and a toolbar using the QToolBar() class. We have then used the setIconSize() function and set the primary size of the icons to be displayed in the toolbar and set this toolbar to the top. We have then created different actions like undo, redo, clear, cut, copy, paste, select all, and wrap text using the user-defined make_action() function. We have also used the setShortcut() method to set a shortcut for the actions. At last, we have used the addAction() method to add all the created actions to the 'Edit' menu and toolbar. At last, we have called the user-defined updateTitle() function we will defined later in this tutorial. Defining the necessary functions and setting the event triggersWe will now define all the necessary functions in order to implement different operations such as opening a file, saving a file to the directory, printing the file, toggling the wrap text command, clearing the content of the file, opening the dialog box displaying the message, updating the title of the window, and creating the actions for the menu and toolbar. Let us now understand the implementation of these functions in detail. Function to Toggle the Wrap Text operation The first function will allow us to toggle the wrap text operation. We will use the setLineWrapMode() method. Let us consider the following snippet of code illustrating the same. File: main.py Explanation: In the above snippet of code, we have defined the function as toggleWrapText(). Within this function, we have used the setLineWrapMode() method and toggled the current state of the editor. Function to clear the content of the file The second function we define will allow us to reset or clear the content of the file. We will use the setPlainText() method to set the complete text to the empty string. Let us consider the following snippet of code illustrating the same. File: main.py Explanation: In the above snippet of code, we have defined the function as resetContent(). Within this function, we have used the setPlainText() method with an empty string to clear the entire content of the file. Function to open the file We will now define a function to open the file. At first, we will select the file from the directory that requires it to be opened. We will then check if the destination is not empty and try reading the content of the file. Let us consider the following snippet of code illustrating the same. File: main.py Explanation: In the above snippet of code, we have defined the function as fileOpen(). Within this function, we have used the getOpenFileName() method of the QFileDialog() class to retrieve the file's path. We have then checked if the selected path is not an empty string and used the try-except method to open and read the file. We have also updated the window title by calling the updateTitle() function. Function to save the file We will now define a function to save the file. At first, we will check whether the user is working on an existing file. If the user is working on a new file, we will call the fileSaveAs() function in order to save it. However, if the user is working on some already existing file, the file will be saved as its previous name using the write() method. Let us consider the following snippet of code illustrating the same. File: main.py Explanation: In the above snippet of code, we have defined the function as fileSave(). Within this function, we have checked if the path of the file is unspecified and called the fileSaveAs() function for the same. If the file path is provided, we use the try-except method to save the file with its previous name using the write() method. Function to save a file with another name We will now define another function to save the file as a new name. Firstly, we will select the path from the directory where we want to save the file. Then we will use the write() method to save the file to that path. Let us consider the following snippet of code illustrating the same. File: main.py Explanation: In the above snippet of code, we have defined the function as fileSaveAs(). Within this function, we have selected the path from the directory where the file will be saved using the getSaveFileName() method of the QFileDialog() class. We then check if the selected path is not an empty string. We have then used the open() method to open the file and the write() method to write the content from the text editor to that file. At last, we have updated the title by calling the updateTitle() function. Function to print the file We will now define a function to print the file. To accomplish this, we will create an object of the QPrintDialog() class. Let us consider the following snippet of code illustrating the same. File: main.py Explanation: In the above snippet of code, we have defined the function as printFile(). Within this function, we have instantiated the QPrintDialog() class. We then used the if-conditional statement to execute the print command by calling the printer() method. Function to open a dialog box displaying the messages We will now define a function in order to display a message box showing certain messages. This function will use the object of the QMessageBox() class to create the dialog box. Let us consider the following snippet of code illustrating the same. File: main.py Explanation: In the above snippet of code, we have defined the function as dialogMessage(). Within the function, we have instantiated the QMessageBox() class. We then used the setText() method to set the message to the dialog box. We have then set an icon showing a 'Critical' mark using the setIcon() method. At last, we have used the show() method to display the final dialog box. Function to update the title of the window We will now define a function that frequently updates the title of the window as per the file name on every file-handling operation. Let us consider the following snippet of code demonstrating the same. File: main.py Explanation: In the above snippet of code, we have defined the function as updateTitle(). Within this function, we have used the setWindowTitle() method to set the format of the window's title. We have defined a variable field where the file name will be displayed as the title along with an initial value as 'Untitled'. Function to create the actions of the menu and toolbar We will now define the last function that will allow us to create different actions to handle the files and the text editor. Let us consider the following snippet of code demonstrating the same. File: main.py Explanation: In the above snippet of code, we have defined the function as make_action() that accepts multiple parameters like the object of the parent class, the path where the action icon is located, the name of the action, the message to be displayed in the status bar, and the function to call. Inside the function, we have instantiated the QAction() class in order to create the action. We then used the setStatusTip() method to display the message designated to each action in the status bar. We have then used the triggered.connect() method to call the functions associated with different actions. At last, we have returned the object of the QAction() class. Hence, the project code is now completed. We can save the file and run the following command in a command shell or terminal to see the output. Syntax: Before we see the output, let us consider the complete code of the "Notepad using PyQt5" project in Python. The Complete Project CodeThe following is the snippet of code of the "Notepad using PyQt5" project in the Python programming language. File: main.py Output: 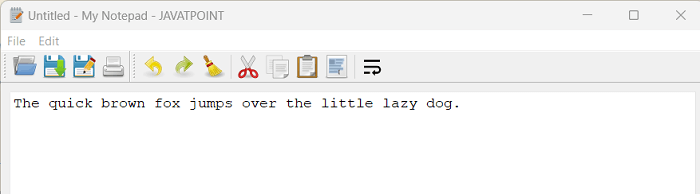
|
 For Videos Join Our Youtube Channel: Join Now
Feedback
- Send your Feedback to [email protected]
Help Others, Please Share


