Face Recognition in Python
Face detection is a process of identifying human faces in images or videos. It is a rapidly expanding area of computer vision that offers a variety of useful applications, such as security systems, face identification, and picture analysis.
This article may examine the many approaches that can enforce face detection in Python.
How Face Recognition Works
A technique called face recognition sometimes called facial recognition, examines and recognizes human faces in pictures and videos. It is a biometric technology that recognizes and detects people's distinctive facial characteristics using a variety of algorithms and methodologies.
There are various processes involved in the facial recognition process. Face detection begins by locating and extracting facial characteristics from an image or video frame. The placement of the eyes, nose, mouth, and other recognizable face hallmarks are examples of these traits.
The program then transforms the detected facial traits into a mathematical representation called a face template or face print. Then, this face template is compared to a database of previously known face templates to see whether there is a match or likeness.
Face recognition systems may be used for various purposes, such as identity verification, access control, surveillance, and customizing. They are employed in many industries, including customer service, mobile technology, social media, and law enforcement.
The ethical and privacy issues raised by facial recognition technology must be noted. Some of the problems with its use include the possibility of misusing personal data, mass spying, and the danger of false positives and negatives. Rules and procedures are being devised to address these worries and guarantee the appropriate use of the technology.
Several ways to write a face detection code in Python, using different libraries and frameworks. Some of the most popular libraries and frameworks include:
- OpenCV: OpenCV (Open Source Computer Vision Library) is very popular among open-source computer vision libraries. It offers a range of algorithms and capabilities for processing images and videos, including face detection. OpenCV provides a pre-trained Cascade Classifier based on Haar cascades to recognize faces in photos and videos. This classifier analyses portions of a picture and seeks patterns that mimic facial features.
- DLIB: Several methods for image processing, computer vision, and machine learning tasks are included in the flexible machine learning library known as Dlib. It offers a face detection tool with a pre-trained form predictor. The Histogram of Oriented Gradients (HOG) features, and the Support Vector Machine (SVM) machine learning technique provide the foundation of the shape predictor.
- Face_recognition: The Python module face_recognition provides a simple user interface for face detection and recognition tasks. It makes use of the deep learning-based face identification algorithm from Dlib. You may use the library to find faces in pictures and videos, and it can identify well-known faces by comparing them to a database of recognized face encodings. It streamlines face recognition by offering high-level features for typical face-related activities.
- MTCNN: The face detection method MTCNN (Multi-task Cascaded Convolutional Networks) is well known for its reliability and accuracy. It comprises several neural networks that cooperate to find facial landmarks and faces. MTCNN can recognize faces of various shapes, orientations, and resolutions and offers facial landmark locations and bounding box coordinates for each face found. Real-time facial detection programs frequently employ it.
- TensorFlow: TensorFlow is a well-liked open-source machine learning framework that provides many tools and capabilities for creating and deploying machine learning models. It offers an API for creating personalized face detection models with deep learning methods. With TensorFlow, you have more control and flexibility over the face identification process since you can create and train your convolutional neural network (CNN) models.
Face Detection using the OpenCV Approach
A well-known open-source computer vision and image processing library is called OpenCV (Open Source Computer Vision Library). For several computer vision applications, such as face detection, it provides a complete collection of functions and methods. Python, C++, and Java are just a few programming languages that OpenCV supports.
The notion of Haar cascades is the foundation for OpenCV's face detection method. Classifiers called Haar cascades are learned to recognize certain patterns or characteristics in pictures. These patterns or features correspond to facial features like the eyes, nose, and mouth in the context of face detection.
Pre-trained Haar cascades with a focus on face detection are available in OpenCV. The learned patterns and parameters required for face detection are included in these cascades, which are XML files. The Haar cascades are based on the basic rectangular patches known as Haar-like characteristics, which stand out from their surroundings.
The process of face detection using OpenCV typically involves the following steps:
- Load the Haar cascade classifier: OpenCV offers pre-trained Haar cascade XML files for face detection; load these to use the classifier. You must load these files into your program.
- Read and preprocess the input picture: Read and preprocess the image in which faces are to be detected. The image could be made grayscale, resized, and given any required improvements during preprocessing.
- Apply the face detection algorithm: Apply the face detection method to the preprocessed picture using the loaded Haar cascade classifier. The classifier searches the image at various sizes and locations for areas corresponding to the recognized face patterns.
- Find faces: A region of the picture is thought to include a face if it complies with the patterns specified by the Haar cascade classifier. A single face might be the subject of several possible detections.
- Results post-processing and display: The prospective face detections are post-processed to remove false positives and improve the final face detection results. To increase accuracy, this can include using extra filters or methods. The final faces might be highlighted or annotated in the picture output.
Installing the OpenCV library is required before we can begin face detection in Python.
This can be done using the following command:
Once the library is installed, we can start writing our code. The relevant modules must first be imported and read in an image as the early phase:
Next, we will use the CascadeClassifier class to detect faces in the image. This class takes in a pre-trained cascading classifier that can be used to detect faces in an image.
The classifier can be trained using a dataset of images of faces, and it uses a combination of features such as edges, shapes, and textures to detect faces.
The detect MultiScale method takes in the image and a few parameters such as the scale factor and the minimum number of neighbors.
The scale factor is used to control the size of the detection window, and the minimum number of neighbors is used to control the number of false positives.
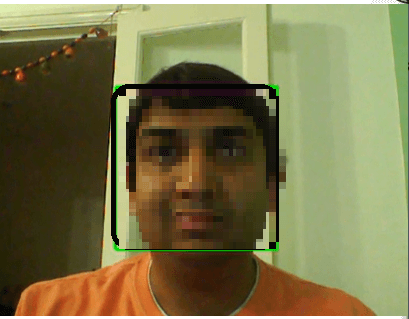
Once the faces are detected, we can draw rectangles around them using the rectangle function:
Implementation using OpenCV
Output

Face Recognition using DLIB
Python's Dlib package for machine learning and computer vision is rather effective. There are a few key ideas and information for accurate and trustworthy results regarding facial recognition using Dlib. Here are several crucial components:
- Pre-trained face detection model: Dlib offers a face detection model that has already been trained using a sizable dataset of faces that have been labeled. This model's purpose is to find faces in video and picture streams. It combines Haar-like characteristics with machine learning methods to recognize faces, notably a Support Vector Machine (SVM).
- Bounding box coordinates: The face detection model in Dlib gives the bounding box coordinates for each face that is recognized. The rectangular area within which the image's recognized face is known as the bounding box. The bounding box's width and height and the (x, y) location of its top-left corner are normally included in the coordinates.
- Facial Landmarks: Facial landmarks are distinct points or landmarks on the face, such as the eyes, nose, mouth, and chin. Dlib also has functionality for recognizing these features. These landmarks aid in correctly recognizing and aligning faces. The form predictor approach, which employs a combination of regression and random forest classifiers, is used to train the face landmark identification model in Dlib.
- Face encodings: Dlib uses face encodings or embeddings to recognize faces. Face encoding is a concise numerical representation of the face that captures the distinctive traits and qualities of a particular person's face. These encodings are produced by Dlib using the ResNet-34 deep learning model. Then, the similarity between the encodings may be assessed, or faces can be matched against a database of recognized faces.
Steps you would generally take to conduct facial recognition using Dlib are as follows:
- The pre-trained facial landmark and face detection models should be loaded.
- Find faces in an image or video frame using the face detection model, then get the bounding box coordinates for each face that was found.
- Use the facial landmark detection model to pinpoint certain facial landmarks inside each recognized face, including the eyes, nose, and mouth.
- Use the ResNet-34 model to create face encodings for the faces that were detected.
- To see if there is a match or resemblance, compare the created face encodings with a database of known face encodings.
Implementation of the Dlib Method:-
Output

Explanation of the Dlib Method :-
- "import dlib" - This line imports the Dlib library, which provides functionality for machine learning and computer vision in Python.
- "detector = dlib.get_frontal_face_detector()" - This line creates a face detector object using the "get_frontal_face_detector()" function provided by the Dlib library. This function returns a pre-trained object detector specifically designed for detecting faces in images.
- "img = dlib.load_rgb_image("image.jpg")" - This line loads an image named "image.jpg" using the Dlib library's "load_rgb_image" function, which loads an image from the specified file path and returns it as an array of RGB values.
- "faces = detector(img)" - This line uses the face detector object to detect faces in the image by calling the detector function on the image. The detector function returns a list of "rect" objects, each representing a bounding box for a detected face in the image.
- "print("Number of faces detected: ", len(faces))" - This line prints the number of faces detected in the image using the "len(faces)" function, which returns the number of elements in the list of "rect" objects.
- "for face in faces:" - This line starts a loop that iterates through all the "rect" objects in the list of faces returned by the detector function.
- "print("Left: ", face.left())" - This line, inside the loop, prints the left coordinate of the bounding box of the current face using the "left()" method of the "rect" object.
- "print("Top: ", face.top())" - This line, inside the loop, prints the top coordinate of the bounding box of the current face using the "top()" method of the "rect" object.
- "print("Right: ", face.right())" - This line, inside the loop, prints the right coordinate of the bounding box of the current face using the "right()" method of the "rect" object.
- "print("Bottom: ", face.bottom())" - This line, inside the loop, prints the bottom coordinate of the bounding box of the current face using the "bottom()" method of the "rect" object.
Face Recognition using Face Recognition Library
Due to its simplicity and use, a face-recognition library is a well-liked option for face-recognition jobs. It offers several crucial features and information that are required for face recognition. Here are several crucial components:
- Face detection: The face_recognition library provides a face_locations() method that locates all faces in an image or video frame and gives their bounding box coordinates. These bounding box coordinates specify the location and dimensions of each identified face.
- Face Landmarks: Face_landmarks(), a function in the library, finds and returns the positions of various facial landmarks, including the eyes, nose, mouth, and chin. These markers might be helpful for tasks like face alignment, emotion identification, and facial expression analysis.
- Face encodings: A function named face_encodings() is offered by the face_recognition library, and it computes a 128-dimensional numerical representation or encoding for each identified face. These encodings, which may be used for face comparison and identification, capture the distinctive traits of every face. The encodings can be kept in a database and contrasted with fresh face encodings for recognition.
- Face matching: The compare_faces() method provided by the library compares two sets of face encodings and provides a boolean result indicating whether or not they match. This feature can be used to compare a detected face to a database of recognized faces for identification or verification purposes.
- User database: A database of recognized faces and their related face encodings is necessary for face recognition. This database is a resource for locating and validating people. By saving each person's face encodings and distinct labels, the face_recognition library enables you to build and maintain such a database.
The face_recognition library's face-recognition processes may be implemented using these components. You can recognize and validate people in photos or video streams by recognizing faces, extracting facial landmarks, computing face encodings, and comparing them to a known database.
It's crucial to remember that the effectiveness and efficiency of face recognition systems depend on the caliber of training data, the size of the database, and other elements like illumination, position changes, and occlusions. Considering these factors, a facial recognition system should be designed and implemented carefully.
Implementation of the code :-
Output

Explanation for code :-
- The first line imports the face_recognition library, which detects and recognizes faces in images and videos.
- The next line loads the image from the file "image.jpg" using the face_recognition.load_image_file() method.
- The line after that detects faces in the image using the face_recognition.face_locations() method, which returns a list of face locations represented by four coordinates (top, right, bottom, left) for each face.
- The following line starts a for loop that loops through each face location in the list. Each iteration of the loop assigns the four coordinates of a face location to the variables top, right, bottom, and left.
- The next line inside the for loop uses the cv2. To create a rectangle over the face, use the rectangle() method. The picture, the top-left quadrant of the rectangle, the lower right quadrent of the rectangle, the colour of the rectangle, and the thickness of the rectangle are all inputs that the function accepts. In this case, the rectangle is red (0, 0, 255), and the thickness is 2 pixels.
- The line after that uses the cv2.imshow() method to display the image with the rectangles drawn around the faces.
- The last line uses the cv2.waitKey() method to wait for the user to press a key before closing the window. The argument against this method is the amount of time in milliseconds before the window closes. In this case, it is set to 0, which means the window will wait indefinitely for the user to press a key.
MTCCN Method for Face Recognition
The Multi-task Cascaded Convolutional Networks (MTCNN) algorithm is a popular technique for face alignment and identification in pictures. P-Net, R-Net, and O-Net are the three networks that comprise this level. Following is a breakdown of each phase and the crucial information needed for face recognition using the MTCNN library:
- P-Net: The MTCNN algorithm's P-Net is in its initial phase. A compact convolutional neural network (CNN) performs the first face detection. P-Net creates a collection of candidate bounding boxes for probable faces in a picture. For additional alignment, face landmark points are included with these bounding boxes.
- R-Net: The R-Net serves as a refinement network and is the second stage of MTCNN. It significantly improves the candidate bounding boxes produced by P-Net, removing false positives and supplying more precise bounding box coordinates. By changing the placements of the face landmarks, R-Net enhances facial landmark detection as well.
- The O-Net: The MTCNN's last phase is the O-Net. A detailed study of the candidate bounding boxes and this more sophisticated network carries out facial landmarks produced by the earlier phases. O-Net produces the final bounding boxes and face landmarks after further refining the bounding box coordinates and more accurately detecting facial features.
The following information is needed to recognize faces using MTCNN:
- Input Images: A face-detection and face-alignment input image are necessary for the MTCNN algorithm. The picture may be in several standard image formats, including JPEG, PNG, or others.
- Bounding Box Coordinates: MTCNN offers bounding box coordinates, which show the location and dimensions of each recognized face. These coordinates specify the rectangle area enclosing the face in the picture.
- Facial landmark points: MTCNN detects and outputs facial landmark points for each recognized face. These points stand in for facial features like the mouth, nose, and eyes. For face alignment and further analysis, the landmark points are utilized.
- Aligned face pictures: MTCNN can deliver aligned face images following face detection and alignment. These aligned photos may be helpful for additional processing, such as face recognition or other facial analysis tasks.
By comparing face characteristics or embeddings against a database of recognized faces, you may conduct face recognition using the bounding box coordinates, facial landmark points, and aligned face pictures offered by MTCNN. To do this, the aligned face pictures must be encoded into numerical representations (for example, using deep learning models like those offered by Dlib or face recognition) and then compared for identification or similarity.l landmark points. These points stand in for facial features like the mouth, nose, and eyes. For face alignment and further analysis, the landmark points are utilized.
Code
Output

Explanation of the code
- "from mtcnn import MTCNN" imports the MTCNN class from the mtcnn library. This class will be used to detect faces in an image.
- "import cv2" imports the OpenCV library, which will be used to read and display the image.
- "filename = "image.jpg" assigns the file name of the image that will be processed to a variable called "filename".
- "pixels = cv2.imread(filename)" reads the image file specified by the "filename" variable and assigns the pixel data to the "pixels" variable.
- "detector = MTCNN()" creates an instance of the MTCNN class and assigns it to the "detector" variable. The default weights for the P-Net, R-Net, and O-Net are used.
- "faces = detector.detect_faces(pixels)" uses the "detect_faces()" method of the MTCNN class to detect faces in the image stored in the "pixels" variable. Every recognised face is returned, and its surrounding containers and visual cues are added to the "faces" parameter.
- "for face in faces:" starts a loop that will iterate through each face detected.
- "x, y, width, height = face['box']" assigns the x and y coordinates, width, and height of the bounding box for the current face to the corresponding variables.
- "cv2.rectangle(pixels, (x, y), (x+width, y+height), (0, 0, 255), 2)" draws a red rectangle around the current face on the original image stored in the "pixels" variable.
- "cv2.imshow('Face', pixels)" displays the image with the faces outlined in red.
- "cv2.waitKey(0)" waits for the user to press a key before closing the window displaying the image. This enables the user to view the image of the individuals before the system closes.
Face Recognition in TensorFlow Method
TensorFlow is an open-source machine-learning library developed by Google. It is designed to facilitate creating, training, and deploying various machine learning models, including deep learning models. TensorFlow provides a flexible framework for building and executing computational graphs, making it well-suited for tasks such as image recognition, natural language processing, and face recognition.
In the context of face recognition, TensorFlow plays a crucial role in several aspects:
- Model Development: TensorFlow provides rich tools and APIs for building deep learning models. It offers high-level APIs like Keras, simplifying creating and training neural networks. TensorFlow allows you to define the architecture of face recognition models, including convolutional neural networks (CNNs), recurrent neural networks (RNNs), and more complex architectures like Siamese networks or triplet networks.
- Pre-Trained Models: TensorFlow provides access to pre-trained models trained on large-scale face recognition datasets, such as VGGFace, FaceNet, or OpenFace. These pre-trained models offer a good starting point for face recognition tasks, as they have already learned to extract relevant features from faces.
- Transfer Learning: TensorFlow supports transfer learning, which allows you to take pre-trained models and fine-tune them on specific face recognition tasks. With transfer learning, you can leverage the knowledge captured by pre-trained models and adapt them to your specific face recognition problem, potentially reducing the training data and computational resources required.
- Optimization and Deployment: TensorFlow offers optimization techniques, such as GPU acceleration and distributed computing, to speed up the training and deployment of face recognition models. TensorFlow's ability to utilize GPUs and TPUs (Tensor Processing Units) allows for efficient computation of large-scale face recognition tasks, making it possible to process large volumes of images or video streams in real time.
- Integration with Computer Vision Libraries: TensorFlow can be integrated with other computer vision libraries, such as OpenCV, to combine the capabilities of both libraries. This integration enables tasks like face detection using OpenCV and subsequent face recognition using TensorFlow, providing a comprehensive solution for face recognition applications.
Overall, TensorFlow plays a vital role in face recognition by providing the tools, pre-trained models, and optimization techniques to develop, train, and deploy deep learning models. Its flexibility and scalability make it popular for building state-of-the-art face recognition systems.
The process of writing a face detection code in Python using TensorFlow involves the following steps:-
- Adding the required libraries: TensorFlow, OpenCV, and Numpy must all be included. Deep learning models are created and executed using TensorFlow, image processing duties are handled by OpenCV, and Numpy handles numerical calculations.
- Loading the MTCNN model: The MTCNN model may be imported into the code using TensorFlow, which offers a pre-trained MTCNN model. Convolutional neural networks (CNNs) make up this model, which was created to detect faces and predict bounding box coordinates.
- Reading the visual: You read an input picture or video frame in this phase using OpenCV. The face detection model receives the image as its input.
- Picture preparation: Some preprocessing operations are normally carried out before submitting the picture to the MTCNN model. To do this, the picture must be resized to the model's specifications, converted to a tensor (a multidimensional array), and its pixel values must be normalized (usually scaled between 0 and 1).
- Implementing the model: The MTCNN model is then applied to the preprocessed picture, using the learned biases and weights to recognize faces. The model predicts each identified face's bounding box coordinates.
- Drawing the bounding box: Using OpenCV, rectangles are drawn around the faces detected using the bounding box coordinates the model gave. This makes it easier to see where and how big each face is in the image.
- Displaying the result: After the bounding boxes are superimposed over the source picture, the output image is displayed. This lets you see the faces discovered and evaluate how well the face detection algorithm works.
The following crucial information is required for facial recognition using TensorFlow:
- Input image or video frame: Face detection and recognition require visual data from the input picture or video frame. It could be a picture file or a stream of video frames.
- Bounding box coordinates: The anticipated coordinates describing each recognized face's location and dimensions are bounding box coordinates. Four values can represent the bounding boxes: The rectangle's width and height are indicated by the (x, y) coordinates of the top-left corner.
- Aligned face images: It is usual to align the identified faces in a standardized way for face recognition applications. To do this, the face region must be cropped and resized to a predetermined size and orientation, which can increase the precision of face recognition models.
- Face embeddings or encodings: TensorFlow offers several methods to create face embeddings or encodings. These condensed numerical depictions of facial traits highlight distinctive qualities. These encodings can be applied for face comparison, identification, or verification.
Example of Tenserflow method
Output
Explanation for the Code:
- Import TensorFlow: TensorFlow is first imported into the program, which gives users the tools they need to create and use deep learning models.
- Load the Caffe model: The program uses the load_model() function from the tf.keras.models module to load a pre-trained Caffe model for face detection. The model is kept in h5 file format and must be found at the location given.
- Define the input image: The input image is a TensorFlow Input object with a shape of (224, 224, 3). This indicates that the image has a height and width of 224 pixels and 3 color channels (RGB).
- Preprocess the image: The input image must now be preprocessed to make it suitable for the model. The image's pixel values are scaled between 0 and 1 using the Lambda layer to divide the pixel values by 255.0. Often, the normalization step is required for appropriate model input.
- Run the image through the model: The preprocessed image is passed through the loaded model using the model() function. This applies to the model's forward pass and generates predictions for the input image.
- Find the location of the face in the image: The program uses TensorFlow's where() function to find the locations in the predictions where the confidence is greater than 0.5. This assumes that the model outputs a confidence value indicating the presence of a face.
- Print the location of the face in the image: The program prints the face locations, which are the coordinates where the predictions are above the specified threshold. The face_locations variable holds the result of the where() operation.
It should be noted that the offered program is only a small portion of code and that it could need more to load the input image, analyze it, and show the results.
Remember that depending on the individual Caffe model you are using, several program specifics may change, such as the model file directory, the model's architecture, and the input requirements.
Conclusion
In conclusion, Python offers a variety of powerful frameworks and tools for face recognition. While Dlib has more sophisticated face and landmark detection capabilities, OpenCV provides a quick and easy solution using pre-trained models. The face recognition library, written on top of Dlib, provides a simple user interface for face detection and identification operations. MTCNN offers a deep learning-based method for more complex face alignment and identification. Additionally, the well-known machine learning framework TensorFlow enables the creation of personalized face recognition models, offering flexibility and scalability. Thanks to its diverse possibilities, Python is a great choice for developing face recognition applications, from straightforward face detection to sophisticated facial recognition systems.
Python's face recognition frameworks and modules constantly improve, allowing programmers to build reliable and precise face recognition systems. Face detection, facial landmark identification, and face recognition are just a few of the tasks these technologies enable developers to take on. Python's facial recognition skills are expected to become much more potent and effective because of continuous computer vision and machine learning developments. Due to its robust ecosystem and community support, which enable developers to research and use cutting-edge face recognition methods, Python remains a favored language for face recognition applications.
|

 For Videos Join Our Youtube Channel: Join Now


